
Chocolate Kiss Cookies Recipe
If you’re on the hunt for a quick, crowd-pleasing dessert, you’ve got to try this Chocolate Kiss Cookies Recipe. These little gems are so easy to whip up, and their soft, cakey texture paired with a melty chocolate center is absolutely irresistible. Whether it’s a last-minute party or a cozy night in, this recipe will save the day—and your sweet tooth will thank you!
Why This Recipe Works
- Simplicity: Uses just a few pantry staples for a foolproof cookie dough.
- Texture Contrast: Soft, cakey cookie base with a melty chocolate kiss center every time.
- Customizable Finish: Roll in sugar or fun sprinkles for a playful look and extra sweetness.
- Quick Baking: Cookies bake in under 10 minutes so you’re enjoying fresh treats in no time.

Ingredients & Why They Work
This Chocolate Kiss Cookies Recipe is magic in part because the ingredients come together to create a soft, tender dough with just the right amount of sweetness and richness. Let’s break down the basics and why each one is key.
- Chocolate cake mix: It’s your shortcut for deep chocolate flavor and a beautifully tender crumb without any fuss.
- Cream cheese: Adds moisture and a slight tang to balance the sweetness, making each bite luscious and soft.
- Unsalted butter: Richness and helps bind everything while contributing to that melt-in-your-mouth texture.
- Large egg: Essential binder that also adds a touch of lift and chewiness to the cookie.
- Granulated sugar or sprinkles: For rolling—this gives a charming little crunch or festive look on the outside.
- Chocolate kisses: The star of the show! These get melty and gooey in the center for pure cookie bliss.
Tweak to Your Taste
One of the reasons I love this Chocolate Kiss Cookies Recipe is how flexible it is. You can easily make it yours by switching up the coatings or even the type of kiss you use. Get creative and have fun!
- Variation: I once rolled the dough balls in cinnamon sugar for a cozy fall twist—delicious and surprisingly good with the chocolate kiss.
- Dietary swaps: For a dairy-free version, try vegan cream cheese and butter alternatives—I’ve found the texture stays surprisingly good.
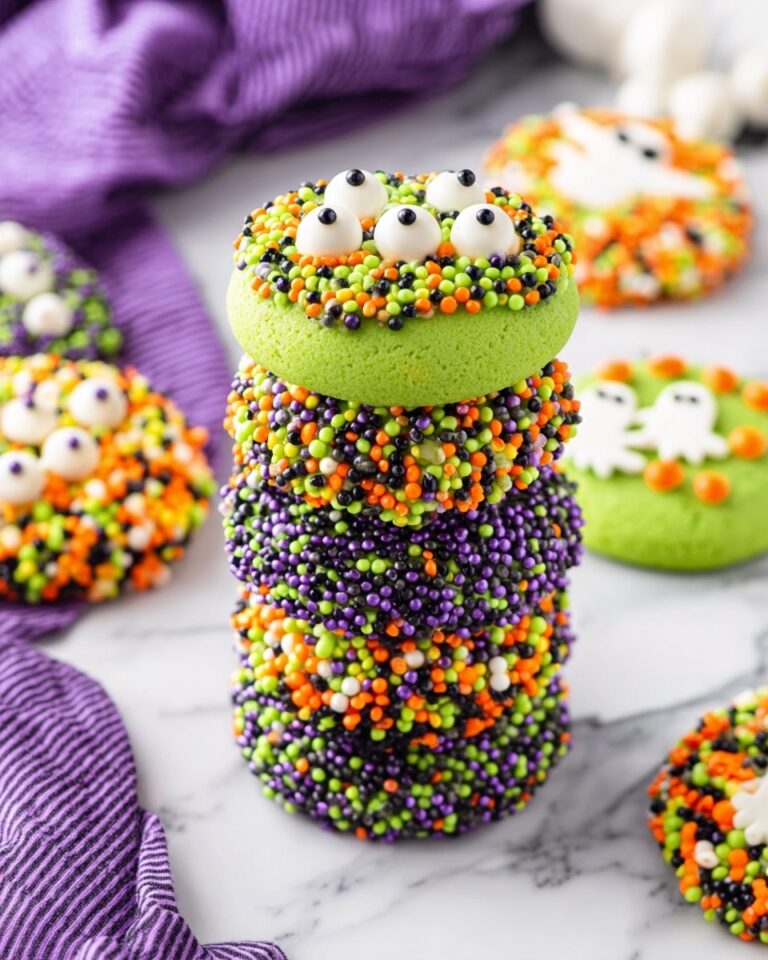
- Sprinkle choices: Use colored sugar sprinkles for holidays or finely chopped nuts if you want a bit of crunch on top.
- Difficulty: Perfectly suited for beginner bakers since it doesn’t require complicated steps or special equipment.
Step-by-Step: How I Make Chocolate Kiss Cookies Recipe
Step 1: Get Your Oven and Pan Ready
First things first, preheat your oven to 350°F (175°C). Line your baking sheets with parchment paper — this helps the cookies release easily and keeps clean-up a breeze. I always line two sheets so I can bake a big batch without waiting.
Step 2: Mix the Cream Cheese, Butter, and Egg
Toss the softened cream cheese, butter, and egg into a large bowl and beat them together until smooth and creamy. This step is key for preventing lumps and creating that dreamy cookie base. Using softened ingredients makes it so much easier, so don’t skip setting these out early!
Step 3: Stir in Chocolate Cake Mix
Next, gently fold in the chocolate cake mix until it forms a soft dough that you can scoop. Don’t overmix here—once the flour gets integrated, stop stirring to keep the cookies tender and cakey.
Step 4: Shape and Coat
Scoop about a tablespoon of dough and roll it into a ball with your hands. Then roll each ball in granulated sugar or your sprinkles of choice until the cookie is fully coated. This step is fun and adds a sweet, textured finish you’ll love looking at.
Step 5: Bake Just Right
Place the coated dough balls on your prepared baking sheets about 2 inches apart because they’ll spread a little. Bake for 7–9 minutes, watching for when the edges are just set, but the centers still look a bit soft. Trust me, that slight softness is what makes these cookies so wonderful after they cool.
Step 6: The Chocolate Kiss Magic
When you pull the cookies out of the oven, immediately press a chocolate kiss into the center of each cookie. The residual heat will melt the base of the chocolate kiss slightly, making it stick perfectly and creating that iconic melt-in-your-mouth center.
Step 7: Cool Completely Before Moving
Let the cookies cool fully on the baking sheet so the kisses harden up again. I’ve learned the hard way that moving them too soon can mess up their neat appearance, so patience here pays off!
Pro Tips for Making Chocolate Kiss Cookies Recipe
- Softened Ingredients: Always use room temperature cream cheese and butter for easy mixing and smooth dough.
- Watch the Bake Time: Pull cookies out when centers look slightly underdone—they’ll finish baking on the sheet and stay soft.
- Press Kisses Immediately: Don’t wait—press the chocolate kisses right when cookies come out to get that perfect melty base.
- Cool on Pan: Let cookies cool fully on the baking sheet to keep the chocolate kisses neat and prevent smudging.
How to Serve Chocolate Kiss Cookies Recipe
Garnishes
I usually keep it simple with a sprinkle coating on these cookies, but I’ve also topped a few with a light dusting of powdered sugar once they’re cooled for a festive winter twist. If you’re feeling fancy, chopped nuts or a drizzle of white chocolate can elevate them too.
Side Dishes
These cookies are divine alongside a cup of strong coffee or a frothy mug of hot cocoa—perfect for sharing during holiday parties or casual brunches. They also make a lovely sweet bite at the end of a light meal.
Creative Ways to Present
For a special occasion, I like arranging the cookies in a circular pattern on a pretty platter, alternating sprinkles colors for a festive touch. Wrapping a few cookies in clear cellophane tied with ribbon makes a charming homemade gift. They’re always a hit this way!
Make Ahead and Storage
Storing Leftovers
I keep leftover cookies in an airtight container at room temperature, layering them with parchment paper to prevent the kisses from sticking and smudging. They stay fresh for about 4-5 days, which rarely happens because they disappear fast!
Freezing
If I want to stash some for later, I freeze the baked cookies in a single layer on a baking sheet first, then transfer them to a freezer bag. They freeze nicely for up to 3 months. Just a heads-up: some sprinkles might dull a bit after thawing depending on what you use.
Reheating
When ready to enjoy frozen leftovers, I let the cookies thaw at room temperature and then pop them in a 300°F oven for 3-5 minutes to warm the chocolate kiss back up and refresh the cookie’s softness. Easy and totally worth it.
FAQs
-
Can I use any chocolate candy instead of kisses?
Absolutely! While classic chocolate kisses work best because of their shape and size, you can substitute with small chocolate pieces or mini peanut butter cups for fun variations. Just make sure they’re individually sized to fit nicely on top of each cookie.
-
Do I have to use a boxed chocolate cake mix?
The boxed mix is a shortcut that guarantees consistent flavor and texture, but if you prefer, you can use homemade chocolate cake mix or a similar chocolate cookie base. Just be prepared for a bit more hands-on mixing and adjusting.
-
Why are my cookies spreading too much?
This can happen if your butter or cream cheese were too soft or if you didn’t chill the dough slightly before baking. Make sure to use softened—not melted—ingredients and consider chilling the dough for 15-20 minutes if spreading is an issue.
-
Can I make these gluten-free?
Yes! Use a gluten-free chocolate cake mix, which many brands offer nowadays, and confirm that all other ingredients like sprinkles are gluten-free too. The texture remains just as tender and delicious.
Final Thoughts
This Chocolate Kiss Cookies Recipe is one that’s close to my heart because it’s saved me more times than I can count—whether I forgot to bake cookies for a get-together or just wanted a quick chocolate fix. You’ll love how easy it is to make, and more importantly, how everyone will crowd the kitchen asking for seconds. Give it a try, and I promise it’ll become one of your go-to recipes for festive treats that feel homemade without the fuss.
Print
Chocolate Kiss Cookies Recipe
- Prep Time: 10 minutes
- Cook Time: 9 minutes
- Total Time: 19 minutes
- Yield: 36 cookies
- Category: Dessert
- Method: Baking
- Cuisine: American
- Diet: Vegetarian
Description
Delicious and easy-to-make Chocolate Kiss Cookies featuring a rich chocolate cake mix dough, cream cheese, and buttery texture, topped with iconic chocolate kisses. These cookies are perfect for festive occasions or everyday treats with a soft center and sweet coating.
Ingredients
Cookie Dough
- 1 (15.25 ounce) box chocolate cake mix
- 8 ounces cream cheese softened
- 1/2 cup unsalted butter softened
- 1 large egg
Coating and Topping
- 1/2 cup granulated sugar or sprinkles for coating
- 36 chocolate kisses unwrapped
Instructions
- Preheat oven: Preheat the oven to 350 degrees Fahrenheit and line baking sheets with parchment paper to prevent sticking and ensure easy cleanup.
- Make dough: In a large bowl, beat the softened cream cheese, butter, and egg together until smooth and creamy. Gradually stir in the chocolate cake mix until a soft dough forms.
- Shape cookies: Scoop about 1 tablespoon of dough and roll it into a ball using your hands. Then roll the ball in granulated sugar or sprinkles to coat evenly.
- Arrange on baking sheet: Place the coated dough balls on the prepared baking sheets about 2 inches apart to allow for spreading during baking.
- Bake cookies: Bake in the preheated oven for 9 minutes, or until the edges are set but the centers remain slightly soft for a chewy texture.
- Add chocolate kisses: Remove the cookies immediately from the oven and press one chocolate kiss into the center of each warm cookie. The heat will slightly melt the base of the kiss, helping it stick firmly.
- Cool completely: Allow the cookies to cool fully on the baking sheets without moving them to ensure the chocolate kisses set properly and the cookies maintain their shape.
Notes
- Store the cookies in an airtight container in a single layer or separate layers with parchment paper to prevent the chocolate kisses from smudging. They will keep well for 4-5 days.
- You can freeze the cookies for up to 3 months. Be aware that sprinkles may lose color vibrancy or smudge after thawing depending on the type used.
- For softer cookies, remove from the oven when edges are set but centers look slightly underbaked.
- Use room temperature cream cheese and butter for easier mixing and smoother dough.
Nutrition
- Serving Size: 1 cookie
- Calories: 130 kcal
- Sugar: 10 g
- Sodium: 140 mg
- Fat: 7 g
- Saturated Fat: 4 g
- Unsaturated Fat: 2 g
- Trans Fat: 0 g
- Carbohydrates: 15 g
- Fiber: 1 g
- Protein: 2 g
- Cholesterol: 25 mg


