
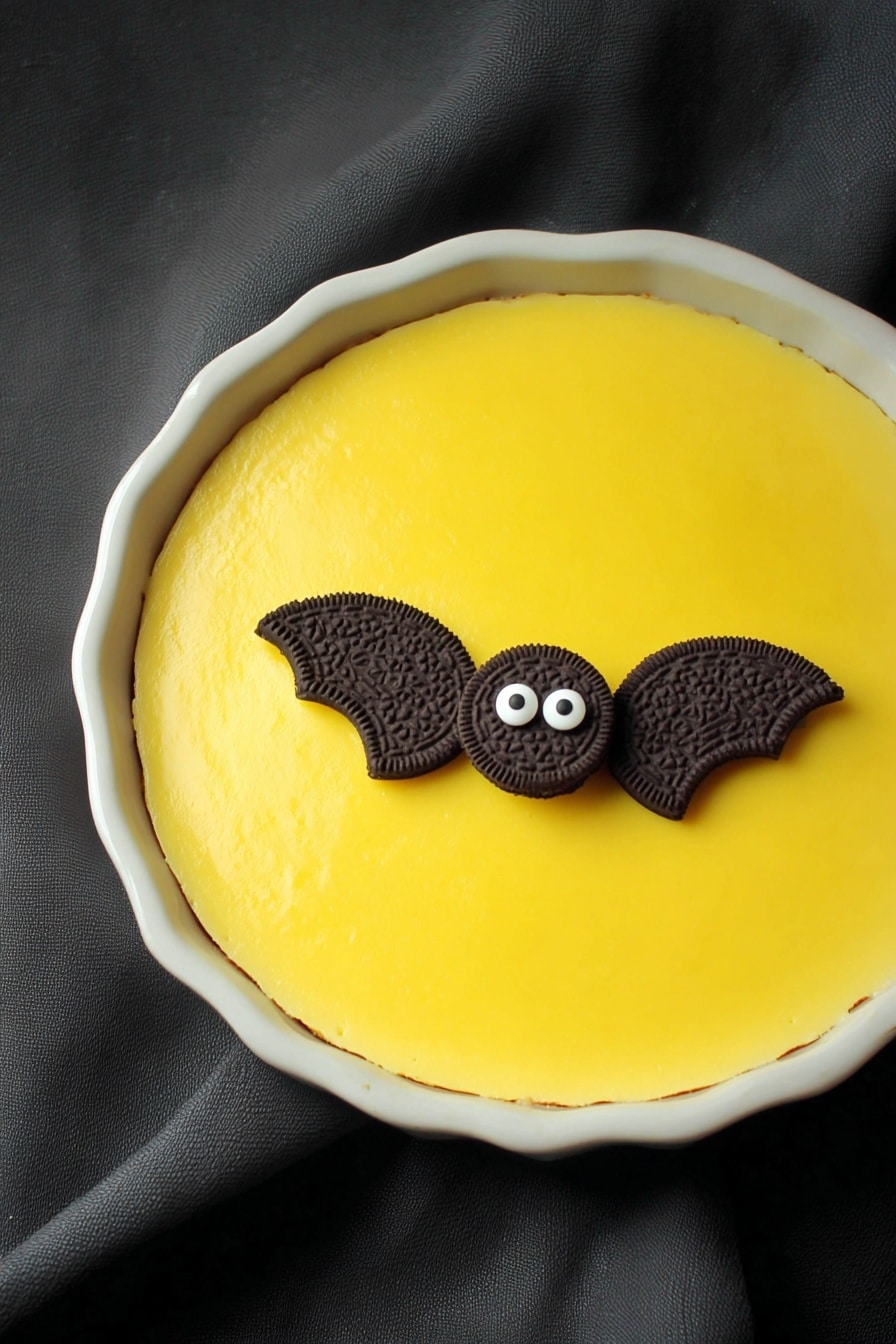
No Bake Boston Cream Halloween Pie Recipe
Hey friend, if you’re looking for an easy, festive, and absolutely delicious dessert that will wow your Halloween guests, you’ve got to try this No Bake Boston Cream Halloween Pie Recipe. It’s creamy, chocolatey, and perfectly spooky with those adorable little chocolate bats on top. Plus, it doesn’t require an oven — so no worries on a busy day or when you just want to keep things simple and fun. Trust me, once you make this pie, it becomes a go-to for celebrating fall with a twist of classic Boston cream goodness paired with Halloween charm.
Why This Recipe Works
- No Oven Needed: Perfect for when you want a fancy dessert but don’t want to heat up the kitchen.
- Layered Flavor & Texture: The crunchy Oreo crust, creamy pudding, fluffy whipped cream, and moist white cake come together for a crowd-pleaser.
- Festive & Fun Presentation: Those chocolate bats aren’t just cute—they bring a playful Halloween vibe everyone will love.
- Easy to Customize: Swap cake varieties or even pudding flavors to make it uniquely yours.

Ingredients & Why They Work
Every ingredient in this No Bake Boston Cream Halloween Pie Recipe plays a key role to balance texture and flavor. From the buttery Oreo crust that grounds the pie, to the light whipped cream and pudding filling, and of course the chocolate glaze that seals it all with richness. Here’s a quick guide on what to look for when picking your ingredients.
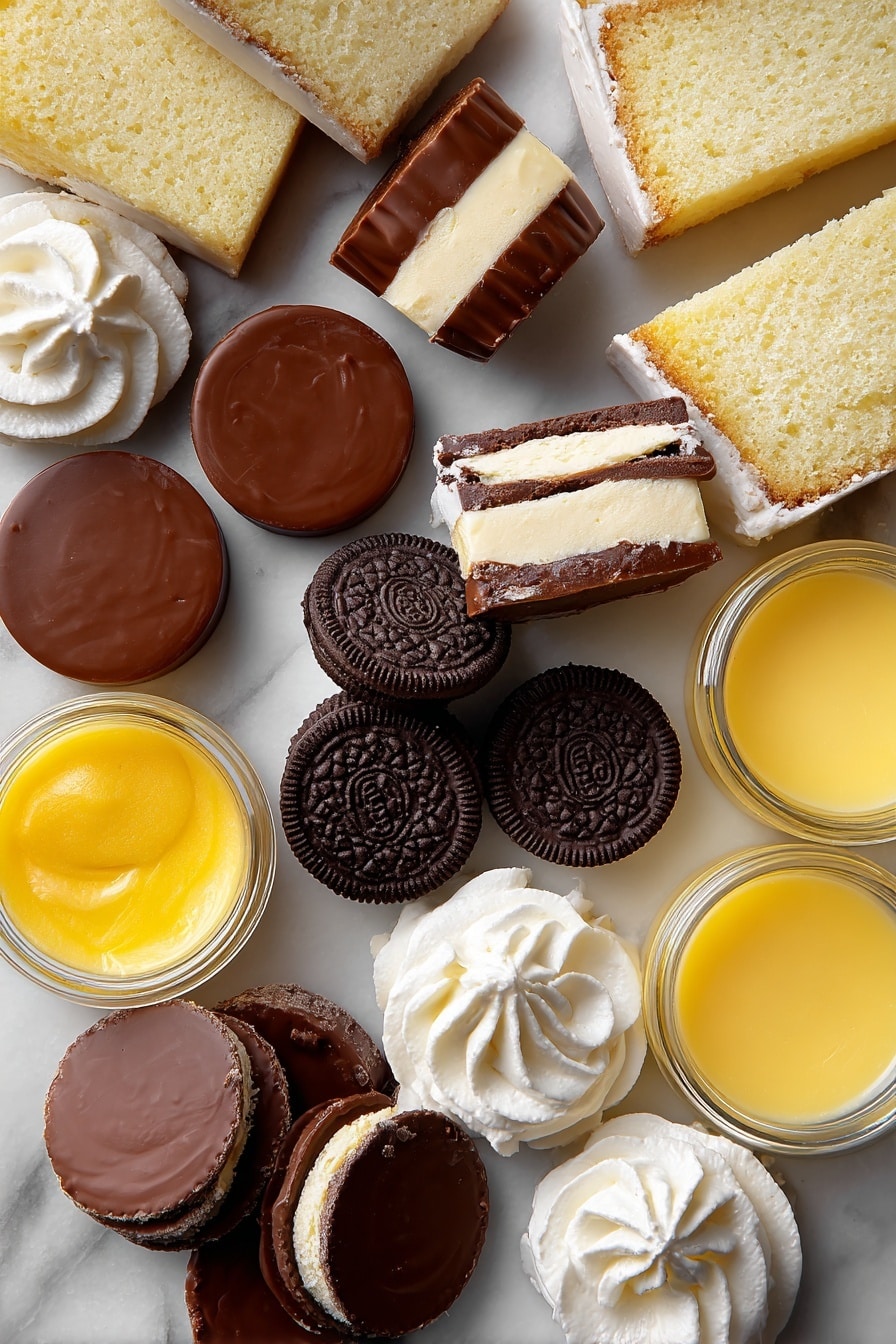
- Oreo chocolate baking crumbs: The base of the crust—pick finely crushed Oreo crumbs for easy pressing and crumbly texture that sticks well with butter.
- Unsalted butter: Helps bind the crust together and balance sweetness.
- White granulated sugar: Just a touch to add a mild sweetness to the crust.
- Semi-sweet chocolate: Use good quality chocolate for the glaze—it really makes a difference in taste and shine.
- Corn syrup: Adds glossiness and smoothness to the chocolate glaze without making it too stiff.
- Yellow gel paste food/icing color: Using gel color rather than liquid food coloring helps you achieve a vibrant, true yellow pudding, which looks perfect for that Halloween vibe.
- Whipped cream: Fresh whipped cream or store-bought works, just make sure it’s fluffy and not watery to keep the layers intact.
- Instant vanilla pudding: The “Boston cream” star adds flavor and that custard-like creaminess, with the added color to remind you of pumpkin pie.
- White pound, angel food, or loaf cake: This soft cake layer adds gentle texture—choose your favorite type for the best bite.
- Reese’s miniature peanut butter cups: For those iconic chocolate bat bodies—a fun twist.
- Oreo Thins sandwich cookies: Clean off the frosting to make bat wings—creative and crunchy in one bite.
- Royal icing: Perfect for “gluing” on edible eyes to your bats for a polished look.
- Edible eyes: Silly, spooky, and irresistible on your bat decorations.
Tweak to Your Taste
I love playing around with this No Bake Boston Cream Halloween Pie Recipe to make it suit different occasions or moods. Whether it’s switching up the cake, adding a little extra cinnamon to the pudding, or even using a flavored whipped cream, the sky’s the limit. Don’t be afraid to make it yours!
- Variation: One time, I swapped angel food cake for a moist lemon pound cake to add a little zing—so good and unexpected!
- Diet-Friendly: For a lighter touch, try a sugar-free pudding mix and whipped coconut cream instead of dairy; the texture stays great.
- Seasonal Twist: Adding a pinch of pumpkin pie spice to the pudding makes it ultra seasonal and cozy for autumn.
Step-by-Step: How I Make No Bake Boston Cream Halloween Pie Recipe
Step 1: Creating the Perfect Oreo Crust
First things first—spray your pie dish with non-stick spray so the crust comes out beautifully clean. Mix those Oreo chocolate baking crumbs with melted butter and sugar until everything sticks together when pressed between your fingers. I usually press the mixture evenly and firmly into the bottom of a round 10.5-inch pie dish, then pop it in the fridge for about 10 minutes to chill and set. This helps the crust hold together when we add the gooey layers!
Step 2: Whipping Up the Chocolate Glaze
While the crust chills, melt your semi-sweet chocolate gently either in the microwave at half power or using a double boiler. When it’s smooth, mix in the melted butter and corn syrup—the corn syrup is the secret to a shiny, dream-like glaze. Now pour this over your set Oreo crust, spreading gently with a spatula so you don’t break up those crumbs. Then, back into the fridge it goes to firm up—about 15 minutes should do it.
Step 3: Building the Filling Layers
After the chocolate has set, it’s time for the fun part. Spread your whipped cream evenly over the chocolate layer to add that light fluffiness that balances the richness. Then scatter the white cake pieces over the cream, making sure they’re nicely spread out. Next, tint your instant vanilla pudding with yellow gel food coloring until you get a bright sunny hue—that’s the Halloween magic right there! Pour the pudding over the cake layer, smoothing it out with a butter knife so it reaches just to the edge of the plate.
Step 4: Crafting and Adding the Chocolate Bats
This part makes the pie a showstopper. Remove wrappers from your mini Reese’s cups—they’re the bat bodies! Then gently break Oreo Thins in half and carefully scrape off the frosting to get crisp “bat wings.” Attach two wing halves on each side of a Reese’s cup using a dab of frosting as glue. Next, secure edible eyes onto the bats’ faces with a bit of royal icing. Place these spooky little bats across the top of the pie just before serving. Pro tip: If you want to prep in advance, keep the bats separated and add them right before serving to avoid sogginess.
Pro Tips for Making No Bake Boston Cream Halloween Pie Recipe
- Use Quality Chocolate: The glaze shines and tastes so much better with semi-sweet chocolate—not too bitter, not too sweet.
- Chill Each Layer: Taking a few extra minutes to chill the crust and glaze helps keep your pie stable and beautiful.
- Color Your Pudding with Gel Colors: It’s worth investing in gel paste food coloring to get that perfect golden yellow.
- Add Bats Last Minute: I learned the hard way that if you put the bats on too early, they get soggy and their eyes run—don’t repeat my mistake!
How to Serve No Bake Boston Cream Halloween Pie Recipe
Garnishes
I love topping this pie with a few extra edible eyes scattered around for a playful creepy touch or a sprinkle of orange and black Halloween sprinkles on the whipped cream edges. You could even add a light dusting of cocoa powder for more chocolate depth. Fresh mint leaves could bring an unexpected pop of green color and freshness too.
Side Dishes
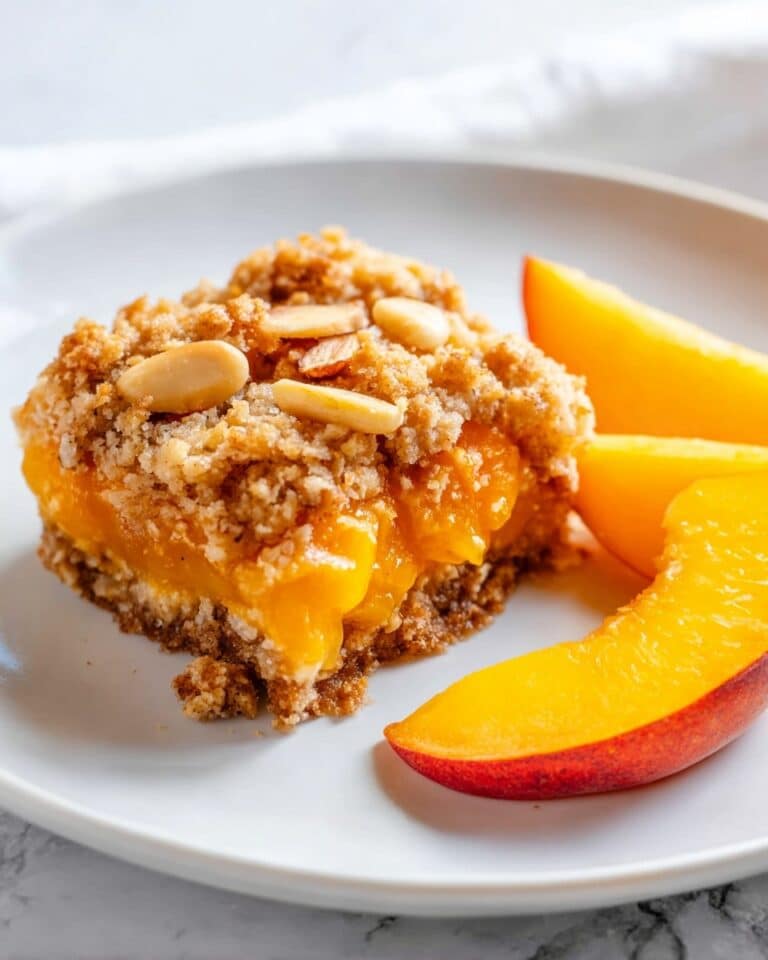
This pie is rich and sweet, so I usually serve it with some fresh fruit on the side—like sliced apples or berries—or a simple cup of coffee or spiced tea to balance the flavors. For a full festive spread, pair it with pumpkin-shaped sugar cookies or cinnamon-spiced nuts to keep all your Halloween treats coordinated.
Creative Ways to Present
For Halloween parties, I’ve served this pie in individual clear glasses layered in the same way, topped with mini bats on toothpicks—so cute and portable! Another fun idea is to arrange the bats flying off the pie plate on a web of pulled sugar or dark chocolate strands for that “spooky web effect.” Kids and adults alike get such a kick out of quirky, thematic presentation.
Make Ahead and Storage
Storing Leftovers
I always keep leftover No Bake Boston Cream Halloween Pie covered with plastic wrap in the fridge. It holds up nicely for up to 3 days. Just remember to remove the chocolate bats before storing so they don’t get soggy or lose their shape. If you’re like me and love a chilled dessert, the flavors actually meld together even better after resting overnight.
Freezing
Freezing this pie isn’t usually my go-to because the whipped cream layer can get a bit icy, but if you want to freeze, wrap individual slices tightly in foil and plastic wrap and thaw in the fridge overnight. The texture won’t be quite the same, but it’s still tasty enough for a last-minute treat.
Reheating
This dessert is best served cold, so I skip reheating. However, if you like your pudding a little less chilled, let the pie sit out for 10-15 minutes before slicing to soften up the layers slightly—it makes for a lovely creamier bite.
FAQs
-
Can I use a regular pie crust instead of the Oreo cookie crust?
You absolutely can! However, the Oreo cookie crust adds a great chocolate crunch that pairs beautifully with the cream filling. If using a regular baked pie crust, make sure it’s fully cooled before adding the glaze and filling to avoid sogginess.
-
What if I can’t find yellow gel food coloring?
Gel food coloring is best because it’s concentrated and won’t water down the pudding, helping you get that perfect bright yellow. If you can’t find it, you can try liquid food coloring but add just a little at a time, though the color may be less vibrant.
-
How far ahead can I make this pie?
I’d recommend assembling the pie up to a day ahead but hold off on adding the chocolate bats until just before serving. The pie will keep well covered in the fridge for about 24 hours for best freshness and presentation.
-
Can I substitute the vanilla pudding for another flavor?
Yes! Chocolate or butterscotch pudding would be interesting alternatives, but note that it’ll change the classic Boston cream taste. Yellow coloring can be omitted or swapped depending on the pudding flavor to match your Halloween theme.
Final Thoughts
This No Bake Boston Cream Halloween Pie Recipe is one of my favorite ways to celebrate the spooky season without too much fuss. I love how it’s visually festive and delightfully indulgent, plus family and friends always ask for seconds — that’s the real sign of success! I hope you’ll enjoy making it as much as I do, and that it brings a little extra magic and comfort to your Halloween gatherings. Go ahead, try it out, and watch those smiles grow around your table!
Print
No Bake Boston Cream Halloween Pie Recipe
- Prep Time: 45 minutes
- Cook Time: 15 minutes
- Total Time: 1 hour
- Yield: 8 servings
- Category: Dessert
- Method: No-Cook
- Cuisine: American
Description
A festive and delicious No Bake Boston Cream Halloween Pie featuring an Oreo cookie crust, creamy vanilla pudding filling tinted with yellow gel coloring, topped with whipped cream and white cake pieces, and decorated with cute chocolate Reese’s bats for a spooky touch. Perfect for Halloween celebrations with no baking required.
Ingredients
Pie Crust
- 400 g Oreo chocolate baking crumbs
- 1/2 cup unsalted butter, melted
- 2 tablespoons white granulated sugar
Pie Glaze
- 6 oz semi-sweet chocolate, melted
- 1 tablespoon corn syrup
- 1/4 cup melted butter
- 1/2 teaspoon yellow gel paste food/icing coloring
Pie Filling
- 2 cups whipped cream, homemade or frozen dessert topping (e.g., Cool Whip)
- 12 containers (99 g each) instant vanilla pudding (3 packages of 4 pudding)
- 270 to 370 g white pound, angel food, or loaf cake, sliced or broken up
Chocolate Bats
- 4 miniature Reese’s peanut butter cups
- 4 Oreo Chocolate (thins) Sandwich Cookies
- Dabs of frosting/icing (royal icing recommended)
- 8 edible eyes
Instructions
- Prepare the dish: Spray the inside of a 10.5 inch round dessert dish (2.5 inches deep) or two shallow 9 inch pie plates (1.5 inches deep) with non-stick cooking spray.
- Make the crust: In a large bowl, mix Oreo cookie crumbs, melted butter, and sugar until the mixture clings together. Press evenly into the bottom of the pie plate. Chill for 10 minutes to set.
- Prepare the glaze: Melt the semi-sweet chocolate in the microwave at 50% power for about 2 1/2 to 3 minutes or until fully melted. Stir in melted butter and corn syrup until smooth. Pour glaze evenly over the Oreo crust and gently spread with a spatula, covering the entire crust. Refrigerate until firm, about 15 minutes.
- Assemble the filling: Spread whipped cream evenly over the chilled chocolate cookie crust. Add sliced or broken white cake pieces on top of the whipped cream. Tint the instant vanilla pudding with yellow gel paste food coloring until desired yellow color is achieved. Spread the yellow pudding evenly over the cake layer and smooth with a butter knife to the edges of the pie plate.
- Make chocolate bats: Remove wrappers from the Reese’s cups. Break Oreo thin cookies in half and separate pieces to create 8 bat wings, scraping off the cream frosting. Press one cookie half on each side of each Reese’s cup to form wings. Pipe dabs of frosting on the backs of edible eyes and secure on top centers of the Reese’s cups to form bat faces. Repeat for all 4 bats.
- Decorate and serve: Place the bats on top of the pie just before serving. If not serving immediately, refrigerate the pie without the bats to prevent sogginess and apply bats just before serving.
Notes
- For one 9-inch pie plate, cut the recipe in half.
- Melt chocolate carefully: avoid high heat or contact with water to prevent seizing.
- Use gel paste food coloring for vibrant yellow; grocery store liquid coloring may not give the right color.
- Refrigerate the pie until firm before adding the glaze and filling.
- Do NOT add chocolate bats until immediately before serving to keep them from becoming mushy and to maintain their appearance.
Nutrition
- Serving Size: 1 slice
- Calories: 420 kcal
- Sugar: 30 g
- Sodium: 150 mg
- Fat: 28 g
- Saturated Fat: 12 g
- Unsaturated Fat: 14 g
- Trans Fat: 0 g
- Carbohydrates: 38 g
- Fiber: 2 g
- Protein: 5 g
- Cholesterol: 40 mg

