
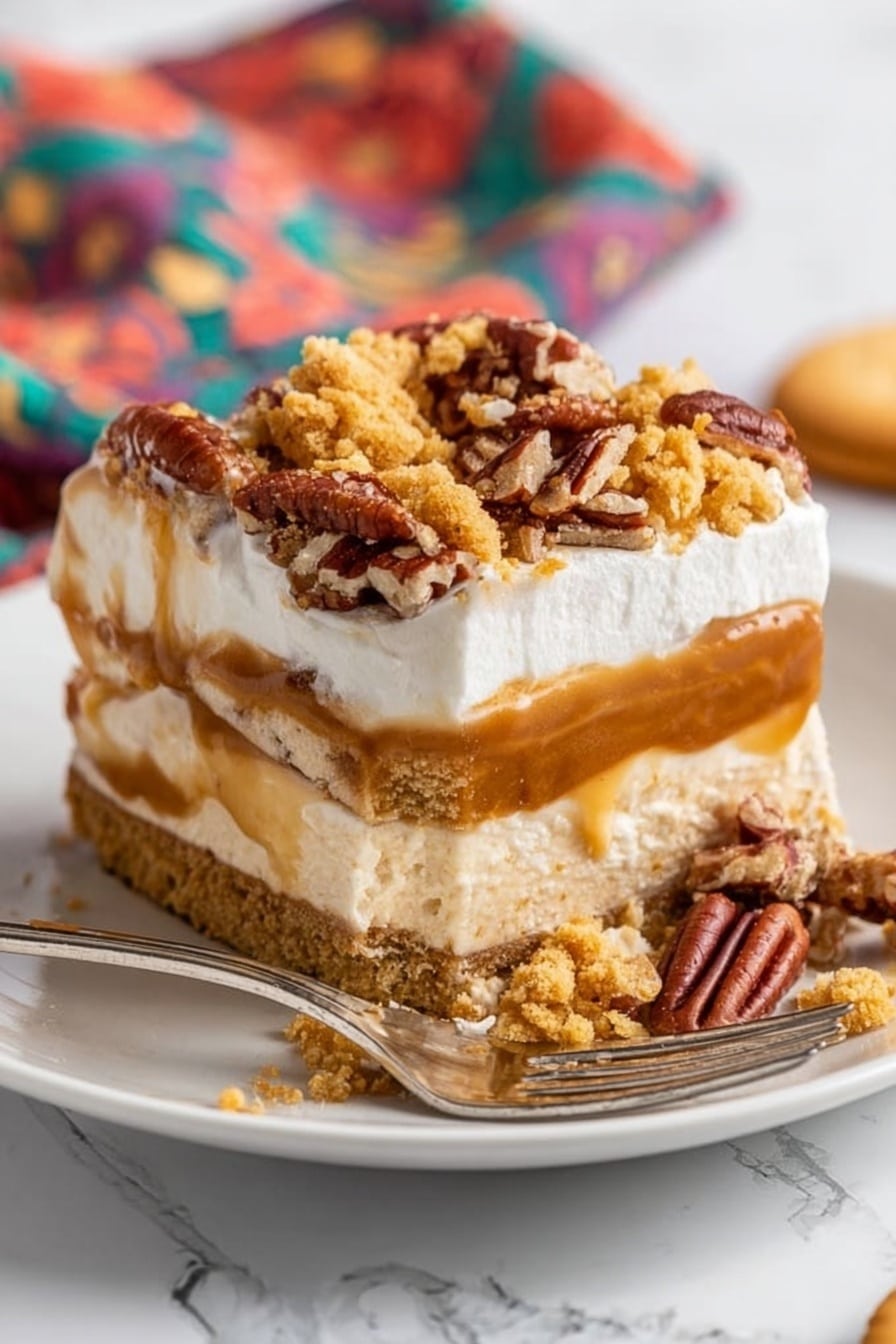
No Bake Pumpkin Lush Recipe
If you’re anything like me and crave easy, crowd-pleasing desserts for the cozy season, you’re going to fall hard for this No Bake Pumpkin Lush Recipe. It’s like a fall-themed dream layered in an 8×8 pan, with no oven required and absolutely no fuss. Trust me, once you try it, it’s going to be your go-to when you want pumpkin spice and creamy goodness without heating up the kitchen.
Why This Recipe Works
- No-Bake Convenience: Skip the oven but get a dessert that feels like it took way more effort than it did.
- Layered Textures: From the crunchy gingersnap crust to the smooth pumpkin cream cheese and fluffy Cool Whip — it’s a party in every bite.
- Seasonal Flavors: Pumpkin spice pudding brings cozy fall vibes without overpowering sweetness.
- Make-Ahead Friendly: Prep it in advance and wow your guests or family with minimal stress.

Ingredients & Why They Work
The magic of this No Bake Pumpkin Lush Recipe comes down to the perfect balance of flavors and textures. Each ingredient plays a role — the gingersnap crust brings spiced crunch, the pumpkin spice pudding adds that quintessential fall flavor, and the pumpkin cream cheese layer offers luxurious creaminess. Here’s a quick rundown of each key player.
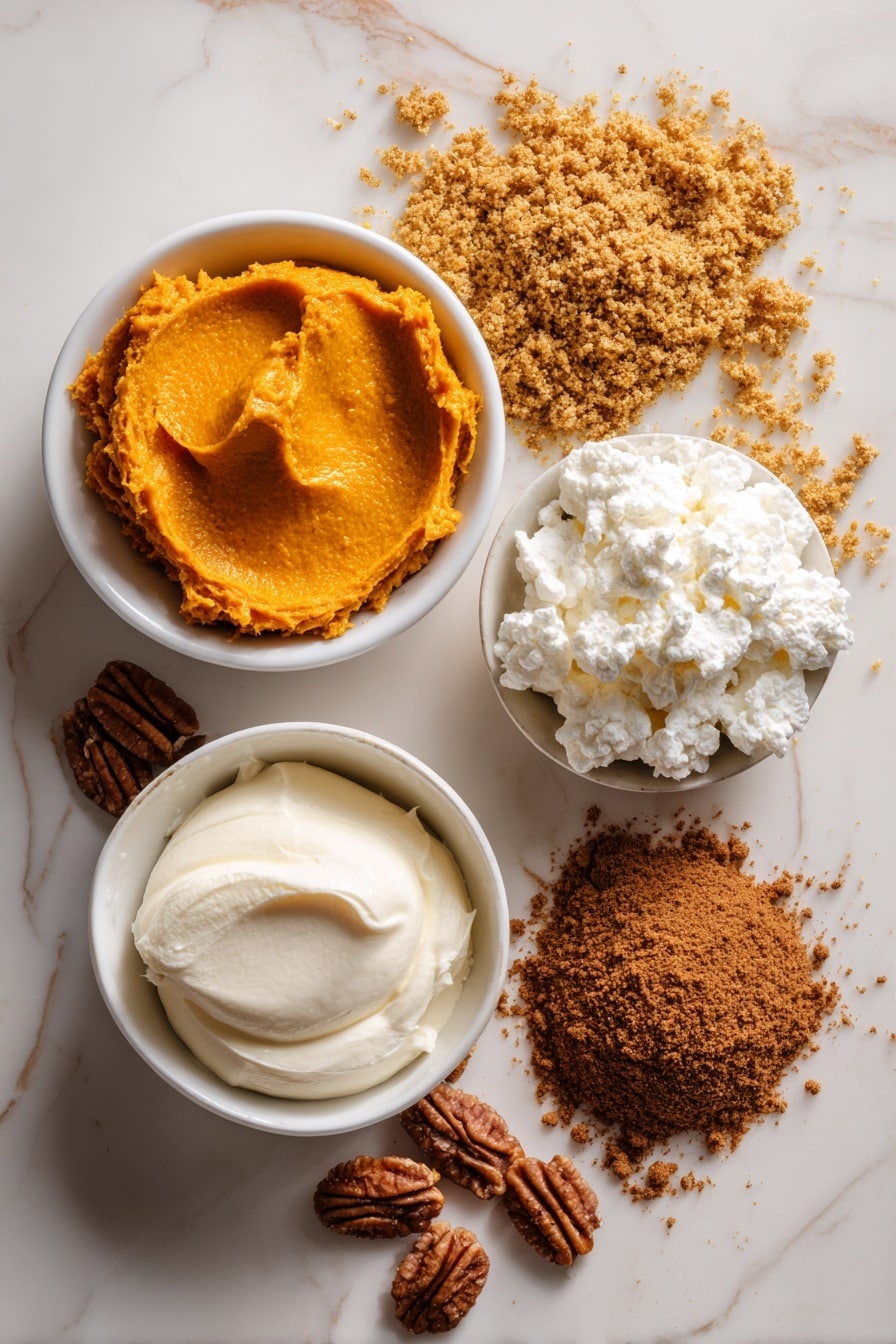
- Gingersnap cookies: Crushing these cookies forms a sturdy, flavorful crust that anchors the whole dish; I love the warm spice they add.
- Unsalted butter: Melts into the cookie crumbs binding the crust while keeping flavors rich but not salty.
- Pumpkin Spice Pudding Mix: This is where the pumpkin flavor shines; can’t find it? Butterscotch pudding is a surprisingly tasty substitute.
- Milk: Needed to properly set the pudding; I always use whole milk for creaminess.
- Cream cheese: Brings that velvety, tangy component that balances the sweetness beautifully.
- Confectioners’ sugar: Smooths and sweetens the cream cheese layer without grit.
- Pure pumpkin puree: Use canned pumpkin, not pie filling; it’s natural and not overly sweet.
- Vanilla extract & pumpkin spice: Boost the overall depth and warm fragrance.
- Cool Whip: Adds softness and lightness; I prefer folding it in gently so it stays fluffy.
- Chopped pecans & additional gingersnap crumbs: Optional toppings that add a nice crunch and a pretty finish.
Tweak to Your Taste
I love to make this No Bake Pumpkin Lush Recipe my own by playing with textures and flavors — it’s super flexible so you can adjust it to what you or your family enjoys. Feel free to experiment a little!
- Nut-Free Variation: I’ve replaced pecans with toasted coconut flakes, and it adds a lovely crunch without the nuts.
- Extra Pumpkin Kick: Sometimes, I swirl in a little extra pumpkin puree into the pudding layer for a more intense pumpkin flavor.
- Spice it Up or Down: If pumpkin spice is too much, I ease up on the pumpkin spice powder but never skip vanilla—it adds warmth without the spice.
- Make It Vegan: Use vegan cream cheese, coconut milk pudding, and dairy-free Cool Whip substitutes for a plant-based twist.
Step-by-Step: How I Make No Bake Pumpkin Lush Recipe
Step 1: Crafting That Perfect Gingersnap Crust
First things first — line your 8×8 pan with parchment paper. It makes lifting the pumpkin lush bars out so much easier later. Next, melt your butter gently in a small bowl, then stir in those crushed gingersnap crumbs. You want a texture that’s like moist sand — not too dry, not too gooey. Press this mixture evenly into the pan and pop it into the freezer for at least 30 minutes. I learned freezing sets the crust so it holds up really well against the creamy layers, making clean slices possible.
Step 2: Whisking Up That Velvety Pudding Layer
While the crust chills, whisk together your pumpkin spice pudding mix with milk until smooth. The mix will start thickening right away but let it chill in the fridge for at least 10 minutes. This brief chill helps it set properly so your layers don’t run into each other later. I always make sure to whisk well to avoid lumps — smooth pudding is the secret to that elegant, luscious look.
Step 3: Mixing the Creamy Pumpkin Cheese Layer
In a separate bowl, beat room temperature cream cheese until it’s silky smooth — no lumps allowed! Add confectioners’ sugar, pumpkin puree, vanilla extract, and pumpkin spice, and blend until evenly mixed. Then, gently fold in one cup of Cool Whip using a spatula — the folding motion keeps the mixture light and fluffy, which is what you want. This layer is the star that balances sweet and tangy, so take your time here.
Step 4: Layering It All Together
Once your crust has hardened and your pudding is ready, it’s time for assembly. Drop spoonfuls of the cream cheese mixture onto the crust and spread it carefully—thick and even is my motto here. Next, spread the chilled pudding on top of the cream cheese layer, smoothing it out gently. Finally, cover with the remaining Cool Whip to finish off that cloud-like topping. For the grand finale, sprinkle chopped pecans and crushed gingersnap crumbs on top if you want some extra texture and festive flair!
Step 5: Chill and Serve
Cover the whole pan well and chill in the refrigerator for at least 4 hours or overnight if you have the time — this helps all the layers set up perfectly and those flavors meld together. If you’re in a rush, the freezer works too, but keep an eye on it — about an hour and a half should do it. When ready, slice with a very sharp knife for clean pieces and enjoy!
Pro Tips for Making No Bake Pumpkin Lush Recipe
- Room Temperature Cream Cheese: Always warm your cream cheese beforehand to avoid lumps and make blending smoother.
- Firmly Press Crust: The firmer you pack your cookie crumb crust, the less crumbly your bars will be when serving.
- Gentle Folding: Fold the Cool Whip into the cream cheese layer with care — too much stirring and you’ll lose that fluffy texture.
- Sharp Knife for Slicing: Warm your knife blade with hot water and wipe dry before slicing to get clean cuts every time.
How to Serve No Bake Pumpkin Lush Recipe
Garnishes
I’m partial to a simple sprinkle of chopped pecans and crushed gingersnap on top—it adds just the right crunch and looks pretty without feeling over the top. Sometimes, I even add a dash of cinnamon powder or a few mini chocolate chips if I want to get fancy.
Side Dishes
This pumpkin lush pairs beautifully with hot drinks — think spiced chai lattes or a cozy cup of coffee. I like serving it alongside a scoop of vanilla ice cream or fresh whipped cream for extra indulgence.
Creative Ways to Present
Once, I made individual servings by layering everything in cute mason jars for a fall brunch — super cute and so easy to grab and enjoy! You could also top with toasted pepitas or drizzle a bit of caramel sauce for a fancy holiday dessert.
Make Ahead and Storage
Storing Leftovers
Leftovers keep really well covered in the fridge for up to 4 days. I store mine in the same pan, tightly wrapped with plastic wrap, or transfer to an airtight container if needed. The flavors only get better as they meld overnight!
Freezing
Freezing works if you want to stash some for later. I slice before freezing and place pieces between parchment paper in a freezer-safe container. When thawing, let them sit overnight in the fridge for the best texture.
Reheating
Since this is a no bake, chilled dessert, I don’t recommend heating it. Instead, just let frozen slices thaw in the fridge so the layers soften naturally and keep their creaminess.
FAQs
-
Can I use regular pumpkin pie spice instead of pumpkin spice pudding mix?
Absolutely! If you can’t find pumpkin spice pudding mix, use vanilla or butterscotch pudding and stir in a teaspoon or so of pumpkin pie spice to taste. Just make sure you let the pudding set well in the fridge before layering.
-
Do I have to use Cool Whip, or can I use whipped cream?
You can swap Cool Whip for fresh whipped cream if you prefer. Just keep in mind that whipped cream is less stable, so it might soften the layers a bit faster. For longer-lasting desserts, Cool Whip is your friend.
-
What’s the best way to crush gingersnap cookies?
I punch the cookies inside a sealed plastic bag with a rolling pin until they’re mostly fine crumbs with a few larger bits for texture. You want a mix that packs well but still offers a slight crunch.
-
Can I make this recipe gluten-free?
Yes! Use gluten-free gingersnap cookies for the crust. Just ensure they crush well and bind nicely with the butter. The rest of the ingredients are naturally gluten-free.
-
How long should I chill the No Bake Pumpkin Lush before serving?
I recommend a minimum of 4 hours in the fridge, but overnight chilling is best. This resting time lets all layers set firmly and the flavors meld seamlessly.
Final Thoughts
This No Bake Pumpkin Lush Recipe is such a cozy, comforting dessert that reminds me of easy holiday get-togethers with family. It’s straightforward, failsafe, and packed with seasonal flavor but without the stress. I can’t recommend it enough if you want a show-stopping dessert that actually feels effortless. Give it a go—you’ll thank me next fall!
Print
No Bake Pumpkin Lush Recipe
- Prep Time: 45 minutes
- Cook Time: 0 minutes
- Total Time: 4 hours 45 minutes
- Yield: 9 servings
- Category: Dessert
- Method: No-Cook
- Cuisine: American
- Diet: Vegetarian
Description
This No Bake Pumpkin Lush is a creamy, layered dessert perfect for autumn gatherings, featuring a gingersnap cookie crust, pumpkin spice pudding, pumpkin cream cheese layer, and Cool Whip topping.
Ingredients
Crust
- 1 ⅓ cups crushed Gingersnap cookie crumbs (about 25 cookies depending on their size)
- 5 tablespoons unsalted butter
Pudding Layer
- 3.4 ounce package Pumpkin Spice Pudding Mix (can use butterscotch pudding if you can’t find pumpkin spice pudding)
- 1 ½ cups milk
Pumpkin Cream Cheese Layer
- 6 ounces cream cheese (room temperature)
- ½ cup confectioners’ sugar
- ¼ cup pure pumpkin puree
- ½ teaspoon pure vanilla extract
- ¾ teaspoon pumpkin spice
- 1 cup Cool Whip
Topping
- 8 ounces Cool Whip (divided)
- Chopped pecans (optional)
- Additional crushed Gingersnap cookies (optional)
Instructions
- Prepare the crust: Line an 8×8-inch baking pan with parchment paper for easy removal and slicing. In a small mixing bowl, melt the butter and add the crushed gingersnap cookie crumbs. Mix until well combined, then press evenly into the pan. Place the crust in the freezer for at least 30 minutes to harden.
- Make the pudding layer: In a medium bowl, whisk together the pumpkin spice pudding mix and milk until smooth. Refrigerate for at least 10 minutes to set.
- Prepare the pumpkin cream cheese layer: In a mixing bowl, beat the cream cheese until smooth. Add confectioners’ sugar, pumpkin puree, vanilla extract, and pumpkin spice, mixing until well combined. Gently fold in 1 cup of Cool Whip with a rubber spatula until fully incorporated.
- Assemble the dessert: Spread dollops of the pumpkin cream cheese layer evenly over the frozen crust, smoothing it out. Next, spread the chilled pudding layer evenly over the cream cheese layer. Cover the pudding with the remaining 8 ounces of Cool Whip to seal the layers.
- Chill and serve: Refrigerate the assembled dessert for at least 4 hours, or ideally overnight, to allow flavors to meld and layers to set. Alternatively, freeze for 1 hour and 30 minutes. Before serving, sprinkle with chopped pecans and additional crushed gingersnap cookies if desired.
Notes
- Pumpkin Spice Pudding Mix can often be found at Walmart or online retailers like Amazon.
- Using parchment paper in the pan makes for easy removal and cleaner slicing.
- If pumpkin spice pudding mix is unavailable, butterscotch pudding mix is a suitable substitute.
- Ensure cream cheese is at room temperature to achieve a smooth, creamy texture.
- Chilling the dessert overnight enhances the flavor and texture.
Nutrition
- Serving Size: 1 serving
- Calories: 350 kcal
- Sugar: 28 g
- Sodium: 250 mg
- Fat: 22 g
- Saturated Fat: 10 g
- Unsaturated Fat: 8 g
- Trans Fat: 0 g
- Carbohydrates: 32 g
- Fiber: 2 g
- Protein: 3 g
- Cholesterol: 50 mg
