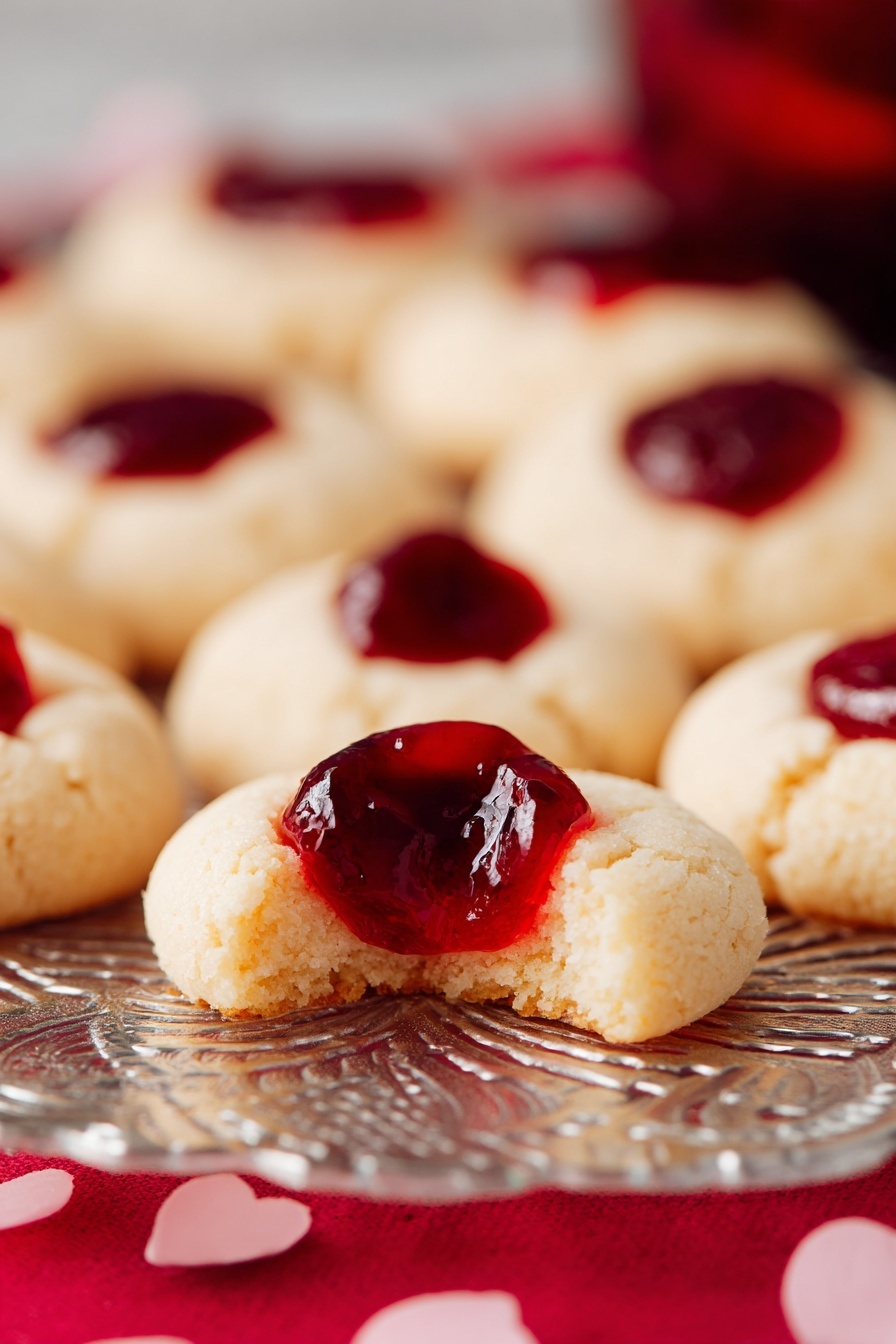
Cherry Cheesecake Cookies Recipe
Hey friend! If you’re on the hunt for a treat that’s both chewy and bursting with that dreamy cherry-cheesecake flavor, you’ve gotta try this Cherry Cheesecake Cookies Recipe. I stumbled on this gem recently and let me tell you—it’s basically dessert magic in cookie form. Soft, tangy cream cheese melded into sweet sugar cookies with pockets of luscious cherry pie filling. Trust me, whether you’re baking for a crowd or just craving a homestyle indulgence, you’re gonna want to read on.
Why This Recipe Works
- Simplicity Meets Flavor: Using refrigerated sugar cookie dough cuts prep time without sacrificing that homemade taste.
- Cream Cheese Magic: Whipped cream cheese blends seamlessly, creating a tender and rich crumb.
- Cherry Surprise: The pie filling centers add bursts of juicy, sweet-tart cherry flavor in every bite.
- Perfect Texture: Rolling in sugar adds a slight crunch contrast to the soft, chewy cookie body.

Ingredients & Why They Work
When you’re baking these Cherry Cheesecake Cookies Recipe, selecting the right ingredients really makes all the difference. Each one plays a special role in the final texture and flavor, so I always aim for quality and proper prep.
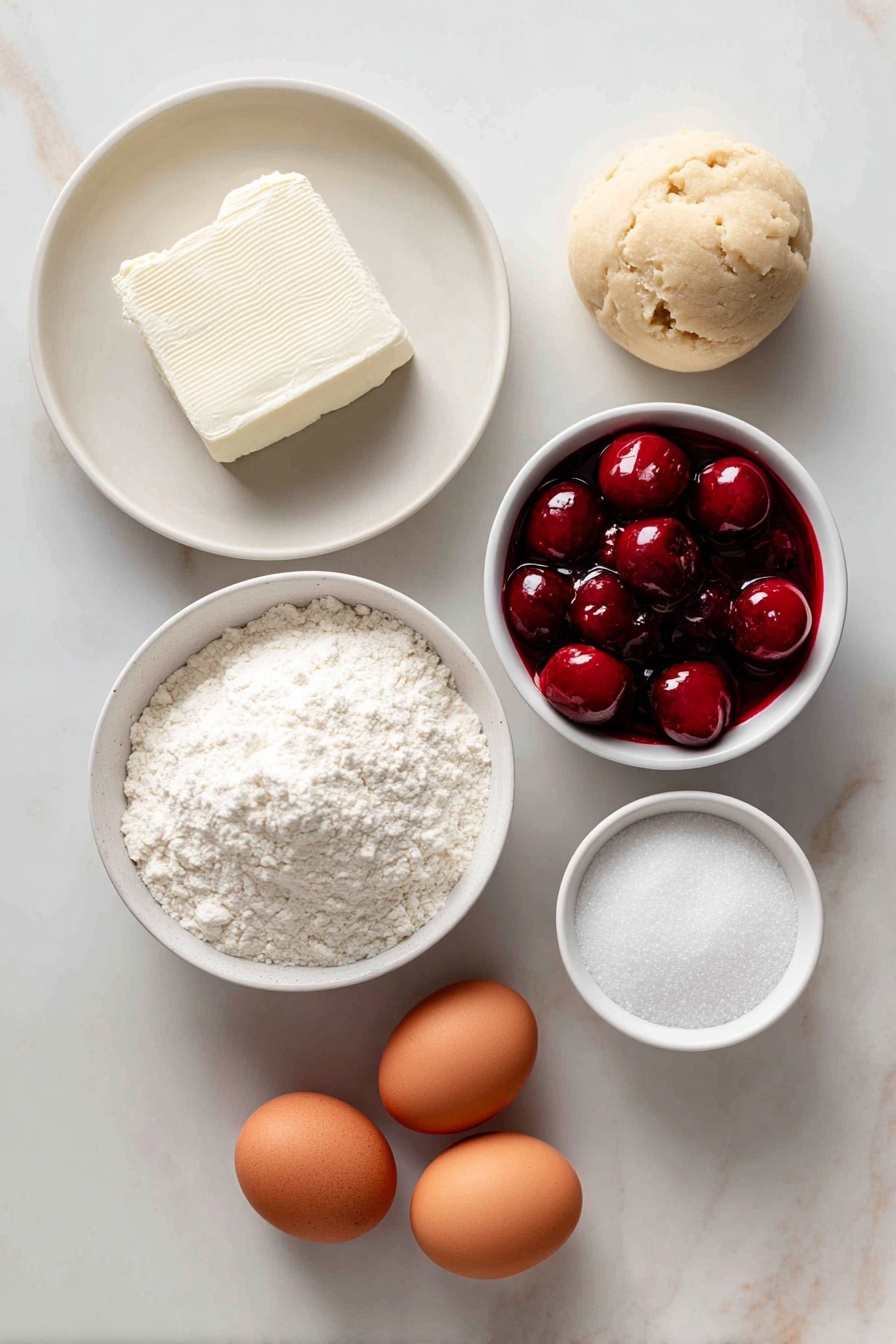
- Refrigerated sugar cookie dough: This is your base—it’s simple, comes pre-measured, and helps you get perfect cookie consistency every time.
- Whipped cream cheese: Soft and airy, it gives the cookies a rich tang and melt-in-your-mouth crumb; make sure it’s well-whipped before mixing.
- All-purpose flour: Adds structure so the cookies hold together nicely without being cakey or too dense.
- Granulated sugar: Rolling dough balls in sugar before baking ensures a sweet, slightly crunchy exterior.
- Cherry pie filling: This is your flavor bomb—choose a quality filling with whole cherries for those juicy pockets that surprise you!
Tweak to Your Taste
I love how flexible the Cherry Cheesecake Cookies Recipe is—you can really make it your own. I’ve experimented and found that small tweaks can really brighten or deepen the flavors, so don’t be shy about adjusting to what you like!
- Variation: Sometimes I throw in a little vanilla extract to amp up that creamy sweetness. It’s subtle but makes the cookies feel extra indulgent.
- Dietary Adjustments: You can swap sugar cookie dough for gluten-free options if you’re baking for someone with sensitivities; just watch the baking time closely.
- Flavor Swaps: Instead of cherry pie filling, I’ve tried raspberry or blueberry for a little twist—delicious and just as colorful!
Step-by-Step: How I Make Cherry Cheesecake Cookies Recipe
Step 1: Prep Your Oven and Baking Sheet
First things first, preheat your oven to 350°F. Line a baking sheet with parchment paper—this keeps the cookies from sticking and helps with even browning. It’s a small step that really smooths the whole baking process.
Step 2: Mix the Dough and Cream Cheese
In a large bowl or your stand mixer fitted with the paddle attachment, combine the refrigerated sugar cookie dough, whipped cream cheese, and all-purpose flour. Beat them together until everything is beautifully blended—don’t forget to scrape the sides so no lumps hide there! The dough should be soft but hold its shape.
Step 3: Scoop, Roll, and Coat
Use a small cookie scoop (about 4 teaspoons) to portion out the dough. Roll each portion gently into a ball between your palms—a quick, light touch does the trick. Then, roll the balls thoroughly in granulated sugar. This sugar coating gives them that sparkly, slightly crunchy surface once baked.
Step 4: Bake and Create Wells for Cherries
Place your sugar-coated dough balls on the baking sheet about 2 inches apart. Bake for 10-12 minutes until the edges just set but the center is still soft. Right after pulling them out of the oven, gently press the back of a rounded teaspoon into the center to create a little well—this is where the cherry filling will rest.
Step 5: Cool and Fill with Cherry Pie Filling
Transfer the cookies to a wire rack to cool completely. Once cooled, use your teaspoon to spoon cherry pie filling into each well—about one cherry per cookie makes the perfect pop. Be gentle so you don’t break the cookie base, but generous enough to get that juicy zing in every bite!
Pro Tips for Making Cherry Cheesecake Cookies Recipe
- Use room temperature cream cheese: It blends better and keeps the dough smooth and soft without lumps.
- Don’t overbake: Cookies look slightly undercooked when you pull them from the oven but will firm up as they cool—this keeps them chewy.
- Create even wells: Press gently with the back of a rounded teaspoon right after baking to avoid cracking the cookie edges.
- Choose good cherry filling: I prefer fillings with whole cherries to get that luscious bite, but avoid overly watery fillings to prevent sogginess.
How to Serve Cherry Cheesecake Cookies Recipe
Garnishes
I like to sprinkle a tiny pinch of powdered sugar just before serving—it adds a classy snowy touch and balances out the cherry’s tartness. Fresh mint leaves also make a pretty, aromatic garnish if you’re feeling festive.
Side Dishes
These cookies shine on their own, but when I make them for a party, I love pairing them with a chilled glass of vanilla almond milk or a dark roast coffee to contrast the sweet creaminess. They also go great with a simple fruit salad for a light finish.
Creative Ways to Present
For birthdays or holiday gatherings, I’ve served these cookies on a tiered dessert platter surrounded by fresh cherries and small cheesecake bites—it’s a showstopper! Wrapping individual cookies in cellophane with a ribbon is also a darling way to gift them.
Make Ahead and Storage
Storing Leftovers
I store leftover Cherry Cheesecake Cookies in an airtight container at room temperature. They stay soft and delicious for up to 2 days—after that, they start to lose that fresh-baked charm, so best to eat them quickly!
Freezing
I’ve frozen the dough balls before baking and popped them straight into the oven from frozen—this works great when you want fresh cookies on demand. You can also freeze fully baked cookies (without the cherry filling) in a sealed container for up to a month, then add the filling fresh after thawing.
Reheating
To reheat, I give the cookies a quick 10-15 seconds in the microwave to revive that soft, creamy texture. Just add the cherry filling after warming if they weren’t pre-filled. Avoid reheating in the oven, as it can dry them out.
FAQs
-
Can I use regular cream cheese instead of whipped cream cheese?
Absolutely! You just want to make sure your cream cheese is softened to room temperature so it blends smoothly with the dough. It might make the dough slightly firmer, and you may need to bake the cookies an extra minute or two to set.
-
What if I don’t have cherry pie filling?
If you can’t find cherry pie filling, try using canned cherry preserves or homemade cherry compote. Just make sure it’s thick enough to hold shape in the wells without making the cookies soggy.
-
How do I prevent the cookies from cracking when pressing the wells?
The key is to press the wells right after removing the cookies from the oven while they’re still soft and pliable. Use a gentle touch with the back of a rounded teaspoon and press slowly to avoid cracks.
-
Can I make these cookies gluten-free?
Yes! Swap the sugar cookie dough for a gluten-free version, ideally one that’s similar in texture and sweetness. Keep a close eye on baking times as gluten-free doughs sometimes bake faster or slower.
-
How long do Cherry Cheesecake Cookies last?
Stored in an airtight container at room temperature, these cookies are best eaten within two days to enjoy their soft texture and fresh flavor.
Final Thoughts
This Cherry Cheesecake Cookies Recipe is honestly one of my all-time favorites to bake when I want something that’s quick but feels truly special. The way that pop of cherry pie filling contrasts with the rich cream cheese cookie is just pure joy. I can’t wait for you to try it and see why it’s become a staple in my kitchen—and hopefully yours, too. Baking this is like a hug in cookie form, and I promise that once you make these, you’ll be making them again and again!
Print
Cherry Cheesecake Cookies Recipe
- Prep Time: 15 minutes
- Cook Time: 12 minutes
- Total Time: 27 minutes
- Yield: 24 cookies
- Category: Dessert
- Method: Baking
- Cuisine: American
- Diet: Vegetarian
Description
Delight in these Cherry Cheesecake Cookies featuring a soft sugar cookie base blended with cream cheese and topped with luscious cherry pie filling. Perfectly sweet with a creamy center, these cookies offer a delicious twist on traditional sugar cookies, combining fruity cherry notes with rich cheesecake flavor.
Ingredients
Cookie Dough
- 1 (16 oz.) package refrigerated sugar cookie dough
- 4 ounces whipped cream cheese
- ⅓ cup all-purpose flour
Topping and Coating
- ½ cup granulated sugar (optional coating)
- ¾ cup cherry pie filling
Instructions
- Preheat Oven: Preheat the oven to 350°F and line a baking sheet with parchment paper. Set the prepared baking sheet aside for later use.
- Mix Dough: In a large bowl or stand mixer fitted with a paddle attachment, beat together the refrigerated sugar cookie dough, whipped cream cheese, and all-purpose flour until fully combined, scraping down the sides as needed to ensure even mixing.
- Portion Dough: Use a small cookie scoop measuring 4 teaspoons to portion out the dough. Lightly roll each portion into a ball with your hands to form uniform cookies.
- Coat and Arrange: Roll each dough ball in granulated sugar to coat them lightly. Place the coated dough balls 2 inches apart on the prepared baking sheet to allow for spreading.
- Bake Cookies: Bake in the preheated oven for 12 minutes or until the edges of the cookies are set but centers remain soft.
- Create Wells: Upon removing the cookies from the oven, gently press the back of a rounded teaspoon into the center of each cookie to create a small well. Transfer the cookies to a wire rack to cool completely.
- Add Cherry Filling: Once cooled, use the teaspoon to scoop about one cherry from the cherry pie filling into each well of the cookies, adding a sweet and fruity topping.
Notes
- Storage: Store cookies in an airtight container at room temperature. For the best taste and texture, consume within two days.
- Cream Cheese: Regular cream cheese can be used instead of whipped cream cheese but make sure it’s softened before mixing. Baking time may need an additional 2 to 3 minutes.
Nutrition
- Serving Size: 1 cookie
- Calories: 150 kcal
- Sugar: 12 g
- Sodium: 80 mg
- Fat: 7 g
- Saturated Fat: 3 g
- Unsaturated Fat: 3 g
- Trans Fat: 0 g
- Carbohydrates: 20 g
- Fiber: 0.5 g
- Protein: 2 g
- Cholesterol: 15 mg


