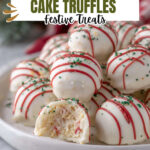
Christmas Tree Cake Truffles with Little Debbie Recipe
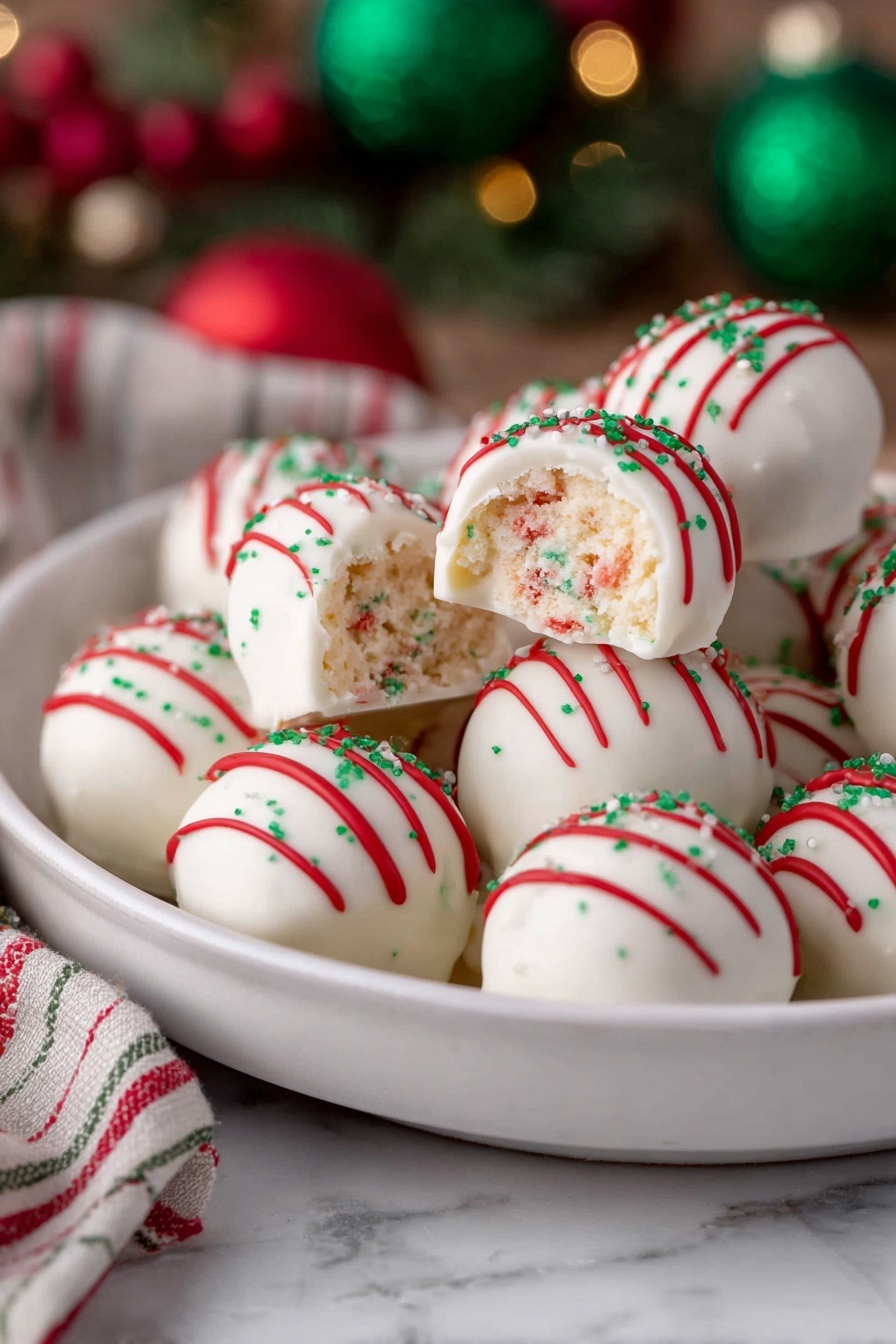
If you’re anything like me and love easy, festive treats that wow without the stress, you’re going to adore this Christmas Tree Cake Truffles with Little Debbie Recipe. Imagine turning those classic Little Debbie Christmas Tree Cakes into bite-sized, chocolate-coated delights decked out with sprinkles and a festive drizzle—total crowd-pleasers and insanely simple to make! Stick around because I’m sharing all my tips to help you nail these tasty truffles perfectly, whether it’s your first time or you’re already a pro at cake pop-style treats.
Why This Recipe Works
- Easy and Accessible: Little Debbie Christmas Tree Cakes give you a delicious, ready-made base, cutting prep time drastically.
- Festive and Fun: Sprinkles, sanding sugar, and drizzled candy melts add cheerful color and holiday vibes without extra fuss.
- Customizable: You can tweak toppings and chocolate types to suit any taste, making this recipe great for picky eaters or themed parties.
- Perfect Bite-Sized Treats: The truffle size makes them easy to share, serve at a party, or sneak a few when no one’s looking.

Ingredients & Why They Work
Each ingredient in this Christmas Tree Cake Truffles with Little Debbie Recipe plays a simple but important role in delivering that rich, festive flavor and perfect texture. From the soft Little Debbie cakes to the creamy white chocolate coating, they come together in a way that’s both fuss-free and totally irresistible.
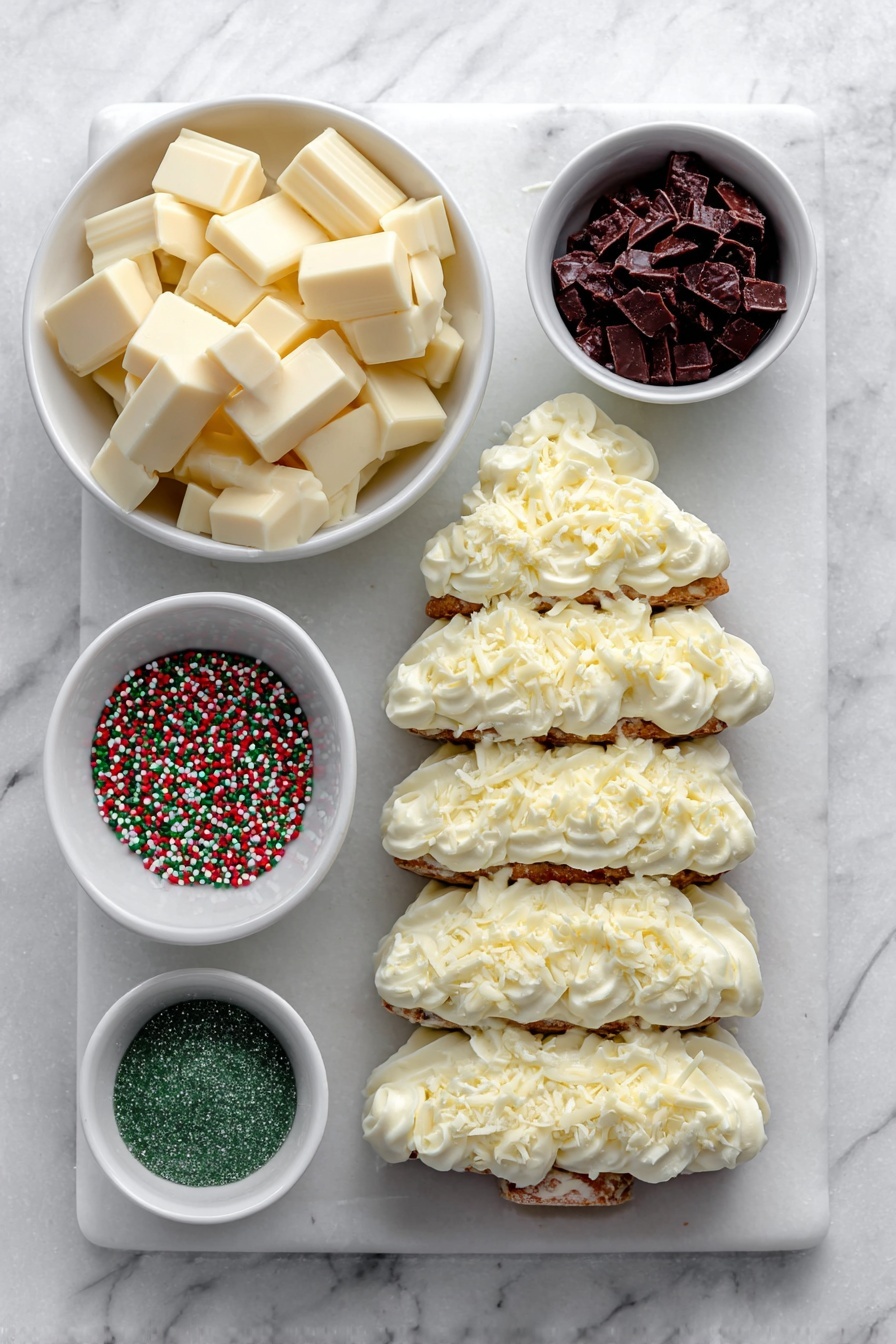
- Little Debbie Christmas Tree Cakes: These are the star of the show—moist, fudgy, and already full of holiday flavor, making your truffle base unbeatable.
- White chocolate or candy melts: Choose your favorite for coating; white chocolate gives the classic, creamy finish, while candy melts streamline the melting and dipping process.
- Festive sprinkles: Bring color and fun right inside the truffles, adding little bursts of crunch and holiday cheer.
- Red candy melts (optional): Perfect for a pretty drizzle that adds contrast and that extra pop of Christmas spirit.
- Green sanding sugar: A simple decoration that adds sparkle and a subtle crunch, rounding out the festive look.
Tweak to Your Taste
One of my favorite things about the Christmas Tree Cake Truffles with Little Debbie Recipe is how easy it is to make it your own. Whether you want to swap out the sprinkles for chopped nuts or drizzle with dark chocolate instead of red candy melts, the options are endless. I’ve found a few tweaks that make this recipe feel fresh and personalized every time.
- Chocolate Swap: I tried using milk chocolate instead of white chocolate once for a richer taste, and it was a hit. Feel free to experiment with your favorite coatings.
- Sprinkle Mix-Up: Instead of festive sprinkles, try crushed peppermint candy for a cool twist — it adds a lovely crunch and minty freshness.
- Make it Gluten-Free: If you’re gluten-sensitive, keep an eye out for gluten-free cake options or substitute with gluten-free brownies for similar results.
- Nutty Addition: Fold in finely chopped pecans or walnuts before rolling the truffles to add texture and a nutty flavor boost.
Step-by-Step: How I Make Christmas Tree Cake Truffles with Little Debbie Recipe
Step 1: Break Down the Cakes into Crumbs
First, unwrap the Little Debbie Christmas Tree Cakes and toss them into a large bowl. I like to use a handheld mixer here because it’s quick and gets the perfect crumbly texture without lumps. Mixing at medium speed just until crumbly ensures the batter holds together nicely for rolling, and don’t forget to toss in those festive sprinkles at this point—they add a surprise pop of color inside your truffles!
Step 2: Form the Truffle Balls
Grab a tablespoon scoop (or just eyeball it like I do) and roll the cake-dough mixture between your palms into round balls. Keep them consistent in size so the coating sets evenly. Lay each ball on a parchment-lined baking sheet and pop the whole tray into the fridge for at least 15 minutes — this chill step helps the truffles firm up and makes dipping easier.
Step 3: Melt the White Chocolate
While the truffles chill, melt your white chocolate or candy melts. I prefer using a microwave for convenience, heating in 30-second bursts and stirring between each. Alternatively, a double boiler works well if you want more control. Be sure the chocolate is smooth and lump-free so your coating looks glossy and even.
Step 4: Dip and Decorate
Using a fork or dipping tool, coat each chilled truffle completely in melted white chocolate, letting the excess drip off before placing it back on the parchment. For that festive flair, melt the red candy melts separately and drizzle them with a piping bag or a snipped ziplock bag. Finish by sprinkling green sanding sugar on top—this step not only adds charm but a nice little crunch that seals the deal.
Step 5: Chill and Serve
Pop the decorated truffles into the fridge again until the coating has fully set—about 10-15 minutes. Then, enjoy your festive, mouthwatering treat that’s easy enough to whip up last minute but looks like you spent hours in the kitchen!
Pro Tips for Making Christmas Tree Cake Truffles with Little Debbie Recipe
- Chill Twice: I learned that chilling the truffle balls before and after dipping makes a huge difference in getting a smooth coating that doesn’t crack.
- Use Parchment Paper: Always place dipped truffles on parchment to prevent sticking and make cleanup a breeze.
- Don’t Overmix: When you mix the cake crumbs and sprinkles, stop as soon as crumbs form — overmixing can make the dough too soft to roll.
- Work Quickly With Chocolate: I avoid chocolate hardening by working in small batches and reheating gently if needed.
How to Serve Christmas Tree Cake Truffles with Little Debbie Recipe
Garnishes
I like to add a touch of extra festivity by using bright green sanding sugar to mimic mini Christmas tree highlights. Sometimes I throw on tiny edible pearls or snowflake sprinkles for a whimsical touch. Honestly, the garnishes are where you get to have fun and really make these truffles pop on any dessert table.
Side Dishes
These truffles shine as a sweet treat after holiday dinners or snack time. Pair them with a hot cup of cocoa or a spicy mulled cider to balance the sweetness and keep that cozy Christmas vibe going. They also go well with fresh fruit platters or simple cookies for a varied dessert spread.
Creative Ways to Present
If you’re giving these as gifts or serving at parties, I highly recommend arranging the truffles in a lined holiday-themed box or on a tiered dessert stand with holiday decorations around. Wrapping some in clear cellophane with a bright ribbon is another sweet way to share them with friends and family.
Make Ahead and Storage
Storing Leftovers
I keep leftover truffles in an airtight container in the fridge—they stay fresh for about a week and still taste fantastic. Just make sure they’re fully set before sealing to avoid sticking.
Freezing
Freezing works really well if you want to prep ahead. After the chocolate is set, place the truffles on a baking sheet to freeze individually before transferring them to a freezer-safe container. They can last up to 2 months frozen and thaw quickly in the fridge before serving.
Reheating
Since these are meant to be enjoyed chilled, reheating isn’t necessary or recommended. However, if you want to soften the chocolate slightly, just leave them at room temperature for 15-20 minutes before serving.
FAQs
-
Can I use other Little Debbie cakes for this recipe?
Absolutely! While Christmas Tree Cakes offer a holiday vibe, you can substitute with other Little Debbie cakes like Fudge Rounds or Zebra Cakes to create delicious truffles with different flavors.
-
How do I prevent the truffles from cracking when dipping?
Chilling the truffle balls before dipping and letting the chocolate set in the fridge helps prevent cracking. Also, avoid working in overly warm environments, as temperature changes can cause the coating to crack.
-
Can I make these dairy-free or vegan?
You can try using dairy-free or vegan cake options and substitute white chocolate with vegan-certified candy melts. Keep in mind that textures may vary slightly, but the recipe stays delicious!
-
How long do these truffles last?
Stored properly in the fridge, these truffles keep well for up to a week. Just make sure they’re kept in an airtight container to preserve freshness and prevent odors from other foods.
Final Thoughts
This Christmas Tree Cake Truffles with Little Debbie Recipe has become one of my favorite go-to treats during the holidays because it combines nostalgic flavors with an easy, fun assembly. I love how these truffles look impressive but don’t require fancy skills or hours in the kitchen. If you’re looking for a sweet, festive project that’ll impress your family and friends (and satisfy your sweet tooth), trust me—you’ll want to make a batch of these ASAP. Give it a try, share some laughs, and enjoy these bite-sized holiday hugs!
Print
Christmas Tree Cake Truffles with Little Debbie Recipe
- Prep Time: 15 minutes
- Cook Time: 10 minutes
- Total Time: 25 minutes
- Yield: 12 servings
- Category: Dessert
- Method: No-Cook
- Cuisine: American
Description
These festive Christmas Tree Cake Truffles are a delightful and easy-to-make holiday treat using Little Debbie Christmas Tree Cakes. Coated in creamy white chocolate and decorated with colorful sprinkles, red candy drizzle, and green sanding sugar, these truffles are perfect for holiday parties or gifting.
Ingredients
Base
- 1 box Little Debbie Christmas Tree Cakes (5 cakes)
Coating and Decoration
- 8 ounces white chocolate or candy melts
- 3 tablespoons festive sprinkles
- 3 tablespoons red candy melts for drizzling (optional)
- Green sanding sugar for decoration
Instructions
- Prepare the Cake Mixture: Unwrap the Little Debbie Christmas Tree Cakes and place them in a large bowl. Use a handheld mixer to blend the cakes until a crumbly dough forms. Mix in the festive sprinkles to incorporate color and texture.
- Form the Truffles: Using a tablespoon, scoop out portions of the cake mixture and roll each between your palms into a ball. Place the rolled balls onto a parchment-lined baking sheet. Continue until all the mixture is used.
- Melt the White Chocolate: In a microwave-safe bowl, melt the white chocolate or candy melts using the microwave in short intervals or by using a double boiler. Stir well to ensure smoothness.
- Coat the Truffles: Using a fork or dipping tool, dip each chilled cake ball into the melted white chocolate, coating it thoroughly. Let any excess chocolate drip off before placing the truffles back onto the parchment-lined sheet.
- Melt and Drizzle Red Candy Melts: Melt the red candy melts in a piping bag or ziplock bag in the microwave in 30-second increments, massaging the bag between each interval for even melting. Snip a small edge of the bag and drizzle the red candy melts over the coated truffles.
- Decorate and Set: Immediately sprinkle green sanding sugar over the drizzled truffles for a festive touch. Place the baking sheet in the fridge for a few minutes to allow the chocolate to set. Serve and enjoy your festive cake truffles!
Notes
- Ensure cake balls are chilled before dipping to prevent melting the chocolate coating.
- Use a double boiler for melting chocolate gently if preferred over microwaving.
- Substitute red candy melts with melted red chocolate or food coloring mixed white chocolate if unavailable.
- Store finished truffles in an airtight container in the fridge to maintain freshness.
- Decorate with other festive sprinkles or edible glitter to customize appearance.
Nutrition
- Serving Size: 1 truffle
- Calories: 150 kcal
- Sugar: 18 g
- Sodium: 60 mg
- Fat: 7 g
- Saturated Fat: 4 g
- Unsaturated Fat: 2 g
- Trans Fat: 0 g
- Carbohydrates: 22 g
- Fiber: 0.5 g
- Protein: 1 g
- Cholesterol: 10 mg