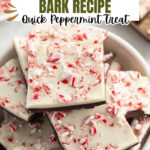
Easy Peppermint Bark Recipe
If you’re anything like me and adore festive treats that are both stunning and simple, you’re going to love this Easy Peppermint Bark Recipe. It’s one of those holiday classics that requires minimal effort but delivers maximum joy — sweet layers of silky chocolate paired with the refreshing crunch of peppermint. Whether you’re making it for holiday parties, gifting, or just because, this recipe will become a go-to. Stick with me, and I’ll share all my insider tips to make it perfect every single time.
Why This Recipe Works
- Simple Ingredients: Just three things and a bit of melting magic delivers big flavor without stress.
- Layered Chocolate Delight: Dark and white chocolates create a gorgeous contrast both visually and taste-wise.
- Peppermint Crunch: Crushed candy canes add that refreshing bite and festive flair making every bite exciting.
- Quick Chill & Cut: Refrigeration firms it up fast, so you’re enjoying this treat in less than 30 minutes.

Ingredients & Why They Work
The balance in this easy peppermint bark recipe is all about quality chocolate paired with just the right amount of peppermint crunch. Each ingredient shines on its own but also plays beautifully together. When you shop, I recommend picking good-quality chocolate chips — you’ll taste the difference. And for peppermint, real candy canes or hard peppermint candies crushed fresh are best for that satisfying snap.

- Dark chocolate chips: Offers a rich, slightly bitter counterpoint to the sweetness of the white chocolate, grounding the flavor.
- White chocolate chips: Provides creamy sweetness and a soft texture, perfect for layering on top.
- Crushed candy canes or peppermint candies: Freshly crushed for maximum crunch and peppermint aroma — avoid pre-ground powders for texture.
Tweak to Your Taste
What I love about this easy peppermint bark recipe is how easily you can make it your own. I’ve played around with it over the years, customizing with different chocolates or adding flavors — and you should too! Don’t hesitate to experiment and find what makes this treat perfect for your taste buds.
- Mixing Chocolate Types: Sometimes I swap dark chocolate chips for semi-sweet or even milk chocolate if I want a creamier sweetness.
- Adding a Hint of Vanilla: A drop of vanilla extract in the melted dark chocolate adds subtle warmth.
- Crunch Upgrade: Try folding in chopped toasted nuts or a dash of sea salt on top – I love the salty-sweet combo!
- Seasonal Variations: Peppermint is classic for winter, but you can swap the candy for crushed toffee or dried berries year-round.
Step-by-Step: How I Make Easy Peppermint Bark Recipe
Step 1: Prep Your Workspace & Ingredients
Before you start melting chocolate, line a baking sheet with parchment paper — trust me, this makes peeling off the bark a breeze. Then, crush your candy canes or peppermint candies using a rolling pin or the bottom of a sturdy glass. Set aside about half for sprinkling later. This little prep helps everything flow smoothly once the chocolate starts melting.
Step 2: Melt the Dark Chocolate with Care
Place your dark chocolate chips in a microwave-safe bowl. Heat for 45 seconds, then stir. Continue heating in 10-second bursts, stirring well each time until it’s silky smooth and no lumps remain. Be patient here to avoid burning the chocolate—slow and steady wins this race.
Step 3: Spread the Dark Chocolate Layer
Pour the melted dark chocolate onto your parchment-lined baking sheet and spread it evenly with the back of a spoon or offset spatula. Aim for about a quarter-inch thickness — not too thin, so it doesn’t break easily, but not so thick that it takes forever to set.
Step 4: Melt White Chocolate & Mix with Peppermint
Using a separate bowl, melt your white chocolate the same way — 45 seconds start, then 10-second intervals with stirring. Once melted, fold in half of your crushed peppermint for that festive flavor throughout the white layer.
Step 5: Layer White Chocolate over Dark & Add Peppermint
Carefully pour the white chocolate mixture over the dark chocolate layer, spreading gently without mixing the two. Sprinkle the remaining crushed peppermint candies on top — this not only looks amazing but adds extra crunch and peppermint punch.
Step 6: Chill & Cut
Pop your tray in the refrigerator for about 10 minutes or until the bark is firm. When set, run a sharp knife along the edges to loosen, then cut into pieces. I like using a serrated knife for clean breaks. You’re ready to enjoy or package up these delightful treats!
Pro Tips for Making Easy Peppermint Bark Recipe
- Don’t Overheat Chocolate: Always stir frequently and melt in short bursts to avoid seizing or burning chocolate.
- Use Fresh Peppermint: Crushing candy canes fresh gives better texture and flavor than pre-ground powders.
- Spread Evenly: Patience with spreading the layers ensures absolutely no blending, preserving that pretty marbled look.
- Cut When Cold: Chilling thoroughly before cutting keeps the bark from crumbling or melting under your knife.
How to Serve Easy Peppermint Bark Recipe

Garnishes
I personally keep the garnishes simple since the crushed peppermint on top already looks festive. But if I really want to jazz it up, I’ll add a light drizzle of melted dark or white chocolate for a striped effect. Sometimes a sprinkle of edible glitter or even tiny crushed candy bits sprinkled over makes these extra party-ready.
Side Dishes
This peppermint bark pairs beautifully with hot chocolate or spiced coffee — especially on chilly evenings. I also love serving it alongside a cheese board or fruit platter as a sweet finish. It’s that versatile little treat that works as a dessert or an anytime snack.
Creative Ways to Present
For gift-giving, I cut the bark into bite-sized pieces and wrap them in clear cellophane tied with a festive ribbon. Another fun idea is layering pieces in decorative jars or tins for a sweet surprise. For holiday parties, arrange pieces on a platter dusted with crushed peppermint and add sprigs of pine or holly for that seasonal vibe.
Make Ahead and Storage
Storing Leftovers
I keep leftover peppermint bark in an airtight container at room temperature if my kitchen isn’t too warm — it stays crisp for up to a week. If it’s humid, I prefer refrigeration to keep the chocolate from melting or becoming soft. Just bring it back to room temp before enjoying for the best texture.
Freezing
Freezing peppermint bark works great if you want to prep ahead for holidays. Wrap the bark in wax paper, then foil, and store in a freezer-safe bag or container. It can last up to 3 months frozen. When ready to eat, thaw it in the fridge for several hours or overnight — this prevents condensation from ruining the texture.
Reheating
Since peppermint bark is best enjoyed cold or at room temperature, reheating isn’t necessary, but if your chocolate softens, let it sit at room temp or chill lightly to firm it back up. Avoid microwaving or heating again, as it can cause the chocolate to bloom or lose its texture.
FAQs
-
Can I use different types of chocolate for this peppermint bark?
Absolutely! You can swap the dark chocolate chips for semi-sweet or milk chocolate depending on your preference. Just keep the quality good to ensure smooth melting and rich flavor. Some people even like mixing dark, milk, and white chocolate layers for a fun twist.
-
How do I crush candy canes without making a huge mess?
I find placing candy canes inside a sealed zip-top bag and gently using a rolling pin works best to control the crumbs and avoid sticky fingers. You can also use a food processor briefly, but watch carefully to prevent turning them into powder.
-
How thick should I spread the chocolate layers?
About a quarter-inch thickness for each layer gives the best balance — sturdy enough to hold together but thin enough to enjoy several pieces in one sitting. Thin layers can break easily and thicker ones take longer to set.
-
Can I make peppermint bark without a microwave?
Yes! You can melt chocolate over a double boiler on the stove, stirring gently to avoid overheating. This method gives you great control and reduces the risk of burning chocolate if you don’t have a microwave.
-
What’s the best way to store peppermint bark long-term?
For long-term storage, freezing is your friend. Wrap tightly in layers, freeze, and thaw in the fridge before serving to maintain crispness and prevent moisture ruining the texture.
Final Thoughts
This easy peppermint bark recipe is such a joy to make and share, and honestly, it brings me so much warm holiday cheer every time I cut into those crisp, minty layers. Whether you’re new to chocolate melting or a seasoned bark maker, this recipe feels like a cozy kitchen hug. So go ahead, grab your chocolate, crush those candy canes, and make some magic — I promise you’ll be glad you did.
Print
Easy Peppermint Bark Recipe
- Prep Time: 10 minutes
- Cook Time: 10 minutes
- Total Time: 30 minutes
- Yield: 8 servings
- Category: Dessert
- Method: No-Cook
- Cuisine: American
- Diet: Vegetarian
Description
A festive and delicious Peppermint Bark recipe featuring layers of rich dark and creamy white chocolate, topped with crushed candy canes for a perfect holiday treat.
Ingredients
Chocolate Layers
- 18 ounces dark chocolate chips (can use semi-sweet or milk chocolate chips)
- 18 ounces white chocolate chips
Topping
- ½ cup crushed candy canes or hard peppermint candies
Instructions
- Prepare Baking Sheet: Line a baking sheet with parchment paper to prevent sticking and allow easy removal of the peppermint bark.
- Melt Dark Chocolate: Place dark chocolate chips in a microwave-safe dish and heat for 45 seconds. Stir, then continue heating in 10-second intervals, stirring between each until the chocolate is completely melted and smooth.
- Melt White Chocolate: In a separate microwave-safe bowl, melt the white chocolate chips using the same method as the dark chocolate. Once melted, stir in ¼ cup of crushed peppermint candies to combine evenly.
- Layer Dark Chocolate: Pour the melted dark chocolate onto the prepared baking sheet and spread it evenly to about ¼ inch thickness using a spatula or the back of a spoon.
- Add White Chocolate Layer: Carefully pour the peppermint-infused white chocolate over the dark chocolate layer and spread gently to cover it completely.
- Top with Peppermint: Sprinkle the remaining ¼ cup of crushed peppermint candies evenly over the white chocolate layer for a festive finish.
- Chill and Set: Place the baking sheet in the refrigerator for 10 minutes, or until the bark is firm and fully set.
- Cut into Pieces: Once hardened, use a sharp knife to cut the peppermint bark into squares or irregular pieces as desired. Serve and enjoy!
Notes
- Use high-quality chocolate for the best flavor and smooth texture.
- Ensure the chocolate is completely melted before spreading to avoid lumps.
- Crush candy canes finely for even distribution and easier consumption.
- Store leftovers in an airtight container in the refrigerator for up to two weeks.
- For a nutty twist, sprinkle chopped nuts along with the crushed peppermint candies on top.
Nutrition
- Serving Size: 1 serving
- Calories: 280 kcal
- Sugar: 24 g
- Sodium: 10 mg
- Fat: 18 g
- Saturated Fat: 11 g
- Unsaturated Fat: 6 g
- Trans Fat: 0 g
- Carbohydrates: 30 g
- Fiber: 2 g
- Protein: 3 g
- Cholesterol: 5 mg