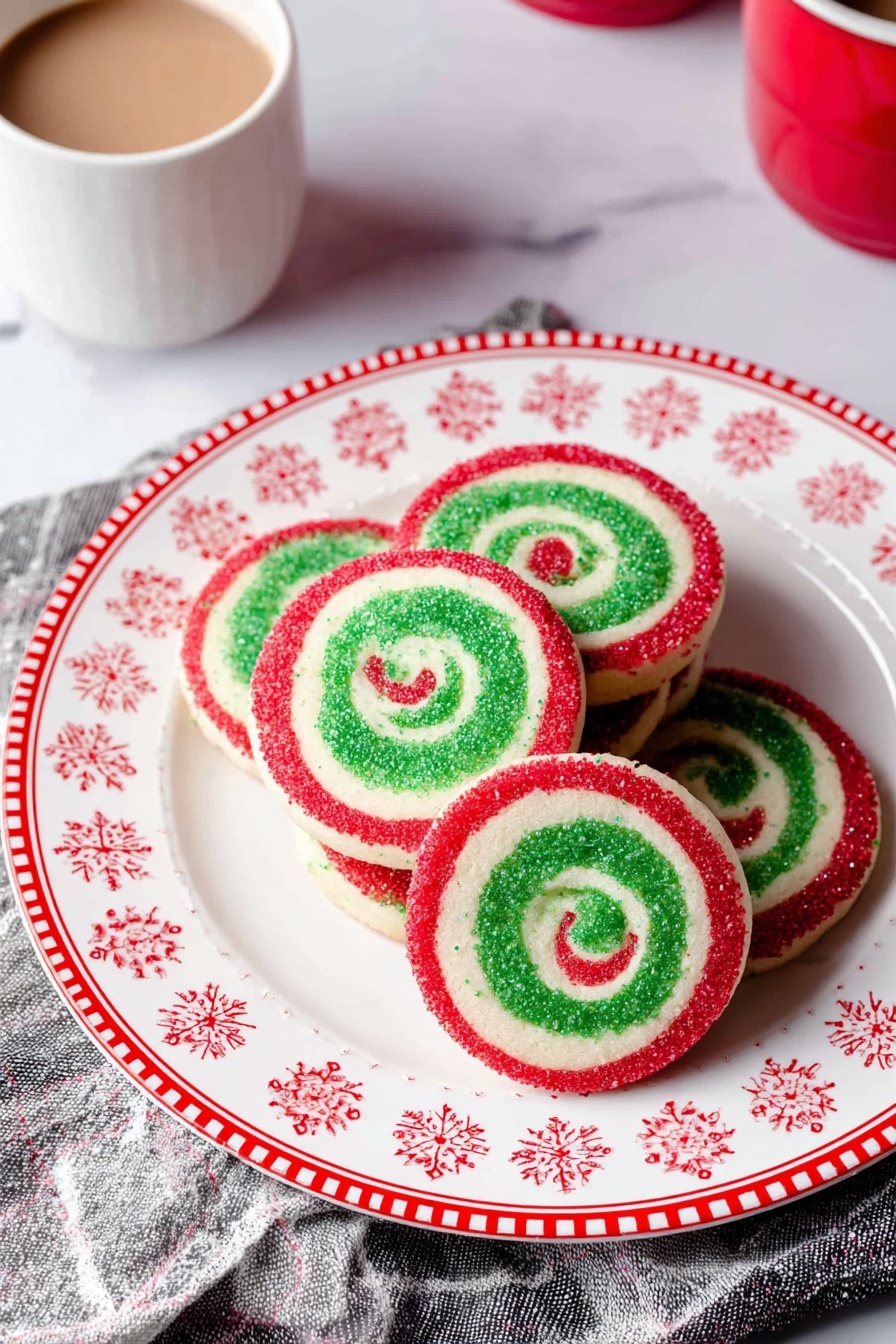
Festive Pinwheel Cookies Recipe
If you’re looking to impress your friends and family this holiday season with something both charming and delicious, you’re absolutely going to love this Festive Pinwheel Cookies Recipe. These beauties aren’t just pretty to look at with their swirls of red, green, and white — they truly melt in your mouth. I remember the first time I baked these; the scent alone had my kitchen feeling like Christmas morning. Trust me, stick with me, and you’ll have a batch that everyone will be asking for again and again.
Why This Recipe Works
- Vibrant Layering: The colored dough layers create that signature swirl and festive look that everyone loves.
- Balanced Sweetness: A combination of granulated and powdered sugar ensures a perfect texture – not too gritty, not too soft.
- Chilling for Structure: Freezing the dough prevents spreading so your pinwheels bake up crisp and defined.
- Simple Ingredients: Basic pantry staples come together to make these elegant cookies achievable and stress-free.

Ingredients & Why They Work
These ingredients may look familiar, but each plays a special part in achieving the perfect festive pinwheel cookies. When shopping, try to get good quality butter and fresh eggs — they really do make a difference in flavor and texture.
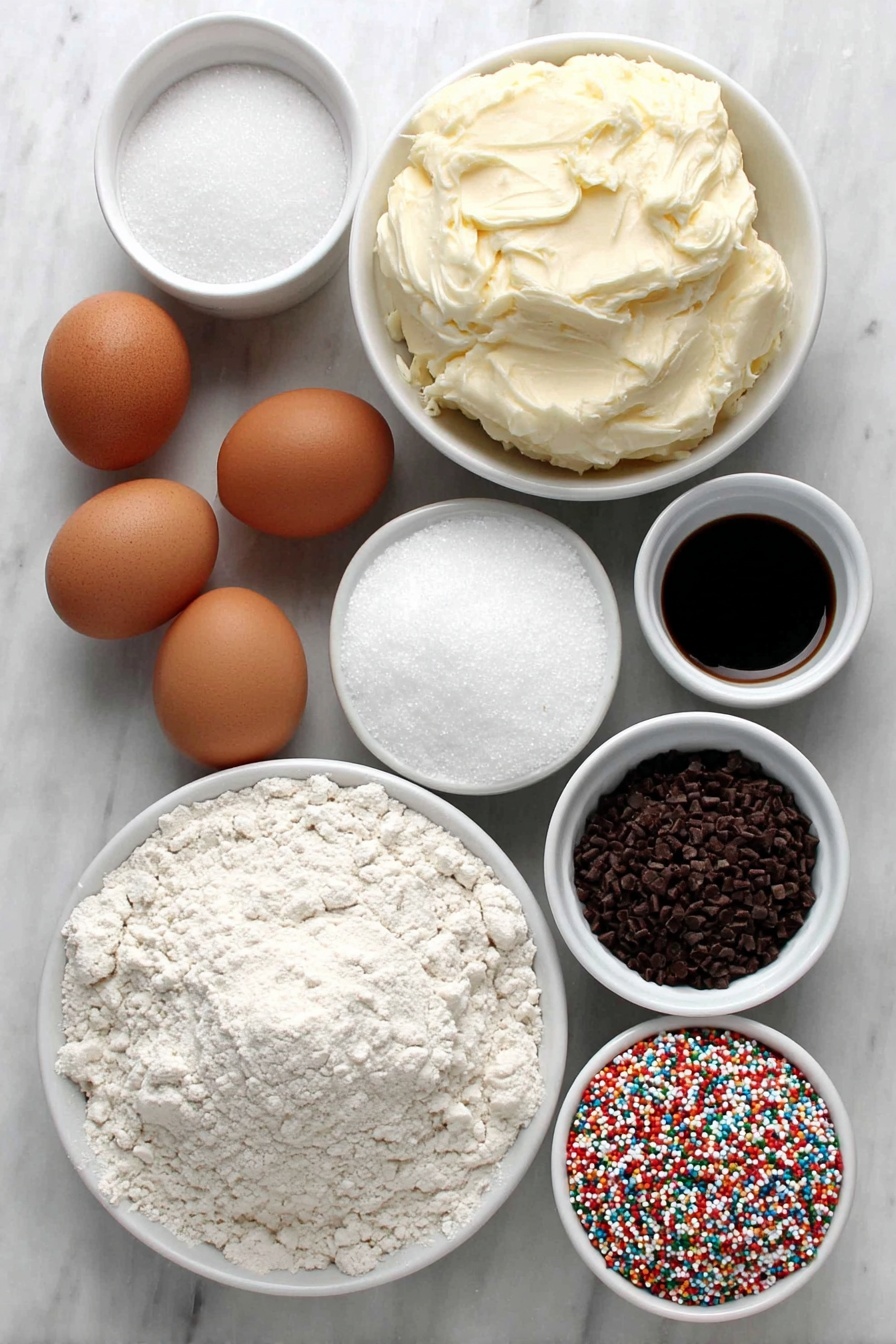
- Salted butter: Adds moisture and flavor; using salted helps balance the sweetness.
- Granulated sugar: Gives a bit of crunch and sweetness to the dough.
- Powdered sugar: Keeps the cookies tender and smooth.
- Eggs: Bind everything together while providing richness.
- Vanilla extract: Enhances all the flavors with a warm, familiar note.
- All-purpose flour: The structure base of the cookie, holding everything in place.
- Baking powder: Just enough leavening to make the cookies light but not puffy.
- Salt: Balances all the sweetness and brings out the flavors.
- Red & green gel food coloring: Essential for that vibrant festive swirl — gel works best over liquid for bright color without messing with dough consistency.
- Holiday colored nonpareils: Adds a festive crunch and beauty to the edges of each cookie.
- Optional flavoring extracts or lemon zest: Personalize your cookies with added depths of flavor if you like.
Tweak to Your Taste
I love having a bit of fun with this Festive Pinwheel Cookies Recipe by tweaking the colors and flavors to match the occasion or my mood. You can make them more citrusy, nutty, or keep them classic — it all works beautifully.
- Variation: Adding a teaspoon of almond or peppermint extract gives these cookies a festive twist; peppermint especially makes the kitchen smell heavenly.
- Dietary Modifications: You could swap the all-purpose flour for a gluten-free blend — just be sure to check for proper binding.
- Color Play: Try swapping traditional red and green for pastel colors for other holidays, or even session colors for birthday parties.
- Texture: For an extra crunch, fold in finely chopped nuts into the white dough layer before rolling.
Step-by-Step: How I Make Festive Pinwheel Cookies Recipe
Step 1: Cream the Butters and Sugars
Start by beating the softened salted butter with granulated sugar and powdered sugar until the mixture is light and fluffy. I find this step critical because it creates the base texture for your dough — don’t rush it! Use room temperature butter for easy creaming. If you’re in a hurry, placing the butter out at least an hour before baking helps.
Step 2: Mix in Eggs and Flavorings
Add the eggs and vanilla extract to your creamed butter-sugar base, scraping the bowl as you go to incorporate everything evenly. If you want to jazz up the flavor, now’s the time to add that extra extract or lemon zest. This keeps the dough rich and full of character.
Step 3: Combine Dry Ingredients and Divide the Dough
Mix together the all-purpose flour, baking powder, and salt, then add them to your wet mixture. Stir until just combined — don’t overwork the dough or you’ll get tough cookies. Once mixed, divide the dough into three equal portions, which will soon become your three color layers.
Step 4: Color the Dough
Return one ball of dough to your mixer or bowl and add 5 to 10 drops of red gel food coloring. Mix it thoroughly until evenly colored. Repeat with another ball and green food coloring. Leave the last ball plain for the white layer. This step is so fun — I always find myself sneaking tastes while mixing!
Step 5: Chill and Roll
Flatten each dough ball into a disc, wrap in plastic wrap, and chill in the freezer for 20 minutes or fridge for about 1 hour. Chilling firms the dough and makes it easier to roll out neatly. Roll each disc out onto parchment into rectangles roughly the same size and shape. Stack with the white dough sandwiched between the red and green layers. Trim the edges so everything’s even, then carefully roll into a tight log using the parchment to help lift. Chill this log in the fridge for at least 1-2 hours — patience here is key!
Step 6: Add the Festive Sprinkles and Slice
Once chilled, roll your dough log in holiday colored nonpareils. You really have to press the dough gently but firmly so the sprinkles stick well and give great coverage. Slice into ¼-inch rounds with a sharp knife — I like to dip my knife in warm water between slices for smooth, clean cuts. Place cookies on a parchment-lined baking sheet, spaced about 1-2 inches apart.
Step 7: Bake and Cool
Bake at 350°F for 10-12 minutes until the cookies are set but not browned. Overbaking dries them out, so keep a close eye starting at the 10-minute mark. Cool completely on a wire rack before storing or serving.
Pro Tips for Making Festive Pinwheel Cookies Recipe
- Room Temperature Ingredients: Always soften your butter and bring eggs to room temp for smooth mixing and dough that holds together well.
- Use a Sharp Knife: This prevents your cookie edges from crumbling and keeps the swirl intact during slicing.
- Chill, Chill, Chill: Don’t skip chilling the dough layers or the rolled log; it makes slicing easier and prevents spreading in the oven.
- Press Sprinkles Gently: Press the log lightly but firmly when rolling in nonpareils, so the sprinkles stick and bake well without falling off.
How to Serve Festive Pinwheel Cookies Recipe
Garnishes
I love keeping it simple with these cookies — just a little dusting of powdered sugar before serving adds a magical snowy effect. Sometimes I add a small mint leaf or a sprinkle of edible glitter for that extra festive sparkle, especially at holiday parties.
Side Dishes
Festive pinwheel cookies pair wonderfully with a warm cup of spiced cider or rich hot chocolate. I also like to serve them alongside a cheese platter during holiday gatherings; the sweet and buttery cookie rounds complement creamy cheeses really well.
Creative Ways to Present
For a festive touch, arrange these cookies in a spiral on a holiday-themed platter to highlight that gorgeous pinwheel design. Wrapping individual cookies in clear cellophane tied with a ribbon makes adorable party favors. During one Christmas, I even layered them in a clear jar with layers of holiday sprinkles for an edible decoration centerpiece — a real conversation starter!
Make Ahead and Storage
Storing Leftovers
I store leftover cookies in an airtight container at room temperature for up to a week. They keep their crisp edges and lovely texture well, but if your home is humid, popping them in the fridge can help maintain that snap.
Freezing
If you want to get ahead, slice the cookie dough log and freeze the individual pieces on a baking sheet before transferring them to a freezer bag. This way, you can bake fresh pinwheel cookies right from frozen by adding a couple of extra minutes to the bake time.
Reheating
To revive any slightly stale cookies, pop them in a preheated 300°F oven for about 5 minutes. This warms them through and crisps them back up without drying them out. Just like freshly baked!
FAQs
-
Can I use different colors for the Festive Pinwheel Cookies Recipe?
Absolutely! The red and green are traditional for the holidays, but you can use any gel food coloring you like — pastels for Easter, bright colors for birthdays, or even neutral tones for less seasonal occasions. Just make sure to use gel coloring to avoid changing the dough consistency.
-
How do I prevent my cookies from spreading too much?
Chilling the dough thoroughly after rolling it into a log is key. This firms up the butter and helps the cookies keep their shape when baked. Also, avoid adding too much liquid or overmixing the dough.
-
Can I make this recipe without food coloring?
You can skip the coloring if you prefer, but the festive pinwheel effect depends on the contrasting colors, so your cookies will look less dramatic. Feel free to experiment with natural dyes like beet powder or matcha if you want a natural alternative!
-
What’s the best way to slice the dough log?
Use a sharp, non-serrated knife and slice the chilled dough log into ¼-inch rounds. For clean cuts, dip your knife in warm water and wipe it dry between slices to prevent sticking and cracking.
Final Thoughts
This Festive Pinwheel Cookies Recipe is more than just a cookie — it’s a holiday tradition I’ve come to cherish. The process is fun, the results are show-stopping, and the flavors are timeless. Next time you want to bake something that feels special but still doable, you’ve got this recipe. Trust me, once you try it, it’s going to become a staple for every holiday season, just like it did in my kitchen.
Print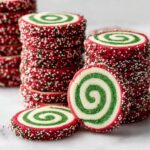
Festive Pinwheel Cookies Recipe
- Prep Time: 15 minutes
- Cook Time: 12 minutes
- Total Time: 2 hours 25 minutes
- Yield: 24 cookies
- Category: Dessert
- Method: Baking
- Cuisine: American
- Diet: Vegetarian
Description
These festive Christmas Pinwheel Cookies feature a beautiful swirl of red, green, and white dough rolled into a log, coated with colorful nonpareils, and baked to a delicate, buttery finish. Perfect for holiday gatherings, these cookies combine vanilla flavor with optional extra zest for a cheerful and tasty treat.
Ingredients
Dough
- 3/4 cup salted butter softened to room temperature
- 3/4 cup granulated sugar
- 3/4 cup powdered sugar
- 2 large eggs
- 2 teaspoons vanilla extract
- 2 1/2 cups all-purpose flour
- 1/2 teaspoon baking powder
- 1/2 teaspoon salt
- Optional: 1/2-1 teaspoon additional flavoring extracts or lemon zest
Coloring and Decoration
- Red gel food coloring
- Green gel food coloring
- Holiday colored nonpareils
Instructions
- Prepare the butter and sugars: Combine the softened salted butter, granulated sugar, and powdered sugar in a mixer. Beat well until the mixture is light and fluffy, ensuring good aeration.
- Add eggs and flavorings: Mix in the two large eggs, vanilla extract, and any optional additional flavorings like extracts or lemon zest. Scrape the bottom and sides of the bowl to incorporate all ingredients evenly.
- Combine dry ingredients and form dough: Add the all-purpose flour, baking powder, and salt to the wet ingredients and mix until just combined. Then divide the dough evenly into three balls.
- Color the dough: Return one-third of the dough to the mixing bowl and add 5-10 drops of red gel food coloring. Mix until evenly colored. Repeat with another third of the dough and green gel food coloring, leaving the last third uncolored (white dough).
- Chill the dough discs: Flatten each colored dough ball into a disc, wrap tightly in plastic wrap, and chill in the freezer for 20 minutes or in the refrigerator for 1 hour to firm up properly.
- Roll out dough layers: Roll out each chilled dough disc on parchment paper into even rectangles with roughly the same size and shape. Stack the layers with white dough in the middle, red and green on the top and bottom. Trim the long edges so they are even for a clean pinwheel look.
- Roll into a log: Using the parchment paper, carefully roll the stacked dough into a tight log to avoid cracks. Wrap the log in plastic wrap and chill in the refrigerator for at least 1-2 hours to firm up for slicing.
- Coat with nonpareils: Unwrap the chilled dough log and roll it on a baking sheet lined with holiday colored nonpareils. Press gently so the sprinkles stick well and coat the outside evenly.
- Slice and bake: Preheat the oven to 350°F and line a baking sheet with parchment paper. Slice the dough log into 1/4-inch thick cookies using a sharp knife, spacing them 1-2 inches apart on the baking sheet.
- Bake and cool: Bake for 12 minutes until the cookies are set. Remove from oven and cool completely on a wire rack before serving.
Notes
- Ensure the butter is softened but not melted to get a light, fluffy dough texture.
- Press sprinkles gently but firmly to ensure they stick well to the dough log before slicing.
- The optional additional flavorings like lemon zest or almond extract can add a nice twist to the classic flavor.
- If you prefer, chill the dough log overnight for better slicing and flavor development.
- Store unbaked dough log wrapped in the fridge for up to one week.
- Use a very sharp knife to slice the logs cleanly and prevent cracking.
Nutrition
- Serving Size: 1 cookie
- Calories: 150 kcal
- Sugar: 10 g
- Sodium: 90 mg
- Fat: 7 g
- Saturated Fat: 4 g
- Unsaturated Fat: 2 g
- Trans Fat: 0 g
- Carbohydrates: 20 g
- Fiber: 1 g
- Protein: 2 g
- Cholesterol: 30 mg
