Halloween Fudge Recipe
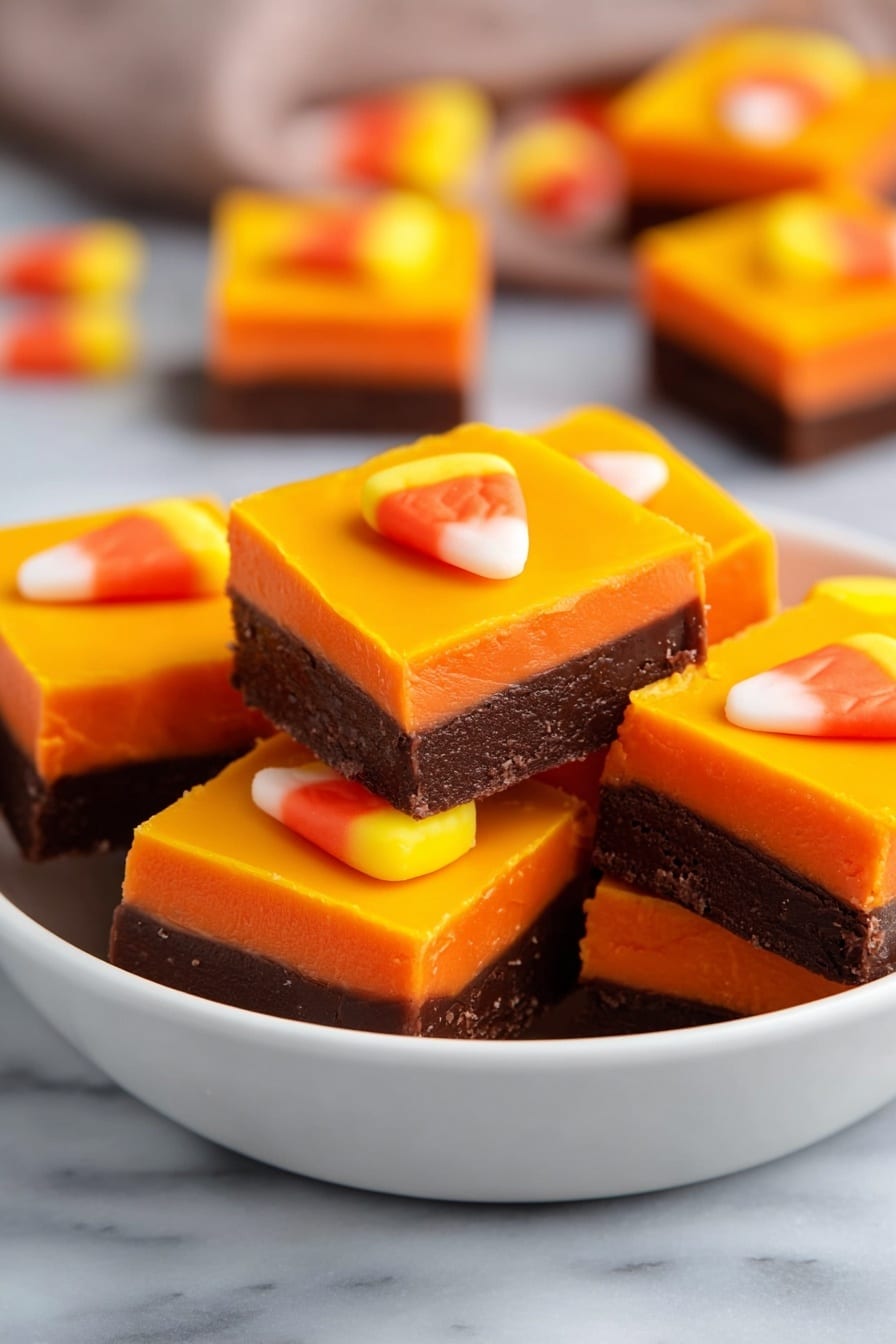
If you’re looking for a treat that’s both fun and deliciously festive, you’re going to love this Halloween Fudge Recipe. It’s the perfect sweet to whip up for your spooky celebrations, and trust me, once you try it, you’ll find it hard to stop snacking. This fudge has a fun twist with candy corn tucked on top and that bright pop of orange from the white chocolate layer—it’s like Halloween happiness in every bite!
Why This Recipe Works
- Balanced Sweetness: Using both semi-sweet and white chocolate chips creates a rich yet balanced flavor that isn’t too overpoweringly sweet.
- Creamy Texture: Sweetened condensed milk gives this fudge a silky smooth texture that melts in your mouth.
- Festive Flair: The orange gel food coloring and candy corn make it visually perfect for Halloween celebrations.
- Easy Prep & No Baking: It’s super beginner-friendly, with microwave steps that save you time and hassle.

Ingredients & Why They Work
Each ingredient comes together in this Halloween fudge recipe to give you that perfect combination of flavor, texture, and seasonal flair. Plus, they’re easy to find, and I’ve learned a few little tricks over the years to get the best results.
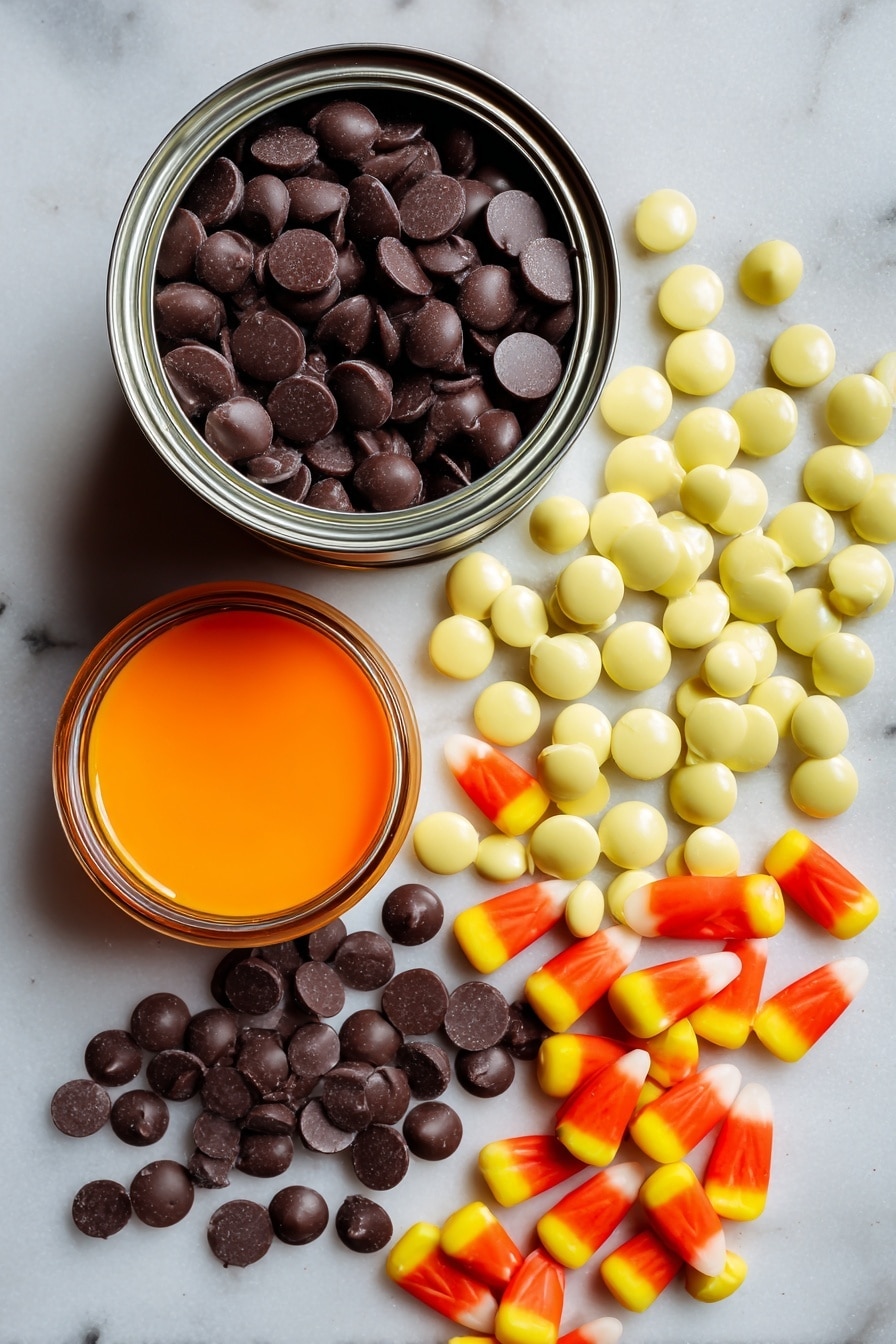
- Semi-sweet chocolate chips: These add just the right amount of chocolate punch without being overly sweet, creating depth in the bottom layer.
- White chocolate chips: Their mild sweetness and creamy texture work beautifully with the food coloring and candy corn for a festive top layer.
- Sweetened condensed milk: Acts as a binder and adds luscious creaminess—make sure you use the canned version, not evaporated milk.
- Vanilla extract: A splash of vanilla enhances all the chocolate flavors without overwhelming them.
- Orange gel food coloring: Gel-based color is essential because it won’t ruin the smoothness of the white chocolate like liquid coloring might.
- Candy corn: These classic Halloween candies not only add sweetness but also festive color and texture on top.
Tweak to Your Taste
One of the best things about this Halloween fudge recipe is how flexible it is. I’ve played around with flavors and add-ins, and I encourage you to customize it your own way. Whether you’re a fan of nuts, want extra crunch, or prefer a different candy topping, this fudge can be tailored easily.
- Variation: I once added a pinch of cinnamon and nutmeg to the white chocolate layer—it brought a cozy warmth that paired beautifully with the sweetness.
- Dietary Mod: If you need a dairy-free version, swap the sweetened condensed milk with coconut condensed milk, and be sure to use dairy-free chocolate chips.
- Fun Twists: Try swapping candy corn for Halloween-themed sprinkles or mini chocolate chips for a different texture pop.
Step-by-Step: How I Make Halloween Fudge Recipe
Step 1: Prep Your Pan Like a Pro
Start by lining an 8-inch square pan with foil and giving it a quick spray with cooking spray. This saves you from a sticky mess later and makes for easy removal when the fudge is set. You’ll thank me when your fudge comes out in one beautiful slab, ready to slice.
Step 2: Melt the Semi-Sweet Chocolate
In a microwave-safe bowl, combine the semi-sweet chocolate chips with 5 ounces of sweetened condensed milk. Microwave on 50% power for 1 minute, then stir. Keep heating in 30-second bursts, stirring in between, until everything is silky smooth. Stir in ½ teaspoon vanilla extract to round out the flavor. Spread this evenly in your prepared pan using an offset spatula—that way, the fudge layer will be beautifully smooth.
Step 3: Chill and Get Ready for Layer Two
Pop that pan in the refrigerator for about 10 minutes. This chilling step helps the bottom layer set so when you pour the white chocolate layer on top, the layers won’t blur into each other. Patience here makes a picture-perfect layered fudge!
Step 4: Melt the White Chocolate with Orange Glow
Just like before, microwave your white chocolate chips with 5 ounces of sweetened condensed milk on 50% power for 1 minute. Stir, and then keep heating in 30-second increments until smooth. Add the other ½ teaspoon vanilla extract and a few drops of orange gel food coloring. Stir well until that gorgeous, bright orange color fills your bowl. Spread this orange goodness on top of the set chocolate layer evenly.
Step 5: Decorate with Candy Corn & Chill
While the top layer is still soft, press candy corn pieces in neat rows all over. This not only adds to the Halloween vibe but also gives a fun texture contrast when you bite in. Then, pop the whole pan back in the fridge for the fudge to harden completely—usually about an hour.
Step 6: Slice, Serve, and Enjoy
Once set, use the foil edges to lift the fudge out of the pan. Slice into squares and bring them to room temperature before serving so the flavors come through perfectly. Watch out, though—these are dangerously addictive!
Pro Tips for Making Halloween Fudge Recipe
- Use Gel Food Coloring: I’ve learned that gel colors keep your white chocolate smooth and vibrantly colored without risking seizing the chocolate.
- Microwave in Intervals: Don’t rush melting; short bursts with stirring prevent burning and clumps, ensuring perfectly smooth fudge.
- Let Layers Chill Properly: Chilling the first layer before adding the second really helps keep the layers defined and pretty.
- Use Foil with Overhang: This simple trick means you can lift the fudge out in one piece and slice more easily—total game-changer!
How to Serve Halloween Fudge Recipe
Garnishes
I like to keep it simple and let the candy corn do most of the show, but sometimes I sprinkle a little crushed pretzel or edible glitter on top for a fun crunch and sparkle effect. The saltiness from pretzels balances the fudge sweetness really nicely.
Side Dishes
Pair this Halloween fudge recipe with a warm cup of spiced apple cider or a creamy pumpkin latte for a cozy dessert table. It also goes great alongside homemade popcorn tossed with cinnamon sugar for a real seasonal vibe.
Creative Ways to Present
For a party, I like to serve fudge in mini disposable Halloween-themed treat cups or stack squares on a tiered dessert stand decorated with mini pumpkins and fall leaves. Layering in clear cellophane bags tied with black and orange ribbons makes for festive take-home gifts.
Make Ahead and Storage
Storing Leftovers
After cutting, store any leftover fudge in an airtight container at room temperature for up to a week. If your kitchen gets warm, I recommend refrigerating it to prevent melting, but a quick bring-back-to-room-temp before serving works great.
Freezing
I’ve frozen this fudge by wrapping tightly in plastic wrap and placing in a freezer-safe container. It keeps well for up to 3 months. Just thaw overnight in the fridge to avoid condensation that can mess with texture.
Reheating
Fudge is best enjoyed at room temperature. If refrigerated or frozen, simply let it sit out for 30 minutes before serving, and if you’re eager, a few seconds in the microwave (covered loosely) can soften it up without melting it into a gooey mess.
FAQs
-
Can I make this Halloween fudge recipe without a microwave?
Absolutely! You can melt the chocolate chips and condensed milk using a double boiler on the stove. Just gently heat the mixture, stirring constantly until smooth. This method is great if you prefer more control over the melting process or don’t have access to a microwave.
-
Is it okay to use liquid food coloring instead of gel?
It’s best to stick with gel food coloring because liquid types contain water, which can cause the white chocolate to seize and become grainy. Gel coloring provides bright colors without compromising the fudge’s smooth texture.
-
How long does this fudge need to chill before slicing?
I recommend chilling the fudge for at least one hour or until it’s completely firm. Chilling ensures clean, easy slicing and the perfect melt-in-your-mouth texture.
-
Can I use other candy instead of candy corn?
Definitely! You can swap candy corn for mini Halloween-themed sprinkles, chopped nuts, or even small gummy candies. Just pick something that contrasts nicely in texture and color for that festive effect.
-
What’s the best way to cut fudge without it sticking?
Use a hot, dry knife — run it under hot water, dry it well, then slice your fudge. Wipe the blade clean and reheat between cuts. This helps you get clean edges and prevents the fudge from sticking to the knife.
Final Thoughts
This Halloween fudge recipe is hands down one of my favorite seasonal treats to make—not just because it looks adorable but also because it’s so easy to pull off and impresses every time. Whether you’re making it for a party, classroom treat, or just a cozy night in, it’s the kind of recipe that brings smiles and delicious memories. Give it a try—you’ll feel like the kitchen witch with this one!
Print
Halloween Fudge Recipe
- Prep Time: 20 minutes
- Cook Time: 10 minutes
- Total Time: 1 hour 30 minutes
- Yield: 24 pieces
- Category: Dessert
- Method: No-Cook
- Cuisine: American
Description
This Halloween Fudge Recipe features a two-layered chocolate and white chocolate fudge with vibrant orange coloring and festive candy corn toppings, perfect for a fun and delicious holiday treat.
Ingredients
Chocolate Layer
- 1 ½ cups (255g) semi-sweet chocolate chips
- 5 ounces sweetened condensed milk (180g by weight)
- ½ teaspoon vanilla extract
White Chocolate Layer
- 1 ½ cups (255g) white chocolate chips
- 5 ounces sweetened condensed milk (180g by weight)
- ½ teaspoon vanilla extract
- Orange gel food coloring (a few drops)
Toppings
- 24 pieces candy corn (or more for smaller pieces)
Instructions
- Prepare Pan: Line an 8-inch square pan with foil and spray with cooking spray to prevent sticking.
- Make Chocolate Layer: In a microwave-safe bowl, combine semi-sweet chocolate chips and 5 ounces sweetened condensed milk. Heat at 50% power for 1 minute, then stir. Continue heating in 30-second increments until melted and smooth. Stir in ½ teaspoon vanilla extract. Spread evenly in the prepared pan using an offset spatula.
- Chill First Layer: Place the pan in the refrigerator and chill the chocolate layer for 10 minutes to set before adding the next layer.
- Make White Chocolate Layer: In a separate microwave-safe bowl, combine white chocolate chips and 5 ounces sweetened condensed milk. Heat at 50% power for 1 minute, stir, and continue heating in 30-second increments until melted and smooth. Stir in ½ teaspoon vanilla extract and a few drops of orange gel food coloring to tint the fudge.
- Add White Chocolate Layer: Spread the orange-tinted white chocolate layer evenly over the chilled chocolate layer using an offset spatula.
- Top with Candy Corn: Immediately press candy corn evenly into the top of the fudge to decorate.
- Chill to Harden: Refrigerate the assembled fudge for 1 hour or until fully set and firm.
- Serve: Slice into 24 pieces and serve at room temperature for the best texture and flavor.
Notes
- Measure sweetened condensed milk by liquid ounces or weight (5 ounces or 180g) for accuracy since can labels differ by liquid or weight.
- Use gel food coloring instead of liquid food coloring to avoid breaking the chocolate and to achieve bright, vibrant colors.
- Adjust candy corn quantity if you prefer smaller fudge pieces or a denser topping.
- Use an offset spatula for smooth, even layers to ensure a neat presentation.
Nutrition
- Serving Size: 1 piece
- Calories: 120 kcal
- Sugar: 20 g
- Sodium: 30 mg
- Fat: 5 g
- Saturated Fat: 3 g
- Unsaturated Fat: 2 g
- Trans Fat: 0 g
- Carbohydrates: 22 g
- Fiber: 1 g
- Protein: 1 g
- Cholesterol: 5 mg

