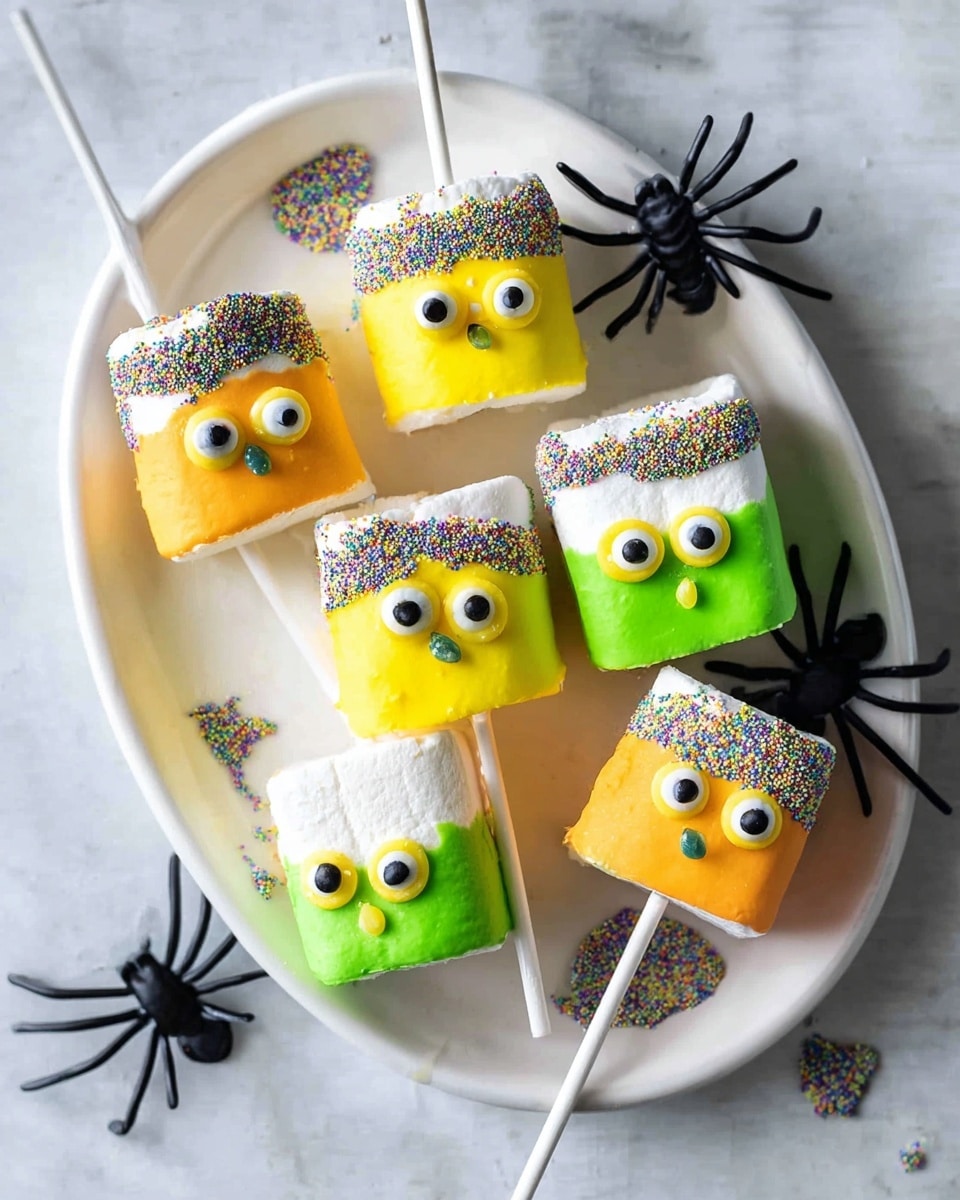
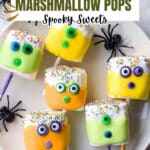
Halloween Marshmallow Pops Recipe
Hey there! If you’re on the hunt for a fun, festive treat that’s super easy to whip up and totally kid-friendly, you’re going to love this Halloween Marshmallow Pops Recipe. These pops are colorful, playful, and just perfect for spooky season celebrations. Plus, they’re such a snap to make that you’ll have a blast putting them together with the kiddos or your friends. Ready to dive in and see why this recipe is fan-freaking-tastic? Let’s get started!
Why This Recipe Works
- Super Simple Ingredients: You only need a handful of easy-to-find items that come together beautifully.
- Kid-Approved Fun: Decorating the pops with candy eyes and sprinkles turns dessert time into a creative celebration.
- Quick to Make: From start to finish takes about 15 minutes, perfect for last-minute party prep.
- Customizable Colors and Flavors: You can mix and match candy melts to suit your Halloween theme or taste buds.

Ingredients & Why They Work
These ingredients might look simple, but they’re the perfect combo for a Halloween treat that’s visually fun and irresistibly sweet. Each element has its role, whether it’s structure, texture, or flavor, so picking good-quality ingredients really pays off.
- Jumbo Marshmallows: The star of the show – choose gluten-free ones if you need to keep it allergy-friendly; their size is perfect for dipping and decorating.
- Cake Pop Sticks: These make the marshmallows easy to handle and give that fun ‘pop’ look.
- Sprinkles: Pick colorful sprinkles for “hair” that add cool textures and festive vibes.
- Candy Eyes: They bring personality and spookiness to each pop — buying good-quality candy eyes keeps them looking great.
- Sweets for Mouth: Small candies like mini M&Ms or edible pearls work great here for creating adorable or eerie smiles.
- Orange, Green, and Yellow Candy Melts: These melt smoothly for easy dipping and give you that classic Halloween palette. Pick melts that melt evenly to avoid clumps.
Tweak to Your Taste
I love how versatile this Halloween Marshmallow Pops Recipe is because you can easily make it your own. Whether you want to swap colors, add some spooky toppings, or make it allergy-friendly, the possibilities are endless. Here are a few of my favorite tweaks!
- Variation: I once swapped the orange candy melts for purple and black for a more gothic vibe — it was a hit at my Halloween party!
- Allergy-Friendly: Use vegan candy melts and gluten-free marshmallows to make sure everyone can enjoy these pops.
- Add Some Crunch: Sprinkle crushed Halloween-themed cookies or pretzels over the candy melts before they harden for a fun texture contrast.
- Personalize Faces: Use edible markers to draw tiny expressions on each pop for an extra personal touch.
Step-by-Step: How I Make Halloween Marshmallow Pops Recipe
Step 1: Stick It and Set It Up
First things first, gently insert one cake pop stick into each jumbo marshmallow—be sure to go in about halfway so it stays secure, but don’t push it all the way through! I find that doing this on a plate or parchment paper gives you a clean spot for dipping later. Have all your sprinkles, candy eyes, and sweet bits ready on small plates or bowls — it makes decorating a breeze.
Step 2: Melt the Magic
Melt each color of candy melts in separate microwave-safe bowls according to the package instructions — usually short bursts of 20 seconds, stirring in between, to avoid burning. The smoother and silkier your candy melts, the better your marshmallows will look after dipping. I always make sure they’re silky smooth by giving a little extra stir at the end.
Step 3: Dip, Decorate, and Dry
This is my favorite part! Dip each marshmallow into a chosen candy melt, fully coating the top and sides. Right after dipping, quickly dip the top into sprinkles to create spooky “hair” — this works best if your candy melts are still wet. While the candy is soft, press candy eyes and sweets to create fun faces. Place the pops standing up (I use a styrofoam block or a glass) to harden, which usually takes about 10 minutes. Keep going till you’ve decorated all your pops.
Step 4: Enjoy and Impress!
Once hardened, your Halloween Marshmallow Pops are ready for their close-up. Serve them on a fun platter or wrap individually in clear bags tied with a ribbon for gifts or party favors. Watching smiles grow at first bite is always a highlight for me!
Pro Tips for Making Halloween Marshmallow Pops Recipe
- Keep Candy Melts Warm: If your melts start to thicken, microwave in very short bursts and stir to keep them smooth and easy to dip.
- Don’t Rush the Drying: Allow the pops to harden fully at room temperature for best results; popping them in the fridge can cause condensation.
- Use a Styrofoam Block: This handy trick keeps your decorated pops upright and safe from smudging.
- Choose Your Sprinkles Wisely: Fine sprinkles work best for “hair” so they stick nicely and don’t fall off easily.
How to Serve Halloween Marshmallow Pops Recipe
Garnishes
I like using a mix of candy eyes for different sizes — it makes each pop uniquely spooky or silly! For the hair, I’m partial to rainbow nonpareils for their crunchy texture, but spooky orange and black sprinkles definitely nail the Halloween feel. Sometimes I add edible glitter for a little magic — because why not?
Side Dishes
Pair these Halloween Marshmallow Pops with some pumpkin-flavored goodies like mini muffins or a cozy cup of hot cocoa with marshmallows on top. I’ve also served them alongside apple slices drizzled with caramel — the combo surprises guests with a mix of sweets and fruit!
Creative Ways to Present
I once stuck all the finished pops upright in a hollowed-out pumpkin — it was such a fun centerpiece for a Halloween party! Another favorite is wrapping each pop in cellophane tied with Halloween ribbon, making them perfect to hand out as treats at school or at parties.
Make Ahead and Storage
Storing Leftovers
I usually keep leftover pops in an airtight container at room temperature, away from moisture and heat, to prevent the candy coating from melting or sweating. They stay fresh and crispy for up to 3 days — perfect if you want to pace out the fun!
Freezing
I haven’t tried freezing these pops because the candy coating can crack and the marshmallows might become a bit chewy once thawed. For best texture, I recommend making them fresh or enjoying leftovers as is.
Reheating
No reheating necessary here — these pops are meant to be enjoyed at room temp. If they seem a little soft, chilling them briefly will help the candy harden again, but I avoid microwaving as it can melt the candy coating.
FAQs
-
Can I use regular chocolate instead of candy melts for the Halloween Marshmallow Pops Recipe?
While you can use regular chocolate, candy melts are specially designed to melt smoothly and harden with a glossy finish, making them ideal for dipping marshmallows. Regular chocolate may not set as firmly and can be tricky to work with for this kind of pop.
-
How do I prevent the marshmallows from sliding off the sticks?
Insert the cake pop sticks gently but firmly about halfway into each marshmallow. If you notice any sliding during dipping, hold the stick steady and dip slowly. Sometimes chilling the pops for a few minutes before decorating helps them stay on better.
-
What’s the best way to store Halloween Marshmallow Pops to keep them fresh?
Keep them in an airtight container at room temperature, away from direct sunlight or heat sources. Avoid refrigeration as humidity can cause the candy coating to sweat or soften.
-
Can I make these pops ahead of time for a Halloween party?
Absolutely! They keep well for a couple of days stored properly. Just finish your decorating the day before and store them so they maintain their shape and crispiness.
-
Are there any allergy-friendly options for this Halloween Marshmallow Pops Recipe?
Yes! Look for vegan and gluten-free marshmallows, and use allergy-safe candy melts and decorations. Always double-check labels, especially for nut-free or dairy-free needs.
Final Thoughts
This Halloween Marshmallow Pops Recipe has earned a special spot in my seasonal repertoire because it’s just so joyful and simple. I’ve made them many times with friends and family, and watching everyone’s creative faces and smiles makes the whole process even sweeter. If you try this recipe, I bet you’ll find it just as fun and rewarding — give it a go and make those spooktacular treats your own!
Print
Halloween Marshmallow Pops Recipe
- Prep Time: 5 minutes
- Cook Time: 10 minutes
- Total Time: 15 minutes
- Yield: 12 pops
- Category: Dessert
- Method: No-Cook
- Cuisine: American
- Diet: Gluten Free
Description
These Halloween Marshmallow Pops are a fun and festive treat perfect for kids and Halloween parties. Jumbo marshmallows are dipped in vibrant orange, green, and yellow candy melts, decorated with candy eyes, sprinkles for hair, and sweets for mouths to create spooky and colorful characters.
Ingredients
Main Ingredients
- 12 jumbo marshmallows (gluten-free)
- 12 cake pop sticks
- Sprinkles for hair
- Candy eyes
- Sweets for mouth
For Coating
- 170 g (1 cup) orange candy melts
- 170 g (1 cup) green candy melts
- 170 g (1 cup) yellow candy melts
Instructions
- Prepare Marshmallows: Insert one cake pop stick into each jumbo marshmallow firmly and set them aside on a clean surface to prepare for dipping.
- Organize Decorations: Lay out the sprinkles, candy eyes, and sweets in separate bowls or plates to have them ready for decorating the marshmallow pops after dipping.
- Melt Candy Coatings: Melt the orange, green, and yellow candy melts in separate bowls according to the package instructions, usually by microwaving in short intervals and stirring between each, until smooth.
- Dip Marshmallows: Dip each marshmallow into one of the melted candy melts, fully coating it, then immediately dip the top part into the sprinkles to create a textured “hair” effect.
- Add Facial Features: While the coating is still wet, place candy eyes and sweets to form a mouth onto each marshmallow pop carefully to create fun Halloween faces.
- Set to Harden: Place the decorated marshmallow pops upright or on parchment paper and allow the candy coating to harden completely at room temperature before serving.
Notes
- Use gluten-free marshmallows as specified for a gluten-free treat.
- You can substitute candy melts with colored white chocolate if preferred.
- To speed up hardening, place the pops briefly in the refrigerator for about 10 minutes.
- These are perfect for children’s Halloween parties or as festive treats around the holiday.
- For extra fun, try other Halloween themed decorations like edible glitter or colored sugar.
Nutrition
- Serving Size: 1 pop
- Calories: 120 kcal
- Sugar: 15 g
- Sodium: 30 mg
- Fat: 3 g
- Saturated Fat: 2 g
- Unsaturated Fat: 1 g
- Trans Fat: 0 g
- Carbohydrates: 22 g
- Fiber: 0 g
- Protein: 1 g
- Cholesterol: 0 mg
