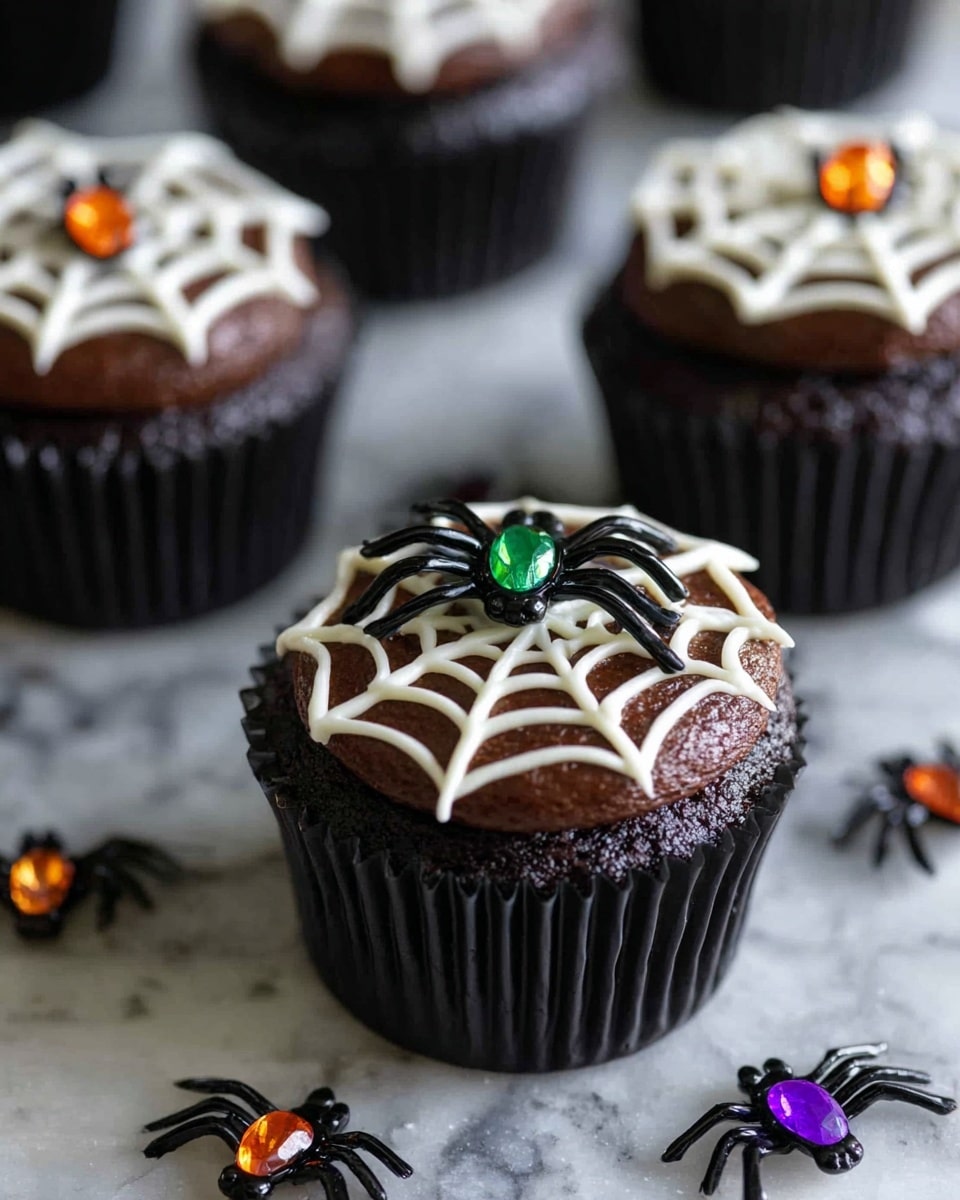
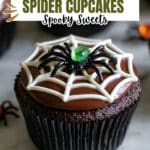
Halloween Spider Cupcakes Recipe
If you’re on the hunt for a Halloween treat that’s fun, festive, and guaranteed to impress, then you’re going to absolutely love this Halloween Spider Cupcakes Recipe. These spooky little delights are chocolatey, creepy, and just the right amount of sweet to get everyone excited for the season — plus, they’re way easier to whip up than you might think. I’ve made them countless times for parties and trick-or-treat gatherings, and trust me, they always steal the show! So, let me walk you through how to make these adorable (and delicious) spider-themed cupcakes with no fuss and lots of fun.
Why This Recipe Works
- Simple yet Stunning: The spiderweb design looks intricate but is made with just a few easy frosting strokes anyone can master.
- Rich Chocolate Base: The chocolate cupcakes pair perfectly with blackened chocolate frosting for a spooky, decadent flavor.
- Playful Decoration: Toy spider rings add a fun, interactive element that kids and adults love.
- Perfect for Parties: This recipe makes 24 cupcakes — ideal for sharing with a crowd or handing out at Halloween events.

Ingredients & Why They Work
I like to keep things straightforward — the ingredients here come together for the perfect balance of rich, smooth chocolate flavor and cute, spooky decoration. Let’s talk about why each one matters and what to look for when you’re shopping.
- Chocolate Cupcakes: Using black cupcake liners not only enhances the Halloween vibe but helps the dark chocolate flavor pop visually; bake them with slightly flat tops to make decorating easier.
- Chocolate Frosting: Go for a creamy, spreadable chocolate frosting — adding black food coloring deepens that spooky look you’re after without compromising flavor.
- White Frosting: Perfect for creating the spider eyes and web details — make sure it’s thick enough to hold shape when piped.
- Black Food Coloring: A few drops turn your chocolate frosting jet black, which is key for that nocturnal, eerie appeal.
- Toy Spider Rings: These add flair and fun to the cupcakes — plus, they’re an instant hit with kids and adults alike.
Tweak to Your Taste
I love making this Halloween Spider Cupcakes Recipe my own by playing with a few tweaks here and there — it lets you match it perfectly to your party vibe or personal style.
- Variation: Once, I swapped the chocolate cupcakes for red velvet — the spiderweb was extra dramatic against that deep red. Try it if you want a twist on the classic.
- Dietary Modifications: Use gluten-free cupcake mix or vegan frosting to keep these spooky treats accessible to everyone without losing that rich flavor.
- Extra Decoration: Adding a sprinkle of edible glitter or little candy eyeballs elevated the creepy factor at my last Halloween party—feel free to get creative!
Step-by-Step: How I Make Halloween Spider Cupcakes Recipe
Step 1: Bake Your Cupcakes with a Flat Top
Start by filling your cupcake liners a little less than two-thirds full — this helps the cupcakes bake with flat tops, which makes decorating so much simpler (and visually cleaner). I usually bake mine in black liners to enhance the spooky feel. Once baked, let them cool completely; frosting warm cupcakes can get messy and cause the icing to melt or slide off.
Step 2: Prepare Your Frosting & Add Color
Whip up a creamy batch of chocolate frosting — homemade or store-bought works fine, but I personally love making mine from scratch for better texture. Add black food coloring a few drops at a time until you get a rich, dark blackish chocolate. Spread a thin layer of this black frosting evenly over each cupcake to create the night-sky base for your spiderwebs.
Step 3: Pipe the Spiderweb Eyes & Web
Using a small frosting tip or a ziplock bag with a tiny corner snipped off, pipe two small white circles on each cupcake for the spider’s eyes. Add a little dot of black or dark frosting in the middle of each eye to give them some life. Then, dip a toothpick into the white frosting and start at the center dot — drag the toothpick straight out to the edge of the cupcake, repeating around to create a spiderweb effect. This technique sounds trickier than it is; just take your time, and you’ll be amazed by how neat it turns out!
Step 4: Top With Toy Spider Rings
Finally, gently place a toy spider ring right on top of each cupcake — it’s this little detail that really brings the whole spider theme alive and makes the cupcakes interactive (kids especially love this part). Just make sure to warn little guests to remove the toys before eating!
Pro Tips for Making Halloween Spider Cupcakes Recipe
- Flat Tops Matter: Filling cupcake liners just under two-thirds full ensures a perfect flat surface for decorating.
- Color Your Frosting Gradually: Add black food coloring a little at a time — it’s easier to deepen color than to fix frosting that’s too dark or runny.
- Practice the Spiderweb: Try making the web on a piece of parchment paper first to gain confidence before decorating cupcakes.
- Toy Spider Safety: Use lightweight, food-safe, or washable spider rings to avoid accidents, and remind guests to take them off before biting in.
How to Serve Halloween Spider Cupcakes Recipe
Garnishes
I usually keep garnishes simple to highlight the spider webs, but sometimes I sprinkle a little edible shimmer dust or add tiny candy eyes around the cupcakes for an extra pop of spooky fun. If you want to go bold, crushed chocolate cookie crumbs make a great “dirt” effect around the cupcake base.
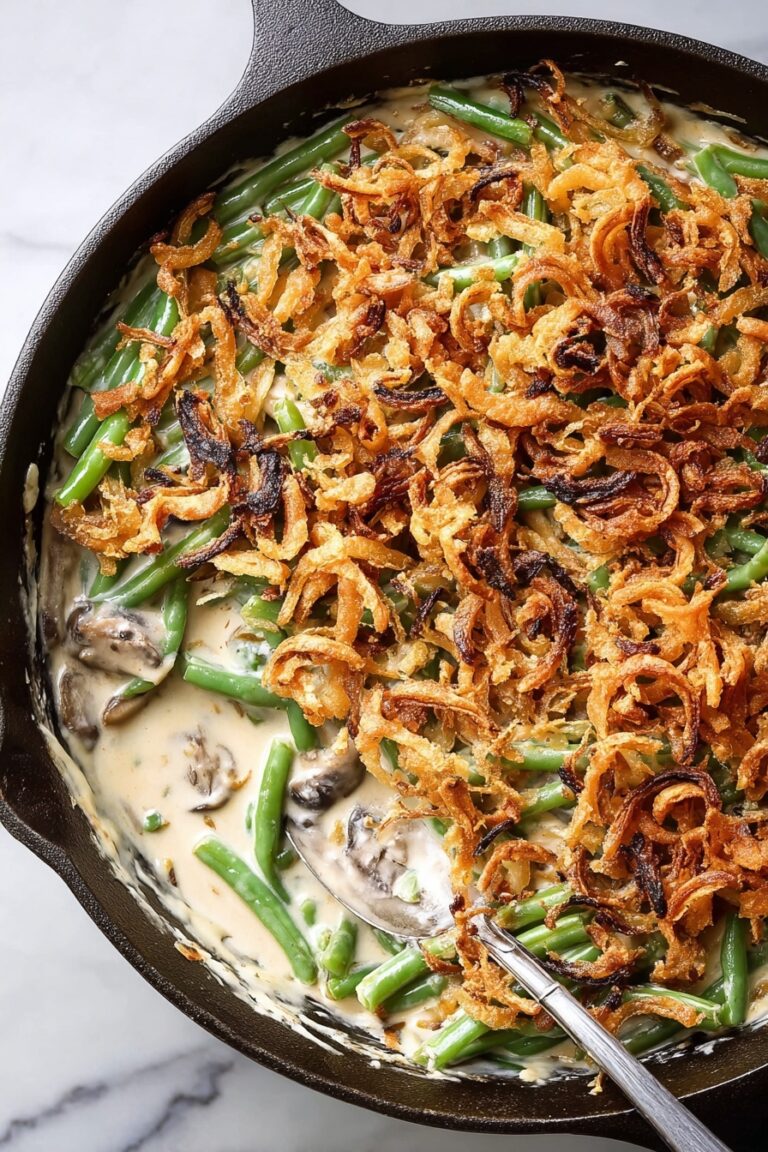
Side Dishes
Alongside these cupcakes, I like serving simple fall-themed drinks like spiced apple cider or a rich hot chocolate. For savory sides, mini sandwiches or simple finger foods keep the focus on the sweets while satisfying hungry partygoers.
Creative Ways to Present
For parties, I’ve arranged these cupcakes on a tiered, black cake stand sprinkled with faux spider webs and little Halloween confetti. Another fun idea is placing them in a “witch’s cauldron” surrounded by dry ice for a spooky fog effect—guaranteed to wow your guests!
Make Ahead and Storage
Storing Leftovers
I usually store leftover cupcakes in an airtight container at room temperature for up to two days. The frosting stays fresh and the cupcakes remain moist — just avoid putting the toy spiders back on until serving again.
Freezing
If you want to prep early, these cupcakes freeze well without the toy spiders. I wrap each cupcake individually in plastic wrap and pop them in a sealed freezer bag. When you’re ready, thaw them overnight in the fridge for the best texture.
Reheating
I recommend serving these cupcakes at room temperature. If they’ve been in the fridge or freezer, just let them sit out for about 30 minutes, and the frosting will soften nicely without melting. Avoid microwaving to keep frosting texture intact.
FAQs
-
Can I use store-bought cupcakes for this Halloween Spider Cupcakes Recipe?
Absolutely! Using store-bought cupcakes is a great shortcut. Just pick chocolate cupcakes with flat tops or gently trim them to make the decorating smoother, and you’re good to go.
-
What do I do if I don’t have black food coloring?
If you don’t have black food coloring, try mixing navy blue, purple, and a tiny bit of red or green food coloring to get a very dark shade. Alternatively, a really dark chocolate frosting can work on its own for a spooky night effect.
-
How long will these cupcakes stay fresh?
They’re best eaten within 2-3 days when stored in an airtight container at room temperature. Refrigerating can dry them out unless wrapped tightly, and always remove toy spider rings before storing.
-
Any tips for piping the spiderweb perfectly?
Practice on parchment paper first to get a feel for the spacing and pressure. Use a toothpick lightly dipped in frosting for the spiderweb lines—it lets you pull thin, clean lines without messing up your icing.
Final Thoughts
I honestly can’t stress enough how these Halloween Spider Cupcakes Recipe bring a little extra magic (and mischief) to any Halloween gathering. Making them has become a tradition for me, and watching friends and family smile at the silly spider rings and the perfectly piped webs is so rewarding. Whether you’re a seasoned baker or just starting out, this recipe is approachable, adorable, and downright delicious — so go ahead, grab those cupcake liners, and let’s get spooky in the kitchen together!
Print
Halloween Spider Cupcakes Recipe
- Prep Time: 30 minutes
- Cook Time: 20 minutes
- Total Time: 50 minutes
- Yield: 24 servings
- Category: Dessert
- Method: Baking
- Cuisine: American
Description
Spooky and fun Halloween Spider Cupcakes featuring chocolate cupcakes with black frosting, white spiderweb designs, and topped with toy spider rings—perfect for a festive party treat.
Ingredients
Chocolate Cupcakes
- 24 baked chocolate cupcakes (preferably in black cupcake liners)
Frosting
- 3 cups chocolate frosting
- 1 cup white frosting
- black food coloring (enough to tint the frosting black)
Decoration
- 24 toy spider rings
Instructions
- Prepare Cupcakes: Fill cupcake liners a little less than two-thirds full with batter to ensure flat tops when baked. Bake the cupcakes and allow them to cool completely before frosting.
- Color Frosting: Prepare the chocolate frosting, then add black food coloring to tint it black for the spiderweb base.
- Apply Base Frosting: Frost a thin layer of the black chocolate frosting on the tops of each cooled cupcake, creating a smooth base for the spiderweb design.
- Create Spiderweb Eyes: Using a small frosting tip or a ziplock bag with a corner cut, pipe two white circles on each cupcake with the white frosting. Add a small dot in the center of each white circle to represent eyes.
- Draw Spiderweb: Starting at the center dot of each white eye, use a toothpick to pull straight lines outward to the edges of the cupcake, repeating around to form the spiderweb pattern.
- Add Spider Rings: Finally, place one toy spider ring on top of each cupcake to complete the Halloween spider theme.
Notes
- Use black cupcake liners to enhance the Halloween theme and hide any imperfections from frosting.
- Ensure cupcakes are completely cool before frosting to prevent melting or slipping.
- If black food coloring is not available, use a very dark brown or charcoal food coloring alternatively.
- To pipe the white frosting, use a small round tip or cut a very small hole in a ziplock bag for more control.
- Carefully handle the toy spider rings to avoid snapping or injury.
- These cupcakes can be made a day ahead and stored in an airtight container at room temperature.
Nutrition
- Serving Size: 1 cupcake
- Calories: 300 kcal
- Sugar: 25 g
- Sodium: 150 mg
- Fat: 15 g
- Saturated Fat: 7 g
- Unsaturated Fat: 6 g
- Trans Fat: 0 g
- Carbohydrates: 40 g
- Fiber: 2 g
- Protein: 3 g
- Cholesterol: 30 mg
