Homemade Peanut Butter Cups Recipe
If you’re a peanut butter and chocolate lover like me, you’re going to flip for this Homemade Peanut Butter Cups Recipe. Seriously, these little treats pack that perfect combo of creamy, sweet peanut butter and rich, melty chocolate, but made right at home—so you get to control every bit of the magic. Easy, fun, and absolutely scrumptious, they’re a fantastic way to treat yourself or impress friends without needing a bakery. Stick with me, and I’ll walk you through the whole process so your peanut butter cups come out beautifully every single time.
Why This Recipe Works
- Simple Ingredients: You only need a handful of ingredients you probably already have, making it super accessible.
- Perfectly Balanced Flavors: Creamy peanut butter meets sweet, smooth chocolate for a match made in heaven.
- Customizable and Fun: Easy to tweak with toppings, different chocolates, or nut butters to suit your taste.
- No Fancy Equipment: You can whip these up with just a microwave, mixer, and muffin tin—no candy thermometer needed!

Ingredients & Why They Work
The magic in this Homemade Peanut Butter Cups Recipe comes from the simple harmony of its ingredients. Each component plays a vital role — from creating that luscious peanut butter center to the firm chocolate shell that surrounds it. When shopping, pick a creamy peanut butter without too much oil separation to keep your filling smooth. And choose a good-quality almond bark or chocolate that melts evenly for that shiny finish.
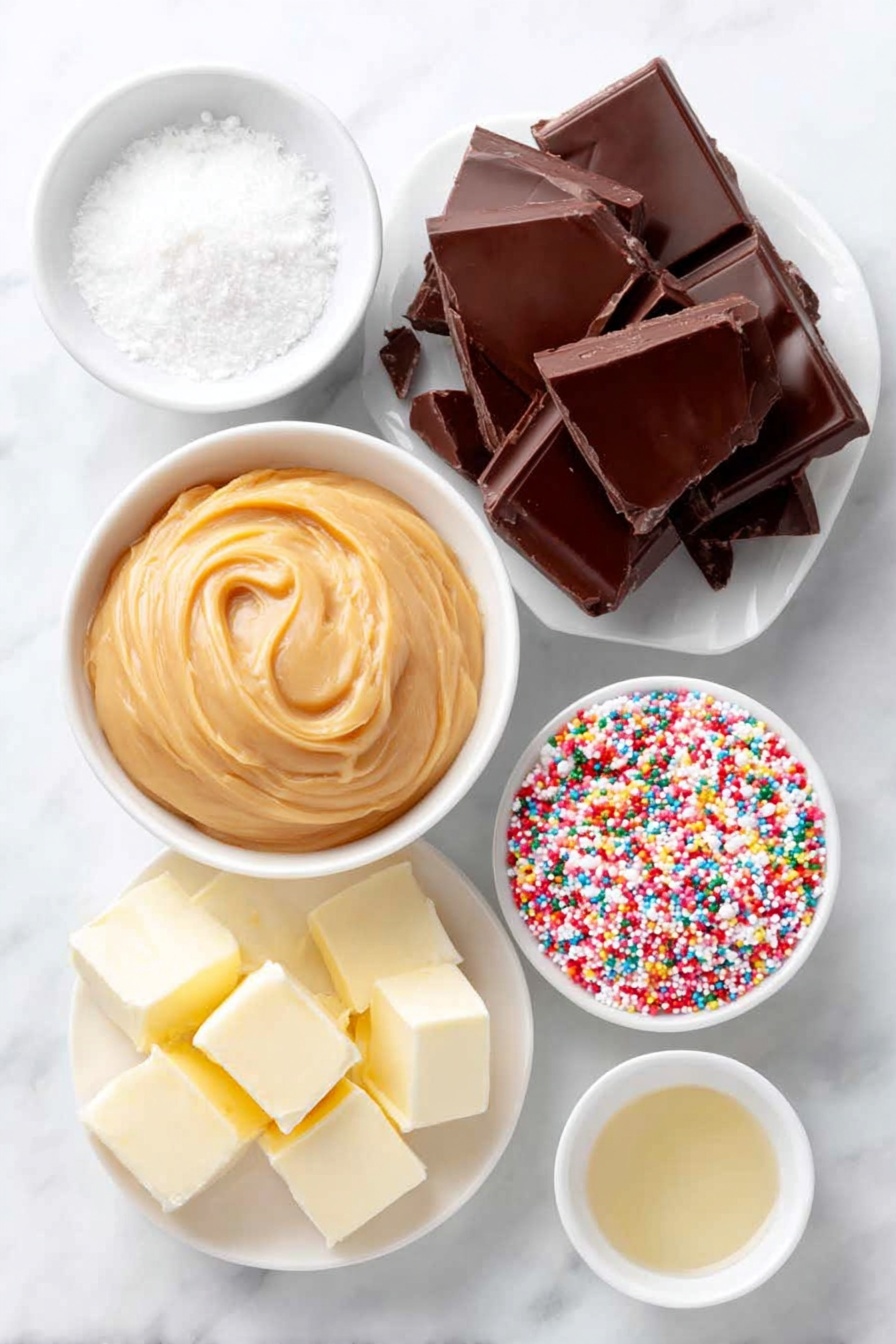
- Creamy Peanut Butter: Provides the creamy, nutty core—avoid natural peanut butter that separates too much or you might get a gritty texture.
- Unsalted Butter: Adds richness and helps smooth the peanut butter mixture for easy shaping.
- Vanilla Extract: Just a splash brightens the flavor and takes the peanut butter filling up a notch.
- Confectioners Sugar: Sweetens and thickens the filling so it holds its shape without crumbling.
- Chocolate Almond Bark: Melts beautifully and sets firm, perfect for coating and sealing in your peanut butter yumminess.
- Sprinkles (Optional): To bring a festive splash and extra crunch if you’re in a decorating mood.
Tweak to Your Taste
I love how forgiving and flexible this Homemade Peanut Butter Cups Recipe is. Over the years, I’ve tried changing up the nuts, chocolate types, and even toppings. It’s your playground! Feel free to experiment and make it your own.
- Nut Butter Swap: I’ve made these with almond butter too, for a slightly different but equally tasty twist.
- Chocolate Varieties: Dark chocolate gives a richer, more intense flavor, especially if you prefer less sweet treats.
- Dietary Changes: Use a powdered sugar substitute or sugar-free chocolate if you want low-sugar options.
- Festive Touches: Around the holidays, I sprinkle crushed candy canes or cinnamon sugar for a fun pop of flavor and color.
Step-by-Step: How I Make Homemade Peanut Butter Cups Recipe
Step 1: Get Your Liners Ready
Start by lining a muffin pan with 18 cupcake liners. I use paper liners because they’re easy to peel off, but silicone ones work too. Having this all set before you melt your chocolate makes assembly quicker and less messy. Trust me, prepping your pan ahead saves you some stress later.
Step 2: Mix the Peanut Butter Filling
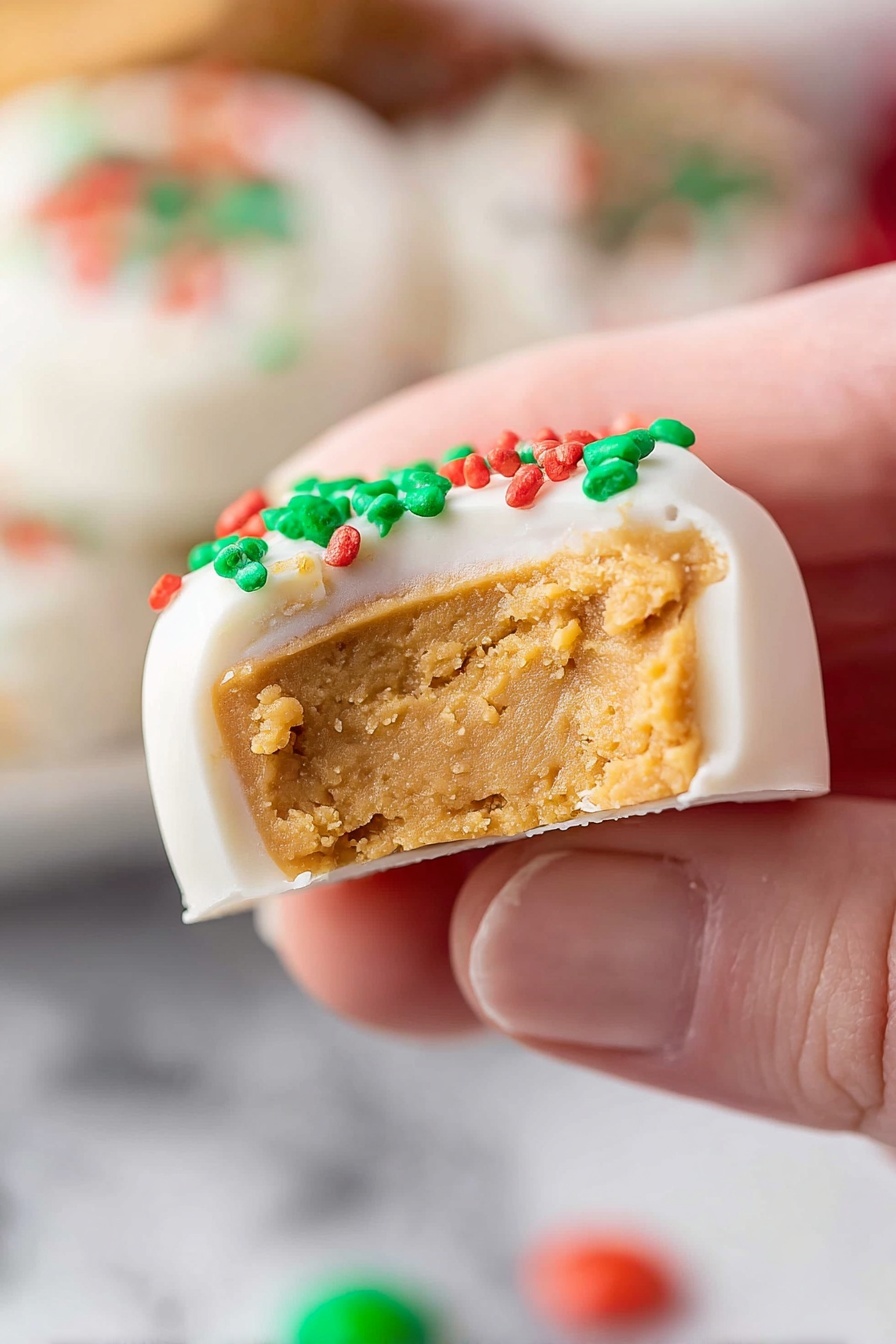
In a big bowl, blend your creamy peanut butter and softened butter with a mixer until silky smooth. Then add vanilla extract and confectioners sugar. The mix will get a little crumbly—that’s perfect! It means it’s thick enough to hold its shape but still soft. If it feels too stiff, a tiny splash of milk can help smooth it out.
Step 3: Melt the Chocolate Almond Bark
Melt the almond bark in the microwave in short 30-second bursts, stirring in between. This prevents burning and helps it melt evenly. When it’s smooth and glossy, you’re good to go. If you don’t have almond bark, good-quality melting chocolate works too, just keep a close eye while melting.
Step 4: Layer Your Cups
Spoon a little melted chocolate into the bottom of each liner, tilting them a bit to coat the sides slightly. This chocolate layer is your cup’s “shell” and keeps the peanut butter from leaking out. I usually spread it with the back of a spoon for even coverage. Pop the pan in the fridge for a few minutes to let it set a bit if you want.
Step 5: Shape the Peanut Butter Centers
Take heaping tablespoons of the peanut butter mixture and roll them into balls. Then, flatten those into thick discs – they’ll fit snugly inside your chocolate cups. Placing chilled discs into the chocolate shells helps them hold their shape better, so if you have time, pop them in the fridge for 10 minutes beforehand.
Step 6: Seal with More Chocolate
Cover each peanut butter disc with the remaining melted chocolate, smoothing the tops with a spoon. This seals everything inside. Before the chocolate hardens, sprinkle on any festive sprinkles or toppings you love. Then, let the cups set for about an hour at room temperature or 30 minutes in the fridge for faster results.
Pro Tips for Making Homemade Peanut Butter Cups Recipe
- Softened Butter is Key: Make sure your butter is room temp; it blends much smoother with peanut butter and prevents lumps.
- Don’t Rush Chocolate Melting: Melt in short bursts and stir thoroughly; this avoids burning and keeps chocolate silky.
- Chill Between Layers: Setting the base chocolate layer before adding peanut butter helps keep the cups neat and avoids leaks.
- Room Temperature Finish: I prefer letting these set at room temp for a firmer bite; refrigerating too long can sometimes dull the chocolate’s shine.
How to Serve Homemade Peanut Butter Cups Recipe
Garnishes
I’m a sucker for rainbow sprinkles on these peanut butter cups—they add a fun crunch and a pop of color that’s especially nice when gifting. Lately, I’ve also loved using crushed sea salt or chopped roasted peanuts for a salty-sweet contrast. Both garnish styles give a little extra texture and flavor boost that my family and guests go crazy for.
Side Dishes
If you’re serving these at a party, pair them with a simple fruit platter or fresh berries to cut through the richness and refresh the palate. A cup of strong coffee or a glass of cold milk also elevates the experience—trust me, coffee and chocolate-peanut butter really are best friends.
Creative Ways to Present
For birthdays or holidays, I’ve lined them up on a pretty cookie tray with colorful cupcake liners and tied the whole thing up with a ribbon. Another fun idea is packaging them individually in mini treat bags for party favors or gifting. You could even drizzle extra chocolate in contrasting colors over the top for a swirly artistic effect that wows every time.
Make Ahead and Storage
Storing Leftovers
After making your homemade peanut butter cups, store them in an airtight container in the fridge. I’ve kept them fresh for up to 2 weeks this way without any loss of flavor or texture. Just make sure the container seals tightly to avoid the chocolate picking up other fridge smells.
Freezing
You can freeze these peanut butter cups for longer storage by placing them on a baking sheet to freeze individually first, then transferring to a freezer-safe bag or container. When I’ve done this, they thaw beautifully overnight in the fridge and taste just as good as freshly made—perfect for prepping extra batches ahead.
Reheating
These treats don’t need much “reheating”—just let them sit at room temp for 10-15 minutes before serving so the chocolate softens slightly, enhancing that melt-in-your-mouth feel. Avoid microwaving or you risk changing the texture of both peanut butter and chocolate.
FAQs
-
Can I use natural peanut butter for this recipe?
Natural peanut butter tends to separate and be runnier, which can make the filling less stable and a bit crumbly. For best results, use creamy peanut butter that is well blended and doesn’t separate oil easily. This helps the peanut butter filling hold its shape nicely.
-
What can I substitute if I don’t have almond bark?
You can substitute regular melting chocolate or high-quality chocolate chips. Just melt them carefully with a little vegetable oil or butter if needed to keep the chocolate smooth and pourable. Keep stirring and watch closely to avoid burning.
-
How long do homemade peanut butter cups last?
Stored properly in an airtight container in the fridge, these peanut butter cups will stay fresh for up to two weeks. For longer storage, freezing is a great option.
-
Can I make these nut-free?
Definitely! Substitute the peanut butter with a seed butter like sunflower seed butter. Just be mindful of the flavor differences and adjust the sweetness or saltiness as you like.
Final Thoughts
This Homemade Peanut Butter Cups Recipe holds a special place in my kitchen because it’s one of those feel-good treats that’s simple enough to make any day, but special enough to impress guests. The step-by-step process is straightforward, and there’s a personal satisfaction in making your own candy from scratch. I truly hope you enjoy making and sharing these delicious bites as much as I have—once you’ve tried them, you might just find yourself making them again and again!
Print
Homemade Peanut Butter Cups Recipe
- Prep Time: 20 minutes
- Cook Time: 10 minutes
- Total Time: 1 hour 30 minutes
- Yield: 18 servings
- Category: Dessert
- Method: No-Cook
- Cuisine: American
- Diet: Vegetarian
Description
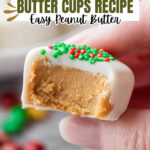
Delicious homemade peanut butter cups made with creamy peanut butter and smooth almond bark chocolate. These treats are easy to make and perfect for any occasion, with an option to decorate with sprinkles for a festive touch.
Ingredients
Peanut Butter Mixture
- 1 cup creamy peanut butter
- 1/4 cup unsalted butter room temperature
- 1 teaspoon vanilla extract
- 1 1/2 cups confectioners sugar
Chocolate Coating
- 1 pound chocolate almond bark or vanilla almond bark
- sprinkles optional
Instructions
- Prepare Muffin Pan: Line a muffin pan with 18 cupcake liners to hold each peanut butter cup.
- Mix Peanut Butter and Butter: In a large bowl, use a mixer to blend 1 cup creamy peanut butter and 1/4 cup unsalted butter until the mixture is smooth.
- Add Vanilla and Sugar: Incorporate 1 teaspoon vanilla extract and 1 1/2 cups confectioners sugar into the peanut butter mixture, mixing until combined. The texture will be crumbly.
- Melt Chocolate: Melt 1 pound almond bark in a microwave-safe bowl by heating in 30-second intervals, stirring after each, until the chocolate is smooth.
- Coat Cup Liners: Spoon a small amount of melted chocolate into the bottom of each cupcake liner, spreading it to cover the bottom and a bit of the sides.
- Shape Peanut Butter Discs: Scoop heaping tablespoons of the peanut butter mixture, roll into balls, then flatten into thick discs.
- Assemble Cups: Place one peanut butter disc into each chocolate-coated cupcake liner.
- Top with Chocolate: Spoon the remaining melted chocolate over the peanut butter discs in each cup, covering them completely. Add sprinkles immediately if desired.
- Set and Chill: Let the peanut butter cups set at room temperature for about 1 hour or refrigerate for 30 minutes before serving or storing.
Notes
- Store peanut butter cups in an airtight container in the refrigerator for up to 2 weeks to maintain freshness.
- For a festive presentation, decorate the cups with sprinkles or candy decorations; otherwise, they can be left plain.
- Ensure the almond bark is melted slowly in short intervals to avoid burning the chocolate.
- Use room temperature butter to help blend smoothly with the peanut butter.
Nutrition
- Serving Size: 1 peanut butter cup
- Calories: 210 kcal
- Sugar: 18 g
- Sodium: 90 mg
- Fat: 15 g
- Saturated Fat: 6 g
- Unsaturated Fat: 8 g
- Trans Fat: 0 g
- Carbohydrates: 18 g
- Fiber: 2 g
- Protein: 5 g
- Cholesterol: 15 mg