Lime Bars Recipe
If you’re anything like me, then you know the magic a bright, zesty dessert can bring to your day—and that’s exactly where this Lime Bars Recipe shines. They’re tangy, sweet, with just the right amount of buttery crust to keep your taste buds dancing. Every time I make these, friends ask for the recipe (and I’m always happy to share). Stick around—I’m going to walk you through the whole process so your lime bars turn out just perfect!
Why This Recipe Works
- Perfectly Balanced Tang: Fresh lime juice and zest provide bright citrus flavor without overwhelming sweetness.
- Buttery Crust Base: A crumbly, golden crust holds everything together and adds richness to every bite.
- Simple Ingredients: No crazy specialty items, so it’s easy to whip up anytime you’re craving something fresh and sweet.
- Light and Refreshing Texture: The filling sets just right, firm but tender, making these bars a delight to slice and serve.

Ingredients & Why They Work
This Lime Bars Recipe is all about a few solid ingredients coming together in perfect harmony. The crust is buttery and lightly sweet, while the filling is zingy with natural lime flavors that cut through the richness. When shopping, pick fresh limes—you’ll taste the difference, trust me!
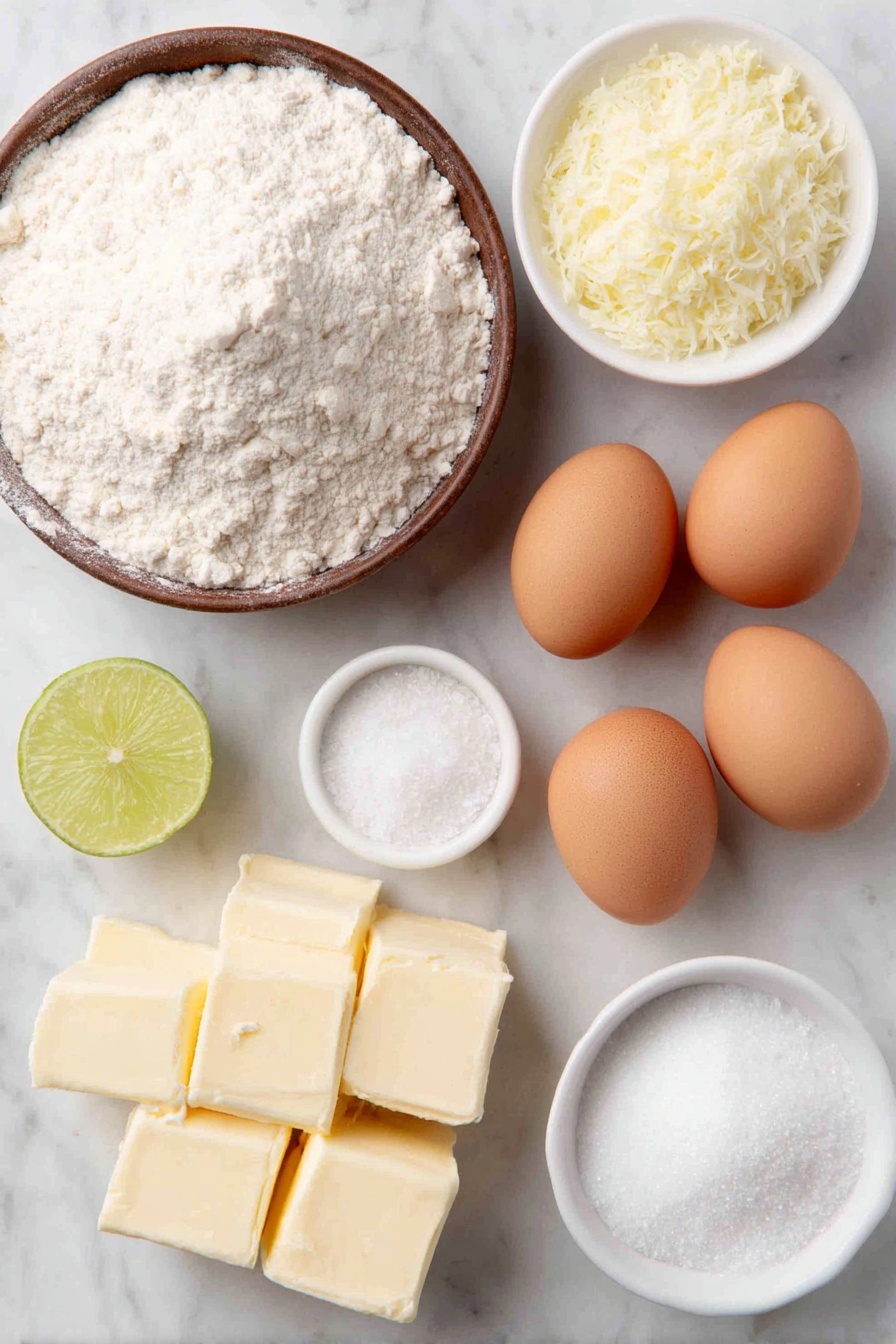
- All-purpose flour: The backbone of the crust, creating that tender yet sturdy base you want.
- Powdered sugar: Helps keep the crust tender and prevents graininess.
- Salt: Just a pinch enhances all the other flavors—don’t skip it!
- Butter: Use real unsalted butter, cold and cut into pieces, for that flaky crust texture.
- Granulated sugar: Sweetens the filling without overpowering the fresh lime taste.
- Eggs: They’re key to binding the filling and giving it that custard-like texture.
- Lime zest: Boosts the lime aroma and gives a punch of flavor beyond juice alone.
- Fresh lime juice: The star ingredient that brings brightness and acidity.
- Food coloring (optional): Just a drop for that classic pale green bar—totally optional but fun if you want the look!
Tweak to Your Taste
One of my favorite things about this Lime Bars Recipe is how flexible it is. You can adjust the tartness or sweetness easily to suit your mood—or dietary needs. I love making it a little zestier by adding extra lime zest or a hint of fresh mint for a summer twist.
- Less sugar: If you prefer a tarter bar, try cutting the sugar by 1/4 cup; I like this on a warm day.
- Gluten-free crust: Substitute gluten-free flour blend with the same amount for an allergy-friendly version that still tastes great.
- Extra citrus: Mixing in a little lemon juice with the lime gives a layered flavor I sometimes go for.
- Colorful twist: Natural food coloring is optional, but a tiny bit always makes these more festive for gatherings.
Step-by-Step: How I Make Lime Bars Recipe
Step 1: Prepare the Crust Like a Pro
First things first: preheat your oven to 350°F. I always line my 11×7-inch pan with parchment paper, letting it overhang on two sides—this makes lifting the whole batch out a breeze later. Pulse the flour, powdered sugar, salt, and cold butter pieces in your food processor until it looks like fine crumbs—think sandy texture. Press this evenly into the pan; I use my fingers and a flat bottom glass to pack it down nicely. Then bake it for 18 to 20 minutes, watching closely so it turns a lovely golden brown but doesn’t burn.
Step 2: Whisk Up the Lime Filling
While the crust is baking, grab a bowl and whisk together the granulated sugar and flour so it’s smooth and lump-free. Add the eggs one by one, whisking well after each addition; this helps the filling be silky and ensures no egginess. Next, stir in the fresh lime zest and lime juice. I like to add a tiny drop of green food coloring—it’s optional, but it gives the bars that classic, cheerful pastel color. The filling should be well combined and smooth.
Step 3: Bake to Set the Filling
Pour the lime filling over the hot crust as soon as it comes out of the oven. Then pop it back in for an additional 18 to 20 minutes. You’ll know it’s ready when the filling no longer jiggles—kind of like a set custard. Let it cool completely in the pan for about an hour, then pop it in the fridge for 1-2 hours to chill and fully set. This chilling step gives you clean, crisp slices every time.
Step 4: Slice and Enjoy
Use the parchment paper overhang to lift the whole lime bars slab from the pan. I find a sharp knife makes all the difference for neat squares. Cut into whatever size you prefer—smaller for party bites, larger for dessert plates. Store any leftovers wrapped in the fridge; they keep beautifully.
Pro Tips for Making Lime Bars Recipe
- Cold Butter is Key: Using cold butter pieces in the crust keeps it flaky and crumbly rather than greasy.
- Work Quickly: Pour the filling over the hot crust right after baking to ensure the best texture and even baking.
- Don’t Skip Chilling: Letting the bars fully cool and chill makes cutting clean slices so much easier.
- Use a Sharp Knife: I wipe my knife clean between cuts for tidy, beautiful bars every time.
How to Serve Lime Bars Recipe
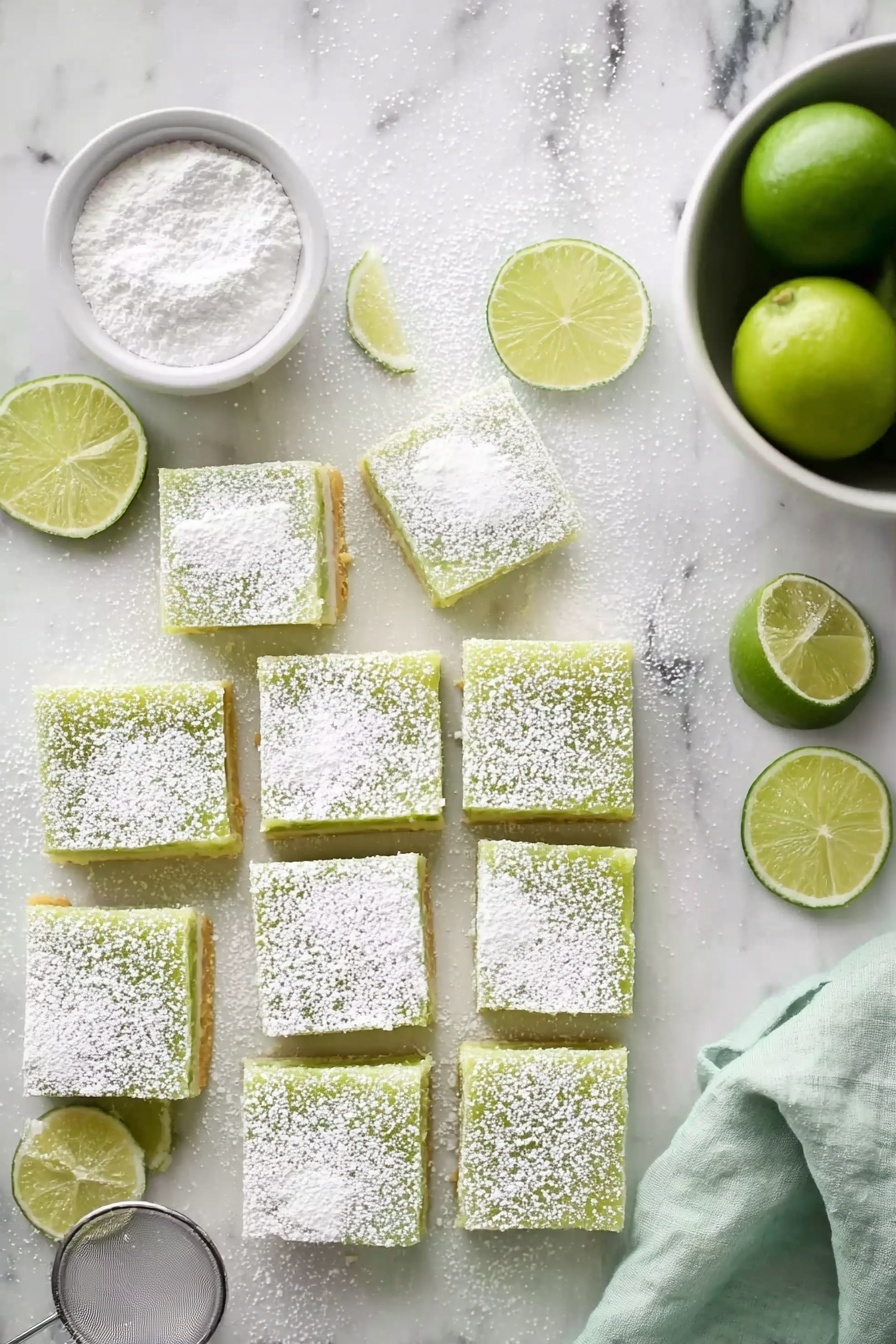
Garnishes
I usually keep it simple—just a light dusting of powdered sugar or a thin twist of lime zest on top to let the bars’ natural brightness shine. On special occasions, sometimes a small dollop of whipped cream or a few fresh berries add a touch of elegance and more color.
Side Dishes
Because these bars are sweet and tangy, I like pairing them with light, fresh options like a crisp green salad or a cold glass of iced herbal tea. They also make a divine finish to summer BBQs or brunch spreads.
Creative Ways to Present
For parties, I’ve arranged lime bars on a platter with edible flowers and lime slices for a tropical feel. You could also set up a dessert bar with various toppings—coconut flakes, tiny mint leaves, or crushed pistachios—to sprinkle on each bar for guests to personalize their treats.
Make Ahead and Storage
Storing Leftovers
Leftover lime bars keep beautifully covered in the refrigerator for up to 4 days. I recommend wrapping them tightly with plastic wrap or storing in an airtight container to prevent them from drying out or absorbing fridge odors.
Freezing
I’ve frozen these bars before by wrapping each piece tightly in plastic wrap and then placing them in a freezer-safe container. When you want a treat, just thaw them in the fridge overnight—they hold their flavor and texture surprisingly well!
Reheating
Because these are best served chilled, I usually don’t reheat them. However, if you want to warm them slightly, a quick 10-second zap in the microwave softens them without melting the crust too much. Just don’t get carried away!
FAQs
-
Can I use bottled lime juice for this Lime Bars Recipe?
While you can use bottled lime juice in a pinch, fresh lime juice makes a noticeable difference in flavor and brightness. Bottled juice may have preservatives and a slightly muted taste, which could affect the overall tang and freshness you want in these bars.
-
How do I know when the lime bars are done baking?
The key sign is that the lime filling no longer jiggles when you gently shake the pan. It should have a custard-like firmness but still be tender. Overbaking can cause it to crack, so keep an eye near the end of the baking time!
-
Can I make the crust by hand if I don’t have a food processor?
Absolutely! Use a pastry cutter or two forks to cut the cold butter into the dry ingredients until the mixture resembles sand and pea-sized crumbs. It takes a little elbow grease but works just as well.
-
Why do you add a little flour to the filling?
The flour helps the lime filling thicken and set properly during baking, giving you that perfect bar texture instead of a runny custard. It also adds a slight tenderness to the filling.
Final Thoughts
Honestly, this Lime Bars Recipe is one of those simple desserts that never fails to impress. I always have a batch ready when hosting friends or just craving something bright and sweet after dinner. It’s approachable but feels a little special with that fresh lime punch. Give it a try—I think you’ll love how easy and delicious it is, and soon enough, it might become your go-to treat too.
Print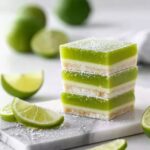
Lime Bars Recipe
- Prep Time: 10 minutes
- Cook Time: 40 minutes
- Total Time: 2 hours 50 minutes
- Yield: 12 servings
- Category: Dessert
- Method: Baking
- Cuisine: American
Description
These zesty Lime Bars feature a buttery, crisp crust topped with a smooth and tangy lime filling, making a refreshing dessert perfect for any occasion.
Ingredients
Crust:
- 1 cup (120 g) all-purpose flour
- ¼ cup (30 g) powdered sugar
- ¼ tsp salt
- ½ cup (113 g) butter, cut into 8 pieces
Filling:
- 1 ¼ cup (250 g) granulated sugar
- ¼ cup (30 g) all-purpose flour
- 4 large eggs
- 2 tsp lime zest
- ⅔ cup (159 ml) fresh lime juice
- drop of green (+ yellow) food coloring, optional
Instructions
- Preheat Oven: Preheat your oven to 350 degrees Fahrenheit. Lightly grease or line an 11×7-inch baking dish with parchment paper, allowing it to overhang by 2 inches on both sides for easy removal.
- Make the Crust: In a food processor, combine all-purpose flour, powdered sugar, salt, and butter pieces. Pulse until the mixture resembles fine crumbs. Press this mixture evenly into the prepared baking dish.
- Bake Crust: Bake the crust in the preheated oven for 20 minutes or until it turns golden brown. Remove from oven and set aside.
- Prepare Filling: In a bowl, whisk together granulated sugar and flour. Add the eggs one at a time, whisking well after each addition. Stir in lime zest, fresh lime juice, and if desired, a drop of green and yellow food coloring until smooth and fully combined.
- Assemble and Bake: Pour the lime filling over the hot crust. Return the pan to the oven and bake for an additional 20 minutes or until the filling is set and no longer jiggles when shaken.
- Cool and Chill: Remove from oven and let the bars cool completely in the pan for about 1 hour. Then refrigerate for 2 hours to fully set the filling.
- Serve: Lift the bars out of the pan using the parchment paper overhang, cut into squares, and serve chilled. Store any leftovers in the refrigerator.
Notes
- Using fresh lime juice is key for the best bright flavor in the filling.
- If you don’t have a food processor, you can pulse the crust ingredients in a blender or use your fingers to mix the butter into the dry ingredients.
- The food coloring is optional and just adds a fun color to the filling.
- Make sure the filling is fully set and no longer jiggles before removing from the oven to ensure a firm texture.
- Use an 11×7-inch pan for the correct thickness; larger pans will yield thinner bars.
- Bars keep well refrigerated for up to 3 days and can be served cold or at room temperature.
Nutrition
- Serving Size: 1 bar
- Calories: 250 kcal
- Sugar: 28 g
- Sodium: 90 mg
- Fat: 12 g
- Saturated Fat: 7 g
- Unsaturated Fat: 4 g
- Trans Fat: 0 g
- Carbohydrates: 34 g
- Fiber: 0.5 g
- Protein: 3 g
- Cholesterol: 75 mg


