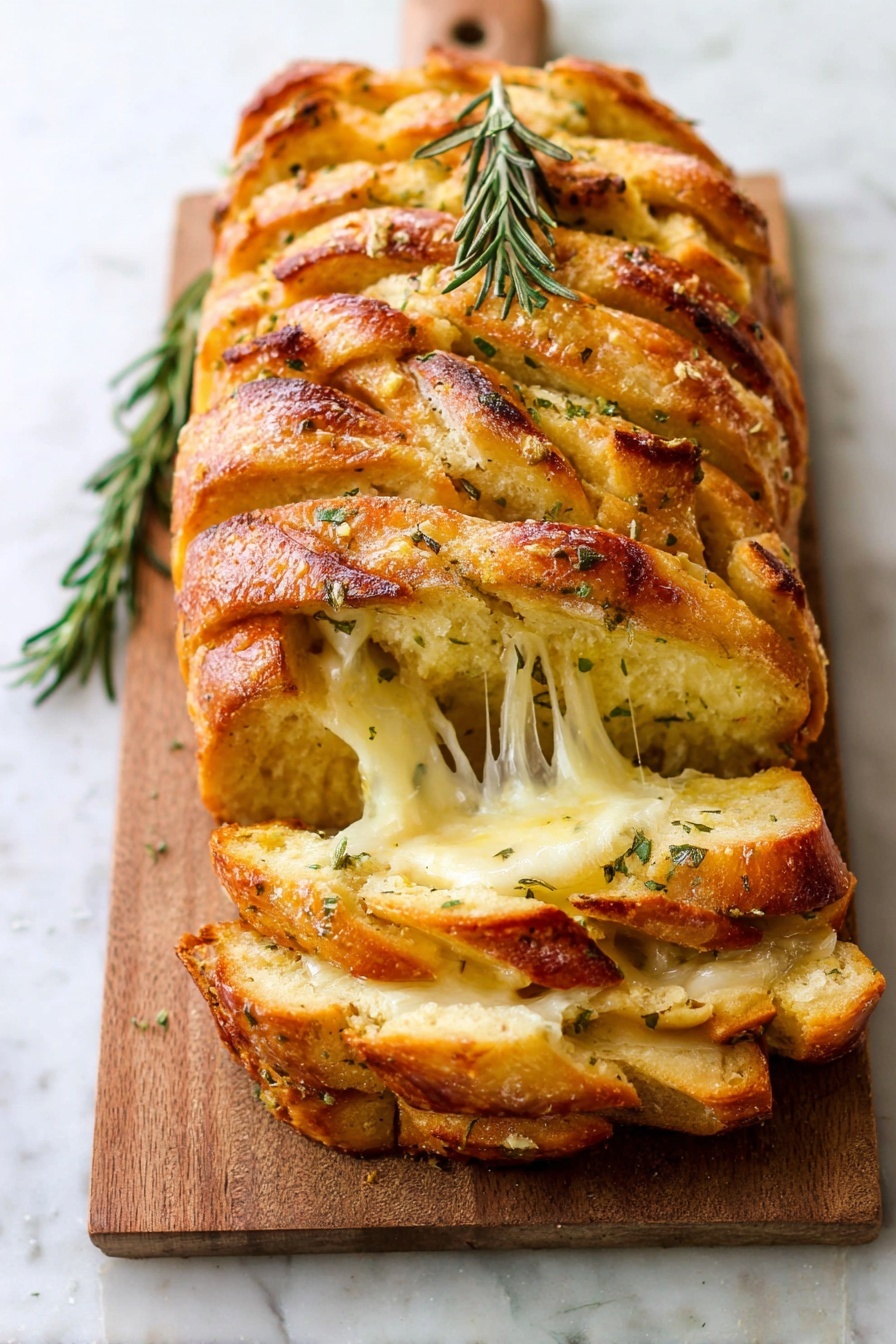
Rosemary Garlic Pull Apart Bread Recipe
If you’re anything like me and love sinking your teeth into warm, buttery bread bursting with flavor, then this Rosemary Garlic Pull Apart Bread Recipe is going to be your new obsession. It’s beautifully soft on the inside with layers of fresh herbs, garlic, and melty cheese, all wrapped up in these easy-to-tear-apart pieces of deliciousness. I swear, this bread not only makes your kitchen smell heavenly but also brings everyone running to the table. Stick around—I’ll walk you through every little step so you can make this glow-worthy, crowd-pleasing loaf at home without any stress.
Why This Recipe Works
- Simple, Reliable Dough: The dough is soft yet sturdy enough to pull apart easily without crumbling.
- Herb & Garlic Infusion: Fresh rosemary and garlic mixture gives each bite a fresh, savory punch.
- Cheesy Goodness: Adding shredded cheese in each layer melts perfectly, creating irresistible gooeyness.
- Versatile & Make-Ahead Friendly: You can prepare the dough ahead or freeze leftovers with no hassle.

Ingredients & Why They Work
This Rosemary Garlic Pull Apart Bread Recipe balances simple pantry staples with flavorful fresh ingredients. The herbs and cheese turn an ordinary bread into something restaurant-worthy, and a few baking tips can make the process a breeze—even if you’re new to bread baking.
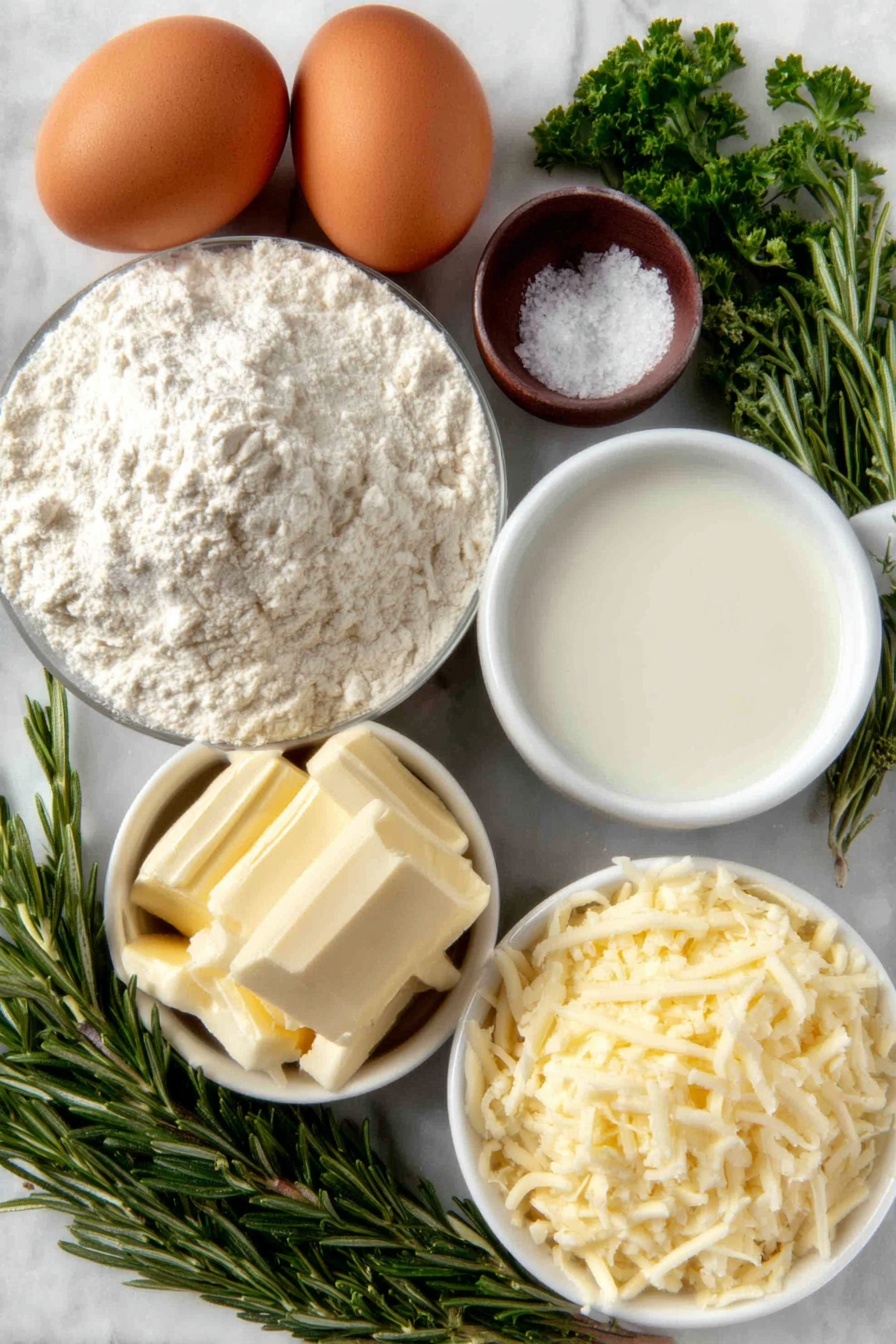
- Platinum Yeast: This instant yeast gives a consistent rise and great texture; I find it easier than active dry yeast for quick, reliable results.
- Whole milk: Adds tenderness and a rich crumb to the dough;
- Unsalted Butter: Both in dough and filling, butter adds incredible richness and helps achieve that soft, pull-apart quality.
- Garlic Powder and Fresh Garlic: Garlic powder in dough boosts savory depth while fresh garlic in the filling packs a bright but mellow flavor.
- Fresh Rosemary and Parsley: Fresh herbs provide vibrant, piney notes and freshness that dried herbs can’t quite replicate, but dried works fine if that’s what you have!
- All-Purpose Flour: Provides the right structure; you can also swap some for bread flour or whole wheat if you want a bit more chew or nuttiness.
- Shredded Cheese: Parmesan, mozzarella, or white cheddar all melt wonderfully—choose your favorite for your unique spin.
- Salt & Sugar: These balance the flavors and help with yeast activation and crust color.
Tweak to Your Taste
This recipe is super forgiving, which is why I love it—you can easily put your spin on it. I often swap fresh herbs based on what’s growing in the garden, or swap cheeses depending on mood or leftovers in the fridge. Feel free to experiment and make it truly yours!
- Variation: I once added a pinch of chili flakes to the filling for a tiny kick—unexpected but fabulous! You might want to try swapping dried oregano or thyme if rosemary isn’t your thing.
- Dietary Modification: Use dairy-free butter and cheese alternatives to make it vegan-friendly; the flavor won’t suffer much, but the texture shifts slightly.
- Seasonal Change: Fresh sage or basil can replace rosemary in a pinch, especially tasty in the fall or summer editions of this bread.
Step-by-Step: How I Make Rosemary Garlic Pull Apart Bread Recipe
Step 1: Wake Up the Yeast and Mix the Dough
Start by combining the Platinum Yeast and sugar in your mixer bowl or a large mixing bowl if you’re working by hand. Warm the milk until it feels just warm to the touch—think bathwater, about 110°F (43°C). Pour the milk over the yeast and give it a gentle whisk. Then cover it loosely with a kitchen towel and let the yeast bloom for 5-10 minutes until it’s frothy and bubbly. This is critical—no froth means yeast is sleeping and won’t give your bread that lovely rise.
Step 2: Bring It All Together and Knead
Once your yeast is alive and well, add in butter, egg, flour, salt, garlic powder, and your wonderfully fragrant chopped rosemary. Turn on your mixer to low (or grab a sturdy spoon) and mix until the dough starts pulling away from the bowl sides in about 3 minutes. It’ll be soft—that’s okay! Then knead for 5 more minutes either with the dough hook or by hand on a floured surface. If it’s sticky, add flour in small bits, but be careful not to dry it out. You’ll know your dough is ready when it feels slightly tacky but springs back when poked. Try the windowpane test if you’re curious!
Step 3: First Rising—Patience is Key
Shape your dough into a nice, smooth ball and place it in a greased bowl. Cover with plastic wrap and put it in a warm spot to rise until it doubles—usually 60 to 90 minutes. I like to use my oven’s “proof” setting or just turn it on to 200°F, then turn off and place the bowl inside. Just enough warmth to help the yeast wake up, not cook the dough!
Step 4: Make the Savory Filling
While the dough is resting, mix the softened butter with the fresh rosemary, parsley, garlic, and salt. I usually mash these together with a fork until it’s fully blended. Keep this filling at room temp so it spreads smoothly later—the butter in the filling needs to be extra soft (bonus tip: a quick 10-second zap in the microwave works wonders).
Step 5: Assembly—The Fun Part!
After your dough has doubled, punch it down gently to release air. On a floured surface, divide it into 12 equal pieces—about the size of a golf ball. Flatten each piece into a roughly 4-inch circle. No need to be perfect here — rustic shapes add to the charm! Spread 1-2 teaspoons of that luscious filling onto each circle, then scatter on about a tablespoon of your shredded cheese. Fold each piece in half and stack them standing up, round side up, into a greased 9×5 loaf pan. This stacking is the magic behind the pull-apart effect.
Step 6: Second Rise and Then Bake to Perfection
Cover the loaf loosely with plastic wrap and let it rise again in a warm spot until puffy, around 45 minutes. Meanwhile, preheat your oven to 350°F (177°C) and position the rack in the lower third. Bake the bread for about 50 minutes until golden brown on top. If you see the top darkening too fast, tent it with foil—better to protect than to burn! You might notice butter pooling at the sides during baking, which is perfectly normal and adds even more flavor.
Step 7: The Grand Finale—Let it Cool, Then Dig In
Take the bread out and give it 10 minutes to settle in the pan, then gently remove it. Brush the top with melted butter and sprinkle with flaky sea salt if you love a little extra crunch and saltiness like I do. This bread is best enjoyed warm—torn apart and shared with friends or family. Trust me, everyone will be thanking you.
Pro Tips for Making Rosemary Garlic Pull Apart Bread Recipe
- Use Room Temperature Butter in Filling: This makes spreading easier and prevents tearing the dough. If your butter is cold, just soften it a bit in the microwave for 10-15 seconds.
- Don’t Over-Flour the Dough: It’s tempting when the dough feels sticky, but adding too much flour will make the bread dry and dense. Keep it soft but manageable.
- Check Your Oven Temperature: Ovens vary a lot. If the bread browns too fast, lower the temp slightly or use foil to cover the top.
- Allow the Dough to Fully Rise: That first rise is crucial for lightness—don’t rush it. A slow, overnight rise in the fridge can even develop deeper flavor if you prefer.
How to Serve Rosemary Garlic Pull Apart Bread Recipe
Garnishes
I love brushing the finished bread with melted butter and sprinkling flaky sea salt just before serving—it’s my signature move that adds a little glisten and extra flavor punch. Sometimes I throw on a sprinkle of fresh parsley or extra rosemary for a vibrant pop of green. If you want to get fancy, grated Parmesan or a little drizzle of olive oil can also elevate the presentation and taste.
Side Dishes
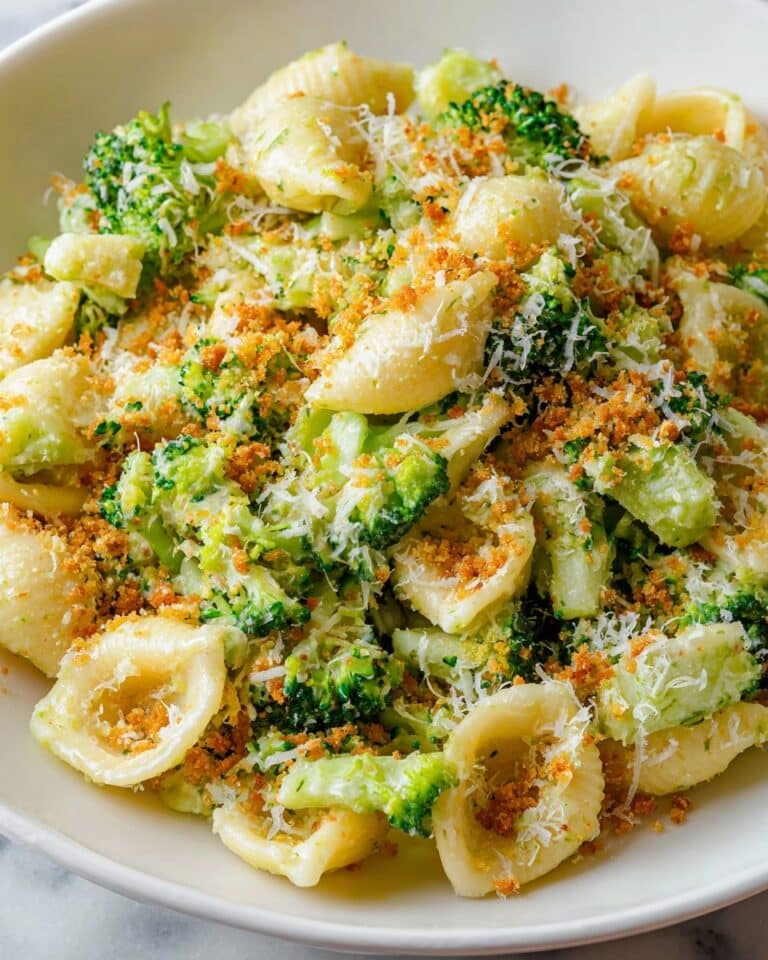
This pull apart bread pairs beautifully with soups—my go-to is a creamy tomato basil or a hearty butternut squash soup. It’s also amazing alongside a big green salad, grilled chicken, or a pasta dish drenched in olive oil and fresh herbs. Honestly, it works as a starter, a side, or a centerpiece for sharing over drinks.
Creative Ways to Present
For a dinner party, I’ve arranged the pull apart bread on a wooden board with small bowls of extra melted herb butter and garlic olive oil for dipping. It makes for a warm, inviting centerpiece that gets everyone reaching in. You can also slice into smaller portions, place on individual plates, and sprinkle with microgreens or edible flowers for a whimsical touch that dazzles guests.
Make Ahead and Storage
Storing Leftovers
I usually keep leftover rosemary garlic pull apart bread in an airtight container at room temp for up to 2 days. After that, it tends to get a bit crusty—still edible, but less soft. If you plan to save some, the fridge can extend life up to a week, but I warn you: refrigeration tends to dry bread faster, so reheat well.
Freezing
I freeze the fully baked and cooled loaf wrapped tightly in plastic wrap and then foil. It freezes beautifully for up to 3 months. When ready, I thaw overnight in the fridge and then warm in the oven—it’s like fresh-baked all over again! The dough itself can also be frozen after the first rise and baked fresh later, which is a fantastic time-saver.
Reheating
My favorite way to reheat leftovers is to wrap the bread in foil and warm it in a 300°F (149°C) oven for 10-15 minutes. This revives softness inside and keeps the crust tender. If you’re in a pinch, the microwave works, but it tends to make the crust a bit chewy, so I prefer the oven method.
FAQs
-
Can I use active dry yeast instead of instant yeast for this recipe?
Yes, you can substitute active dry yeast, but you’ll want to proof it first in warm water with a bit of sugar before adding the other ingredients. The rising times might be slightly longer compared to instant yeast like Platinum Yeast.
-
Can I make the dough ahead of time?
Absolutely! After the first rise, you can punch down the dough, cover it tightly, and refrigerate for up to 2 days before proceeding. This slow rise improves flavor. Just bring the dough back to room temperature before shaping and assembling.
-
What cheeses work best in the filling?
Parmesan, mozzarella, and white cheddar are all excellent options. Parmesan adds a nutty sharpness, mozzarella gives gooey stretch, while cheddar provides a slight tang. Feel free to blend or substitute based on your preferences.
-
How do I know if the dough has risen enough?
When the dough doubles in size and springs back slowly when gently poked, it’s ready. For the second rise, it should look puffy but doesn’t have to be perfectly doubled again. A snug but airy dough means your bread will be soft and pull apart nicely.
-
Can I add other herbs or spices?
Definitely! Thyme, oregano, or basil are wonderful substitutes or additions to rosemary. A pinch of chili flakes or smoked paprika in the filling can add a subtle heat and complexity too.
Final Thoughts
This Rosemary Garlic Pull Apart Bread Recipe has become one of my absolute favorite kitchen projects because of how easy it is to make something that looks complicated and tastes incredible. It’s perfect for family dinners, potlucks, or when you want a cozy snack with a little extra flair. You’ll love pulling apart the warm layers and savoring the garlicky, herby magic baked right inside. Trust me, once you try it, it’ll be on repeat in your home just like it is in mine.
Print
Rosemary Garlic Pull Apart Bread Recipe
- Prep Time: 3 hours
- Cook Time: 50 minutes
- Total Time: 4 hours
- Yield: 1 loaf
- Category: Bread
- Method: Baking
- Cuisine: American
Description
This Rosemary Garlic Pull Apart Bread is a flavorful, soft loaf infused with fresh herbs, garlic, and cheese. Perfect for sharing, it features layers of buttery rosemary-garlic filling baked to golden perfection. Ideal as a savory snack or side, this bread offers an irresistible aroma and tender crumb with a cheesy twist.
Ingredients
Dough
- 2 teaspoons Platinum Yeast from Red Star
- 1 Tablespoon granulated sugar
- 3/4 cup (180ml) whole milk
- 3 Tablespoons (43g) unsalted butter, softened to room temperature
- 1 large egg
- 2 and 1/3 cups (291g) all-purpose flour, plus more as needed
- 1 teaspoon salt
- 1 teaspoon garlic powder
- 1 Tablespoon finely chopped fresh rosemary (or 2 teaspoons dried)
Filling
- 5 Tablespoons (71g) unsalted butter, extra soft
- 1 Tablespoon finely chopped fresh rosemary (or 2 teaspoons dried)
- 1 Tablespoon finely chopped fresh parsley (or 2 teaspoons dried)
- 2 garlic cloves, minced or 1/2 teaspoon garlic powder
- 1/4 teaspoon salt
- 3/4 cup (95g) shredded parmesan, mozzarella, or white cheddar cheese
Optional Topping
- 1 Tablespoon (14g) unsalted butter, melted
- Coarse or flaky sea salt for sprinkling
Instructions
- Make the dough: Place yeast and sugar into a bowl or stand mixer bowl. Warm milk to about 110°F (43°C) and pour over yeast mixture, whisk gently, cover loosely and let sit for 5-10 minutes until frothy.
- Mix the dough: Add softened butter, egg, flour, salt, garlic powder, and rosemary. Beat on low until dough comes together and pulls away from sides, about 3 minutes, adding more flour if needed.
- Knead the dough: Knead dough in the mixer with dough hook or by hand for 5 minutes until soft and elastic, performing windowpane test to ensure sufficient kneading.
- First rise: Shape dough into a ball, place in greased bowl, cover tightly, and let rise in a warm place until doubled in size, about 90 minutes.
- Prepare filling: In a medium bowl, mix extra soft butter with rosemary, parsley, garlic, and salt until combined. Set aside at room temperature.
- Assemble bread: Punch down risen dough and divide into 12 equal pieces. Flatten each into 4-inch circles, spread 1-2 teaspoons filling on each, then sprinkle 1 Tablespoon cheese. Fold in half and arrange in a greased 9×5-inch loaf pan, round side up.
- Second rise: Cover pan with plastic wrap and let dough rise until puffy, about 45 minutes in a warm place.
- Preheat oven: Adjust oven rack to lower third and preheat to 350°F (177°C).
- Bake: Bake the loaf until golden brown, about 50 minutes. Tent with foil if top browns too quickly. Remove from oven and place pan on wire rack.
- Optional topping: Brush melted butter over loaf and sprinkle with flaky sea salt.
- Cool and serve: Cool for 10 minutes in the pan, then remove and serve warm.
- Storage: Store leftovers covered at room temperature for up to 2 days or in the refrigerator for up to 1 week. Reheat in 300°F (149°C) oven for 10-15 minutes or microwave to soften.
Notes
- Make Ahead: Freeze baked loaf up to 3 months; thaw at room temperature and rewarm in oven.
- Dough can be refrigerated after first rise for up to 2 days before shaping and second rise.
- Freeze raw dough after first rise for up to 3 months; thaw in the refrigerator overnight before continuing.
- Use Platinum Yeast for best results; active dry yeast may require longer rise times.
- Can substitute bread flour or up to 1 cup whole wheat flour for all-purpose flour.
- Extra soft butter for filling is best for easy spreading; microwave briefly if needed.
- If the dough is sticky while kneading, add flour 1 Tablespoon at a time to maintain softness.
Nutrition
- Serving Size: 1 slice (1/12 of loaf)
- Calories: 220 kcal
- Sugar: 2 g
- Sodium: 280 mg
- Fat: 10 g
- Saturated Fat: 6 g
- Unsaturated Fat: 3 g
- Trans Fat: 0 g
- Carbohydrates: 25 g
- Fiber: 1 g
- Protein: 6 g
- Cholesterol: 45 mg


