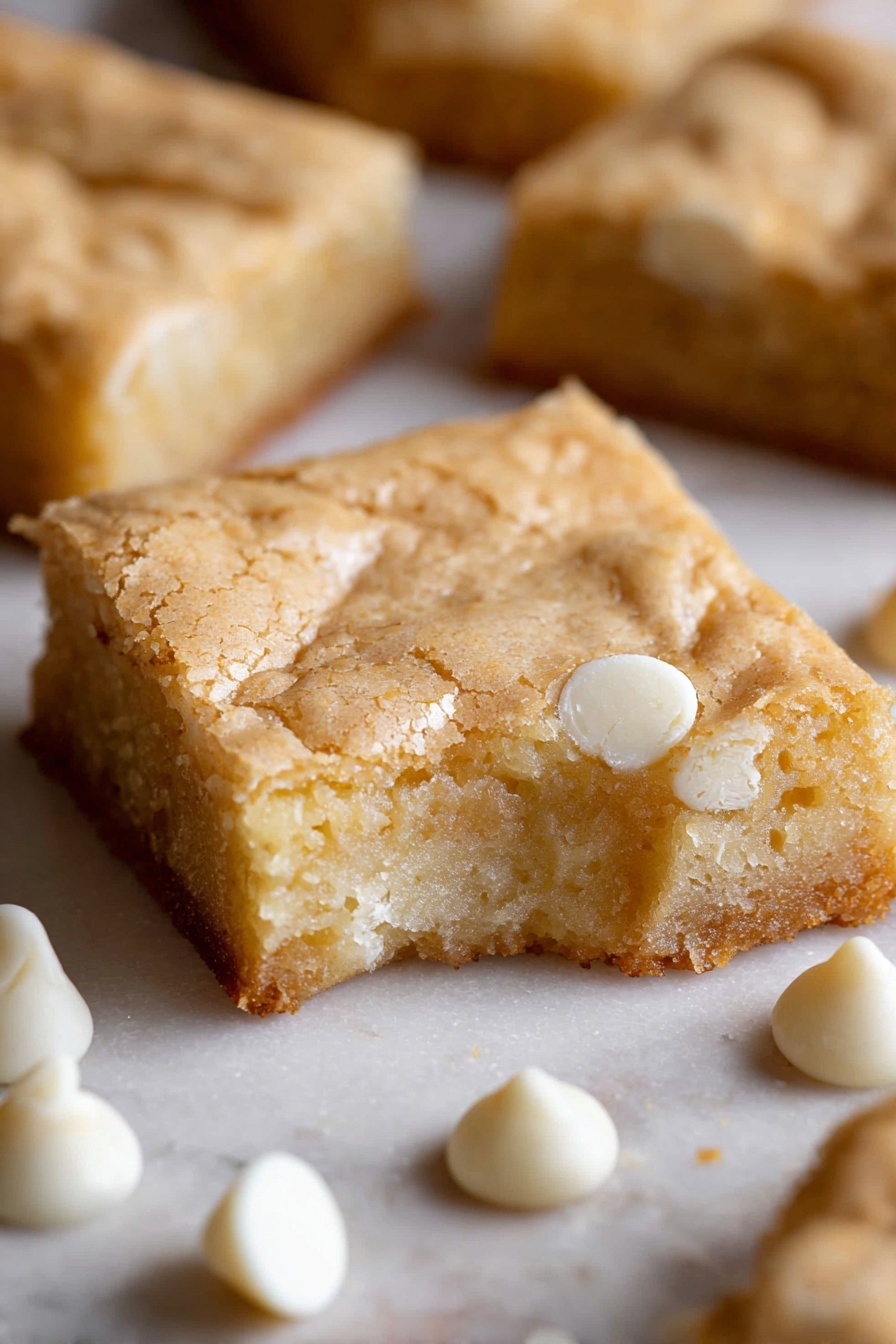
White Chocolate Brownie Bars Recipe
If you’re on the hunt for a dessert that’s just a little different but still hits all the right notes, I’ve got you covered with this fan-freaking-tastic White Chocolate Brownie Bars Recipe. Imagine rich, creamy white chocolate folded into a tender, buttery brownie base that’s perfectly sweet and oh-so-satisfying. These bars are seriously a game-changer for anyone who loves classic brownies but wants to switch things up with that special white chocolate twist. Stick with me, and I’ll walk you through the entire process so you nail them every time!
Why This Recipe Works
- High-quality white chocolate: Using premium white chocolate bars gives the bars a creamy, luxurious flavor that chocolate chips just can’t match.
- Double eggs plus yolks: This combo adds richness and a fudgy texture without making the bars cakey.
- Gentle folding technique: Mixing the dry ingredients just until combined keeps the texture tender, not dense.
- Low baking temperature: Baking at 325°F helps the bars cook evenly without drying out or browning too fast.

Ingredients & Why They Work
Each ingredient in this White Chocolate Brownie Bars Recipe plays an important role that adds up to pure deliciousness. Let’s break down why these particular choices come together so beautifully and how you can make sure you’re selecting the right stuff at the store.
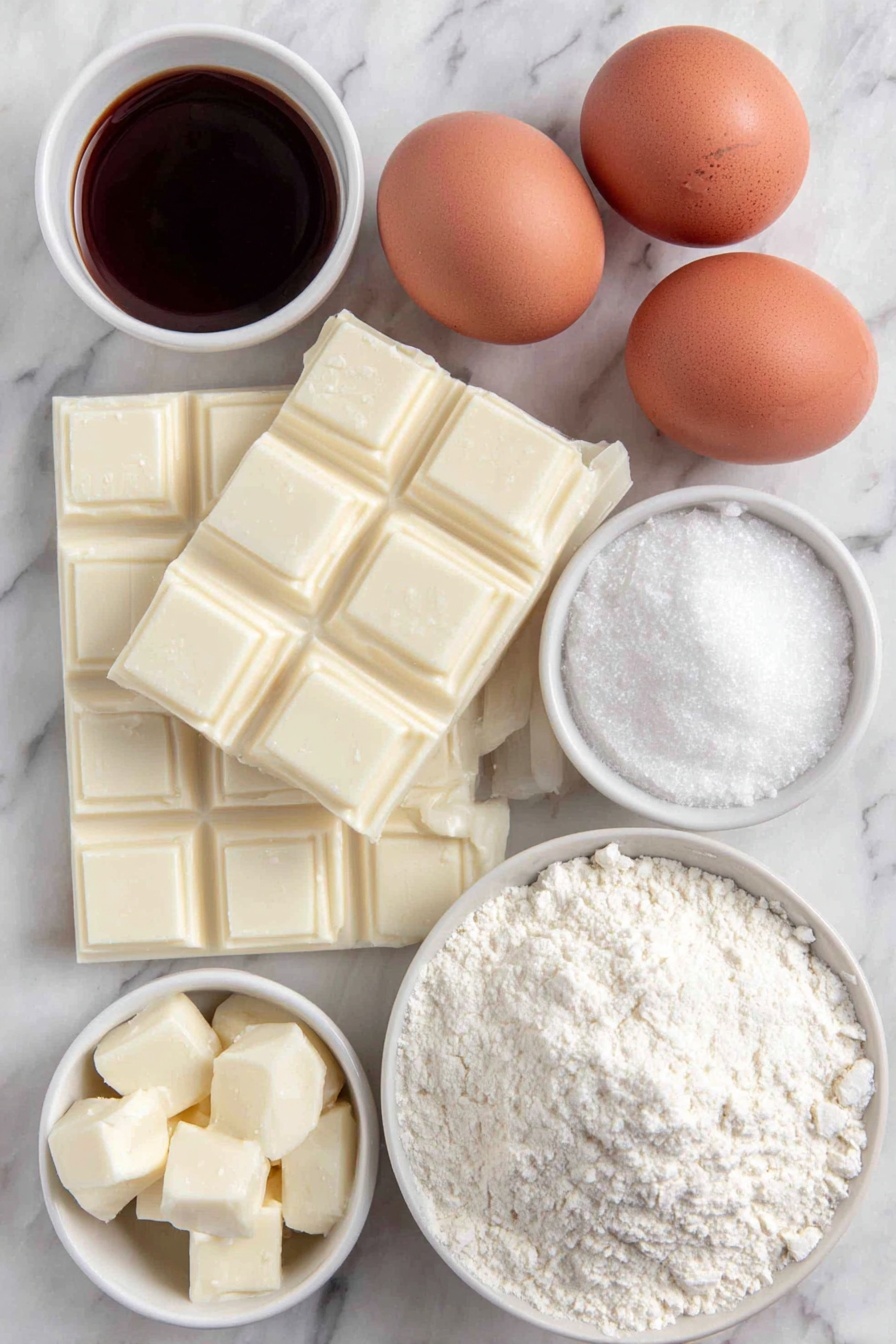
- White chocolate bars: I always reach for high-quality bars from brands like Lindt or Ghirardelli—chocolate chips just don’t melt as smoothly or taste quite as rich.
- Unsalted butter: Butter is the star here for that rich, tender crumb. Using unsalted lets you control the saltiness better.
- Eggs and egg yolks: The eggs bind everything together, while extra yolks add fudginess and a slightly custardy texture.
- Granulated white sugar: For that classic sweetness and slight crunch on top when it bakes.
- Vanilla extract: This boosts the flavor beautifully—don’t skip it.
- All-purpose flour: Provides structure but keeps the bars soft rather than cakey.
- Salt: Just a pinch enhances all the sweet flavors and balances richness.
Tweak to Your Taste
I like to think of this White Chocolate Brownie Bars Recipe as a base canvas—you can easily add in your favorite mix-ins or switch things up to suit the season or your cravings. It’s fun to personalize, and I encourage you to experiment as you get comfortable with the basics!
- Add-ins like nuts or dried fruit: I sometimes toss in chopped macadamia nuts or dried cranberries for a lovely crunch and contrast—it’s such a nice surprise in every bite.
- White chocolate chunks on top: For a little extra melty surprise, sprinkle some chopped white chocolate on the batter before baking.
- Swirls of raspberry jam: For a fruity note, swirl in raspberry jam into the batter right before baking—it adds a beautiful tartness that cuts the sweetness.
- Dairy-free swaps: I haven’t tested this extensively but using vegan butter and a dairy-free white chocolate should work. Let me know if you try it!
Step-by-Step: How I Make White Chocolate Brownie Bars Recipe
Step 1: Get Your Oven and Pan Ready
First thing’s first: preheat your oven to 325 degrees Fahrenheit. I usually grease a 9×9-inch pan lightly with butter, but lining it with parchment paper is a total game-changer—it makes lifting out the bars easier when they’re done without risking any breakage.
Step 2: Melt Butter and White Chocolate Gently
Next up, melt the butter and chopped white chocolate bars together in a double boiler over medium-low heat. Stir constantly to make sure the chocolate melts evenly and doesn’t scorch. If you don’t have a double boiler, a heatproof bowl sitting over simmering water works just fine. Once it’s a glossy, smooth mixture, set it aside to cool slightly while you prep the rest.
Step 3: Whisk Eggs, Yolks, Sugar, and Vanilla
In a large bowl, whisk together the eggs, egg yolks, granulated sugar, and vanilla extract until the mixture is pale and smooth. I find using an electric hand mixer speeds this up and gets the perfect fluffy texture that holds the batter together nicely—but if you’re a whisk lover, just make sure to get some elbow grease going!
Step 4: Combine Everything Carefully
Now pour in your melted white chocolate and butter mixture to the egg mix and whisk until fully combined. Then, fold in the flour and salt gently using a rubber spatula. It’s important not to overmix here—stir just until you no longer see dry spots. This keeps the brownies tender and soft, which is exactly what we want!
Step 5: Bake and Cool
Pour your batter into the prepared pan and smooth it out with a spatula. Bake for about 29 to 33 minutes—keep an eye on them around the 28-minute mark because ovens vary. When done, the edges should be set, but the center should still have a slight wobble. Let the bars cool completely in the pan on a wire rack before attempting to cut; this step helps them firm up and slice cleanly.
Step 6: Slice and Enjoy
Once cooled, run a butter knife around the edges to loosen the bars, then gently flip the entire slab out of the pan. Cut into 16 squares using a sharp knife, wiping it clean between cuts for neat edges. And just like that, you’ve got a batch of dreamy white chocolate brownie bars to share (or keep all to yourself—I won’t tell!).
Pro Tips for Making White Chocolate Brownie Bars Recipe
- Choose quality ingredients: The better your white chocolate and butter, the richer and creamier the bars will be, so don’t skimp here.
- Be gentle with mixing: Overmixing after adding flour can toughen the batter—fold just until no flour streaks remain.
- Watch your baking time: These bars are done when the edges look set but the center still jiggles slightly—carryover heat finishes the job.
- Cool completely before slicing: It’s tempting to dig in hot, but waiting makes cleaner cuts and the perfect texture.
How to Serve White Chocolate Brownie Bars Recipe
Garnishes
I love finishing these bars with a light dusting of powdered sugar or a drizzle of raspberry sauce to brighten them up. Sometimes I sprinkle a few toasted white chocolate chips or flaky sea salt flakes on top for that extra pop of texture and flavor.
Side Dishes
Serve these bars alongside a scoop of vanilla ice cream or fresh berries for a simple but elegant dessert. A cup of rich coffee or a creamy latte pairs beautifully, too—trust me, I’ve tested this pairing more times than I can count!
Creative Ways to Present
Hosting a gathering? Try cutting these into bite-sized squares and stacking them on a pretty platter layered with parchment paper. You can add edible flowers or gold dust for a festive touch. I’ve even served them with homemade whipped cream and fresh mint leaves on top for a fancy finish.
Make Ahead and Storage
Storing Leftovers
I keep leftover white chocolate brownie bars in an airtight container at room temperature for up to 3 days. If it’s warm or humid, I move them to the fridge to prevent melting or sogginess. Just let them come back to room temp before enjoying for the best texture.
Freezing
These bars freeze beautifully! I cut them into squares, place parchment paper between layers in a freezer-safe container, and freeze for up to 2 months. Thaw overnight in the fridge before serving, and they’ll taste just like fresh.
Reheating
If you want warm bars, pop them in the microwave for 10-15 seconds or heat gently in a low oven until warmed through—but be careful not to overheat, or the white chocolate can seize up and become grainy.
FAQs
-
Can I substitute white chocolate chips for the bars?
You can, but I highly recommend using white chocolate bars instead. Bars melt more evenly and give the brownies a richer, creamier texture. Chips often contain stabilizers that don’t melt as smoothly, which can affect the final result.
-
Why bake at 325°F instead of a higher temperature?
Baking at a lower temperature ensures the white chocolate doesn’t brown or burn and the brownies cook evenly. It also helps maintain a tender, fudgy texture rather than a dry or cakey one.
-
How do I know when the White Chocolate Brownie Bars are done?
Edges should look set and slightly pulling away from the pan while the center remains a bit wobbly. This indicates the brownies are cooked through but still moist and fudgy inside. They will set more as they cool.
-
Can I make these bars gluten-free?
You can substitute the all-purpose flour with a gluten-free baking blend, but results may vary depending on the blend. I suggest using a trusted gluten-free mix that includes xanthan gum for best texture.
Final Thoughts
This White Chocolate Brownie Bars Recipe has become one of my all-time favorites to share with friends because it feels both decadent and approachable at the same time. The smooth, buttery white chocolate melded into the soft brownies creates a comforting yet sophisticated treat that’s perfect for any occasion—whether a cozy night in or an impromptu get-together. I hope when you try it, you fall in love with these bars just like I did, and maybe even add your own personal spin. Happy baking!
Print
White Chocolate Brownie Bars Recipe
- Prep Time: 10 minutes
- Cook Time: 33 minutes
- Total Time: 43 minutes
- Yield: 16 brownies
- Category: Dessert
- Method: Baking
- Cuisine: American
Description
Deliciously rich and creamy white chocolate brownies made with high-quality white chocolate and a buttery batter, perfect for satisfying your sweet tooth with a soft and fudgy texture.
Ingredients
Chocolate Mixture
- 8 oz white chocolate bars, chopped
- 3/4 cup unsalted butter, chopped into small cubes
Wet Ingredients
- 2 eggs
- 2 egg yolks
- 1 1/4 cups granulated white sugar
- 1 tbsp vanilla extract
Dry Ingredients
- 1 3/4 cups all-purpose flour, spooned and leveled
- 3/4 tsp salt
Instructions
- Preheat and Prepare Pan: Preheat the oven to 325 degrees Fahrenheit. Lightly grease a 9×9 inch pan or line it with parchment paper for easier removal of the brownies.
- Melt Chocolate and Butter: Melt the butter and white chocolate together in a double boiler over medium-low heat, stirring constantly until smooth and fully combined. Remove from heat.
- Mix Wet Ingredients: In a large bowl, whisk the eggs, egg yolks, sugar, and vanilla extract together until the mixture is pale and smooth. An electric mixer can be used to speed this process.
- Combine Mixtures: Pour the melted white chocolate and butter mixture into the wet ingredients and whisk until fully combined and smooth.
- Add Dry Ingredients: Gently fold the flour and salt into the wet ingredients using a rubber spatula just until combined to avoid overmixing.
- Pour Batter and Bake: Pour the batter into the prepared pan and smooth the surface with a mini offset spatula. Bake for 33 minutes until the edges are set and the center is slightly soft.
- Cool and Cut: Let the brownies cool completely in the pan on a wire rack. Once cooled, loosen the edges with a butter knife and invert to remove from the pan. Cut into 16 squares and serve.
Notes
- Use high-quality white chocolate such as Lindt or Ghirardelli for best flavor and texture.
- Lining the pan with parchment paper helps with easy removal and cleaner cuts.
- Do not overmix the batter after adding flour to keep brownies tender and fudgy.
- Check the brownies at 30 minutes, but bake up to 33 minutes to ensure the perfect texture.
- Allow brownies to cool completely before cutting to prevent crumbling.
Nutrition
- Serving Size: 1 brownie
- Calories: 270 kcal
- Sugar: 24 g
- Sodium: 140 mg
- Fat: 16 g
- Saturated Fat: 10 g
- Unsaturated Fat: 5 g
- Trans Fat: 0 g
- Carbohydrates: 29 g
- Fiber: 1 g
- Protein: 3 g
- Cholesterol: 85 mg

